Skills Network Portals
Once you have created a lab, you then need to add it to your course via Studio. When you are adding a lab to your course, you embed your lab into a unit of your course. This way, learners will naturally progress through the course, and complete your labs as they go.
Add an Instructional Lab to your Course
This section is only for instructional labs. If you wish to add a different lab type to your course, see the Add a (Non Instructional) Lab to your Course section below.
As a Skills Network author, you can create "instructional labs". These are labs that include step by step instructions for working with tools external to Skills Network Labs, such as services on IBM Cloud.
HTML files will be automatically generated from instructional labs so they can be easliy embedded or linked to from your course. To embed an instructional lab in your course, follow the steps below.
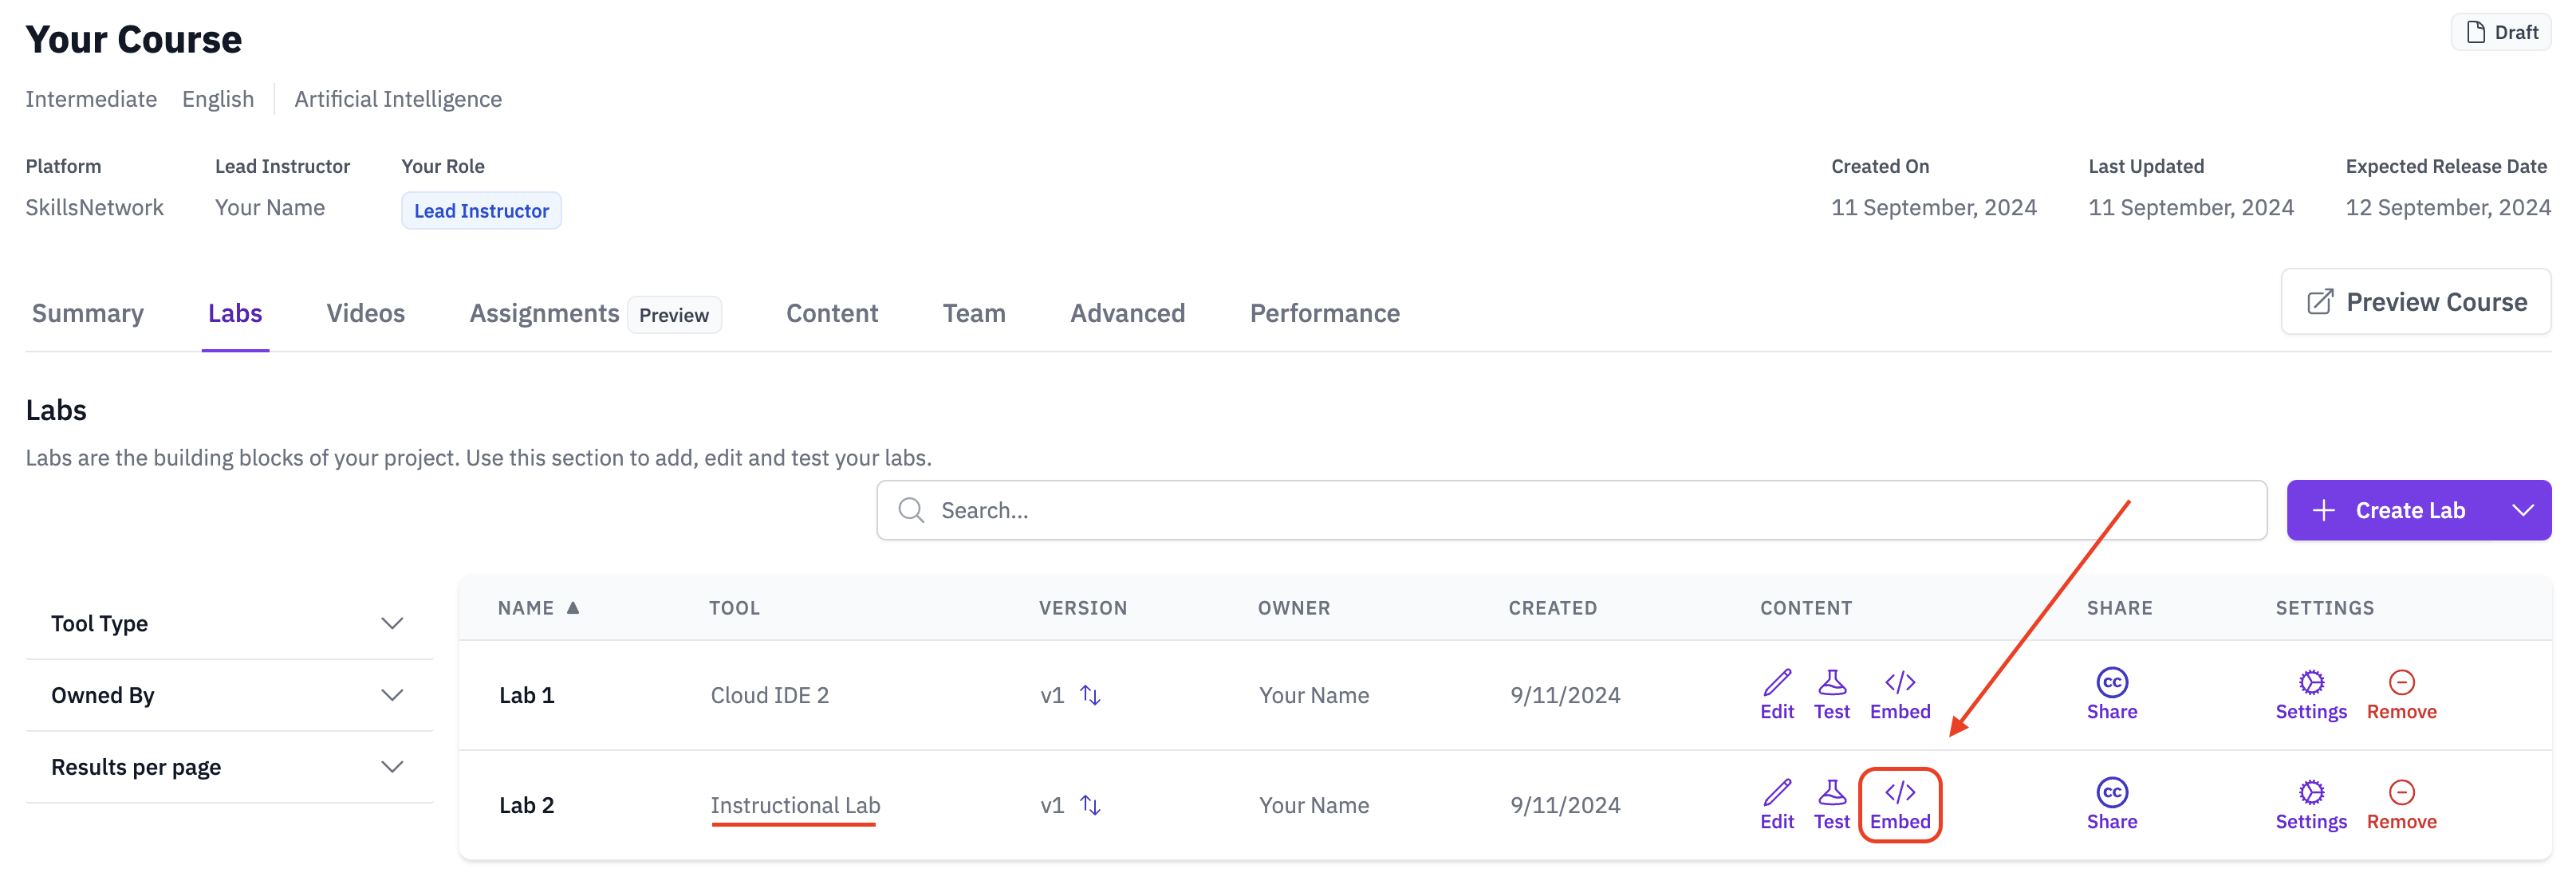
- On your course page, navigate to the lab you want (under the
Labstab) and click "Add to Course"
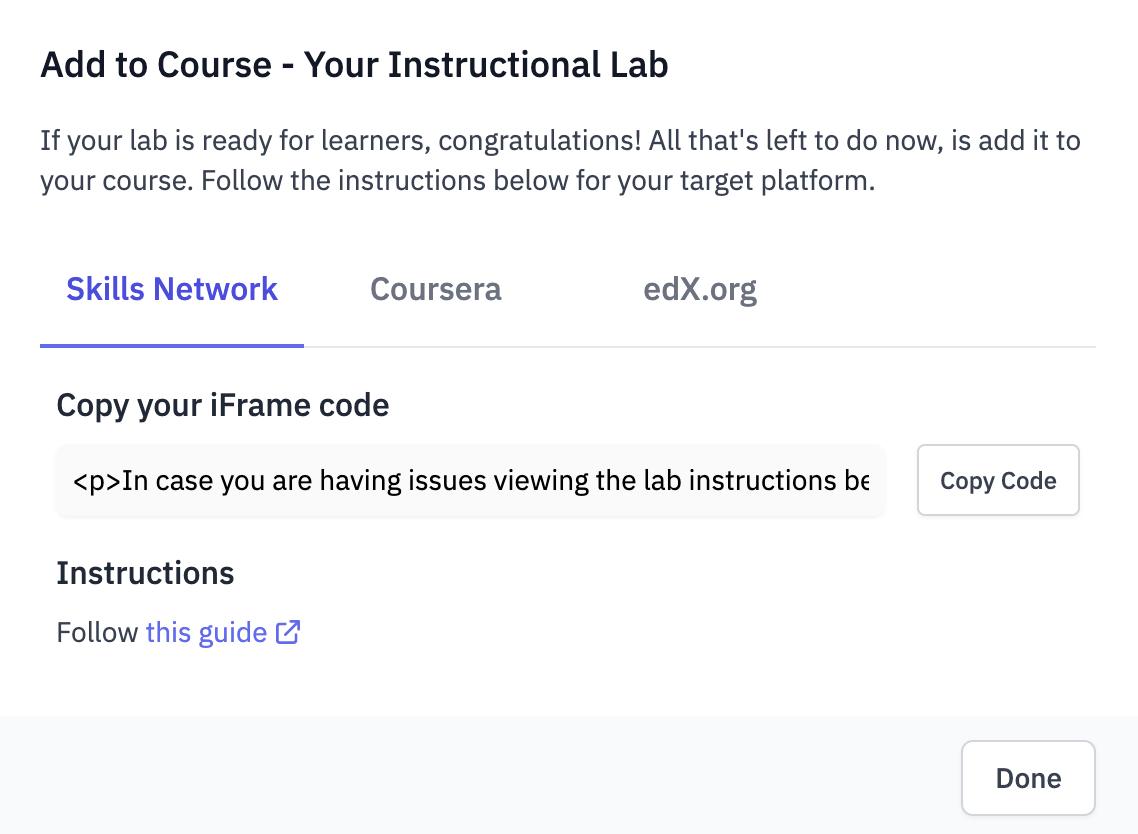
- Copy the iFrame code provided
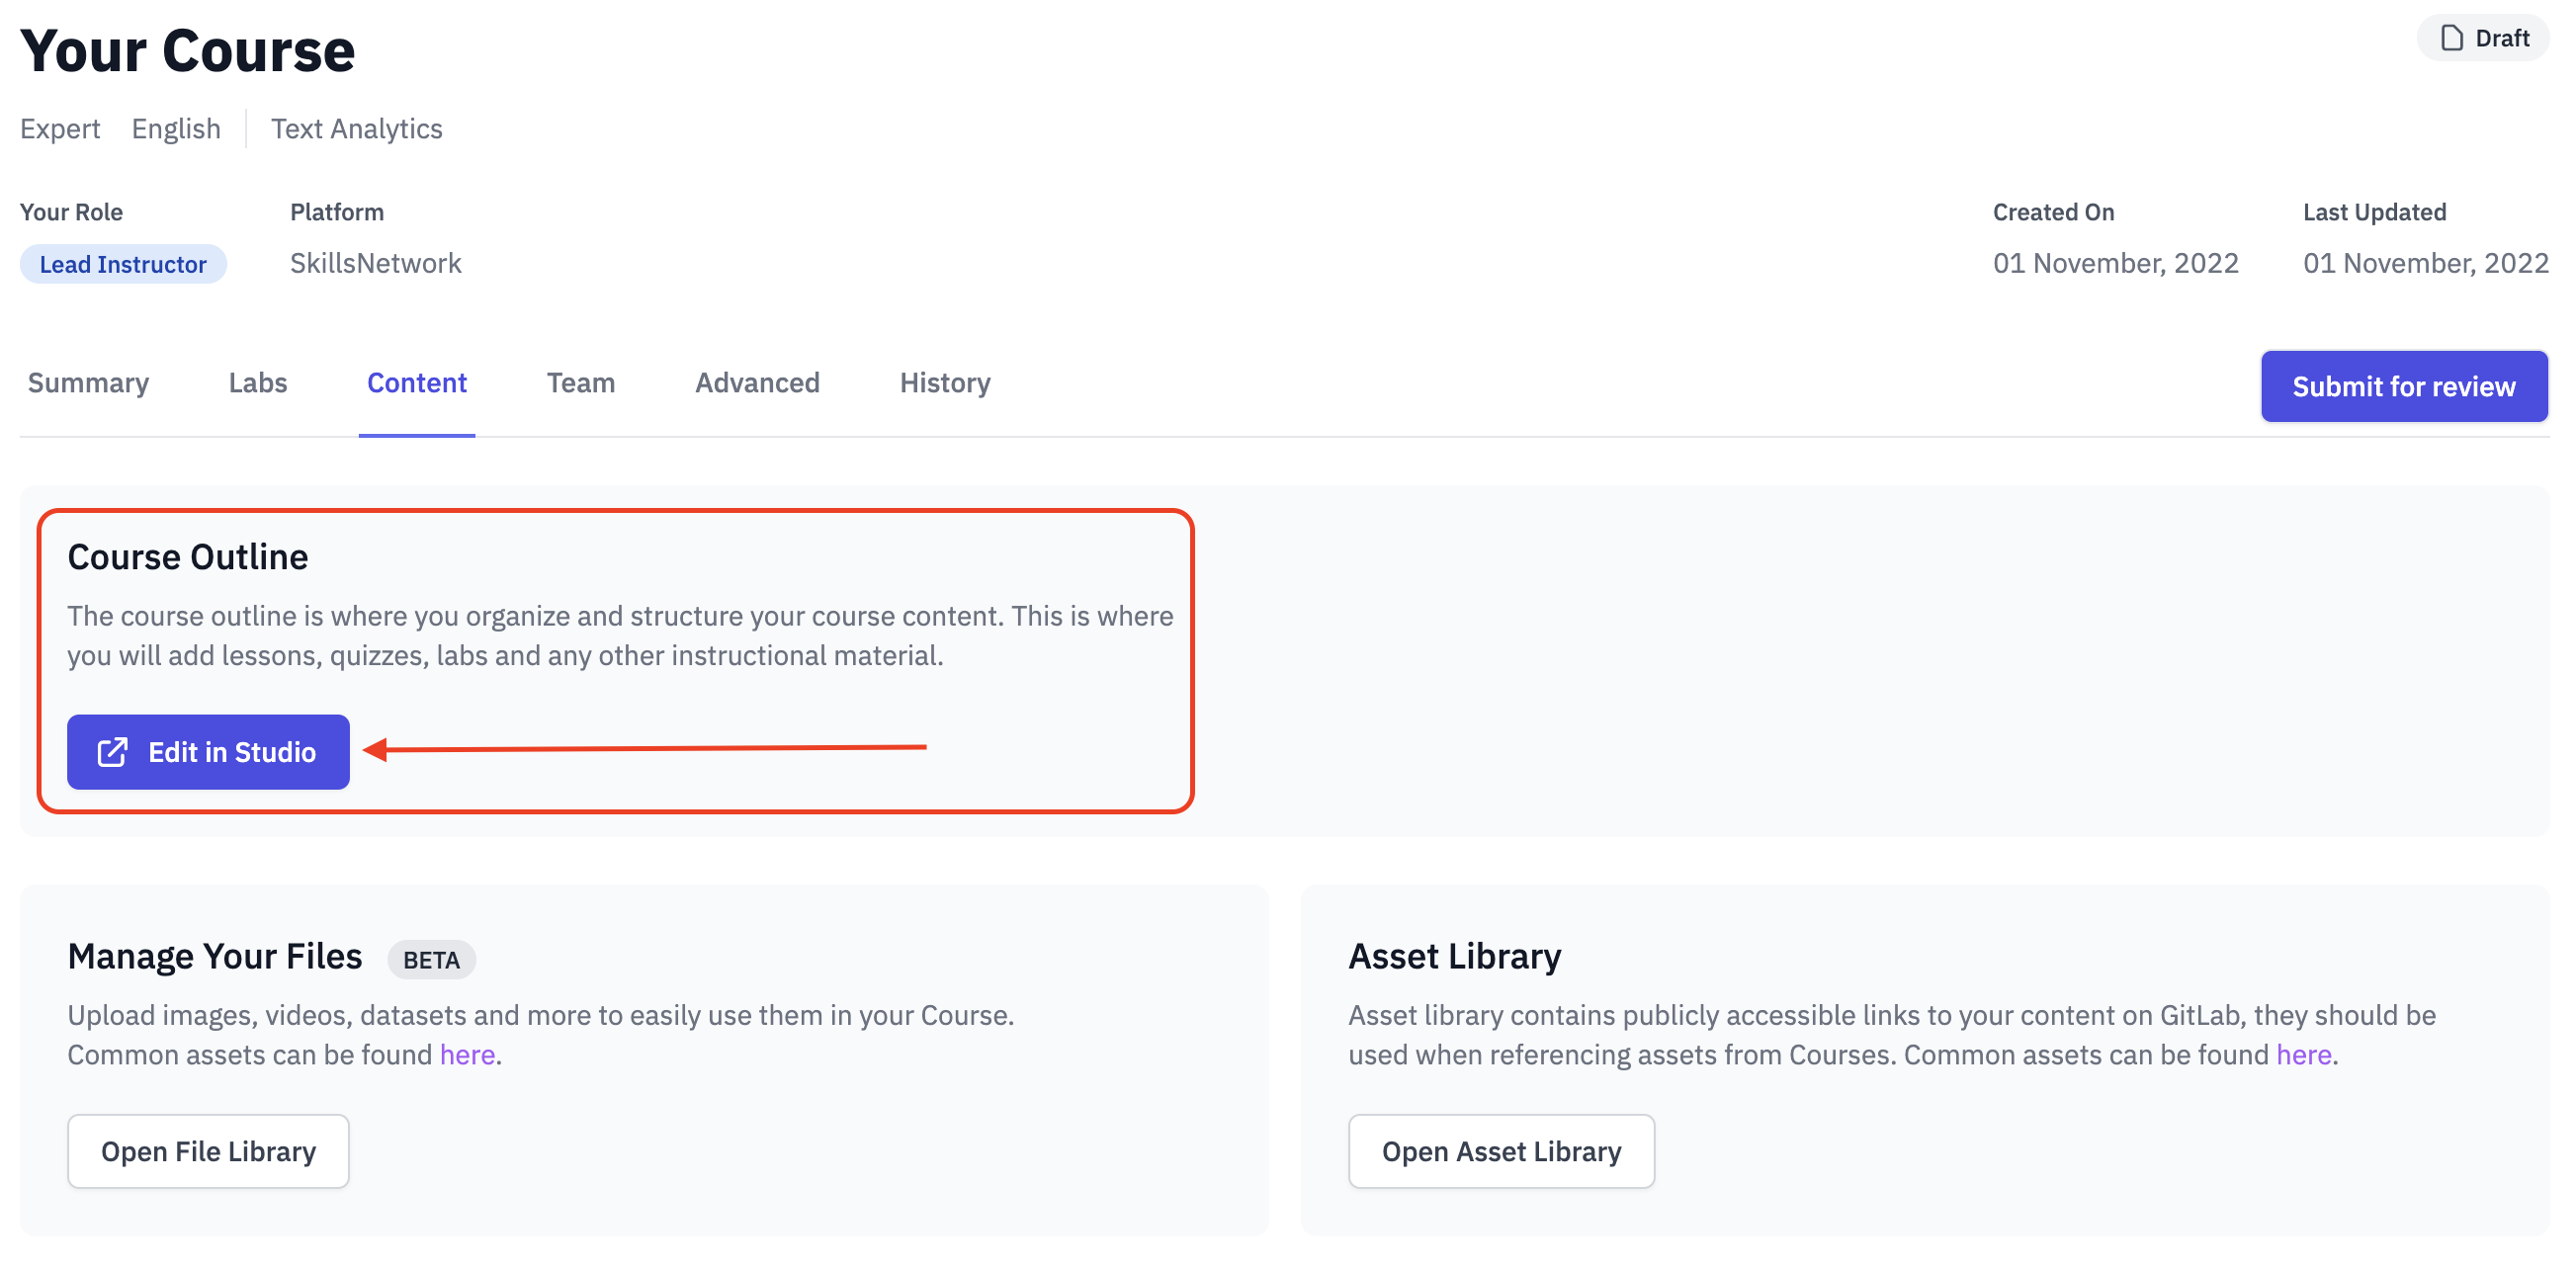
- Close the pop-up and navigate to your Course Outline in the
Contenttab on your course page. Press the "Edit in Studio" button to open the outline in Skills Network Studio
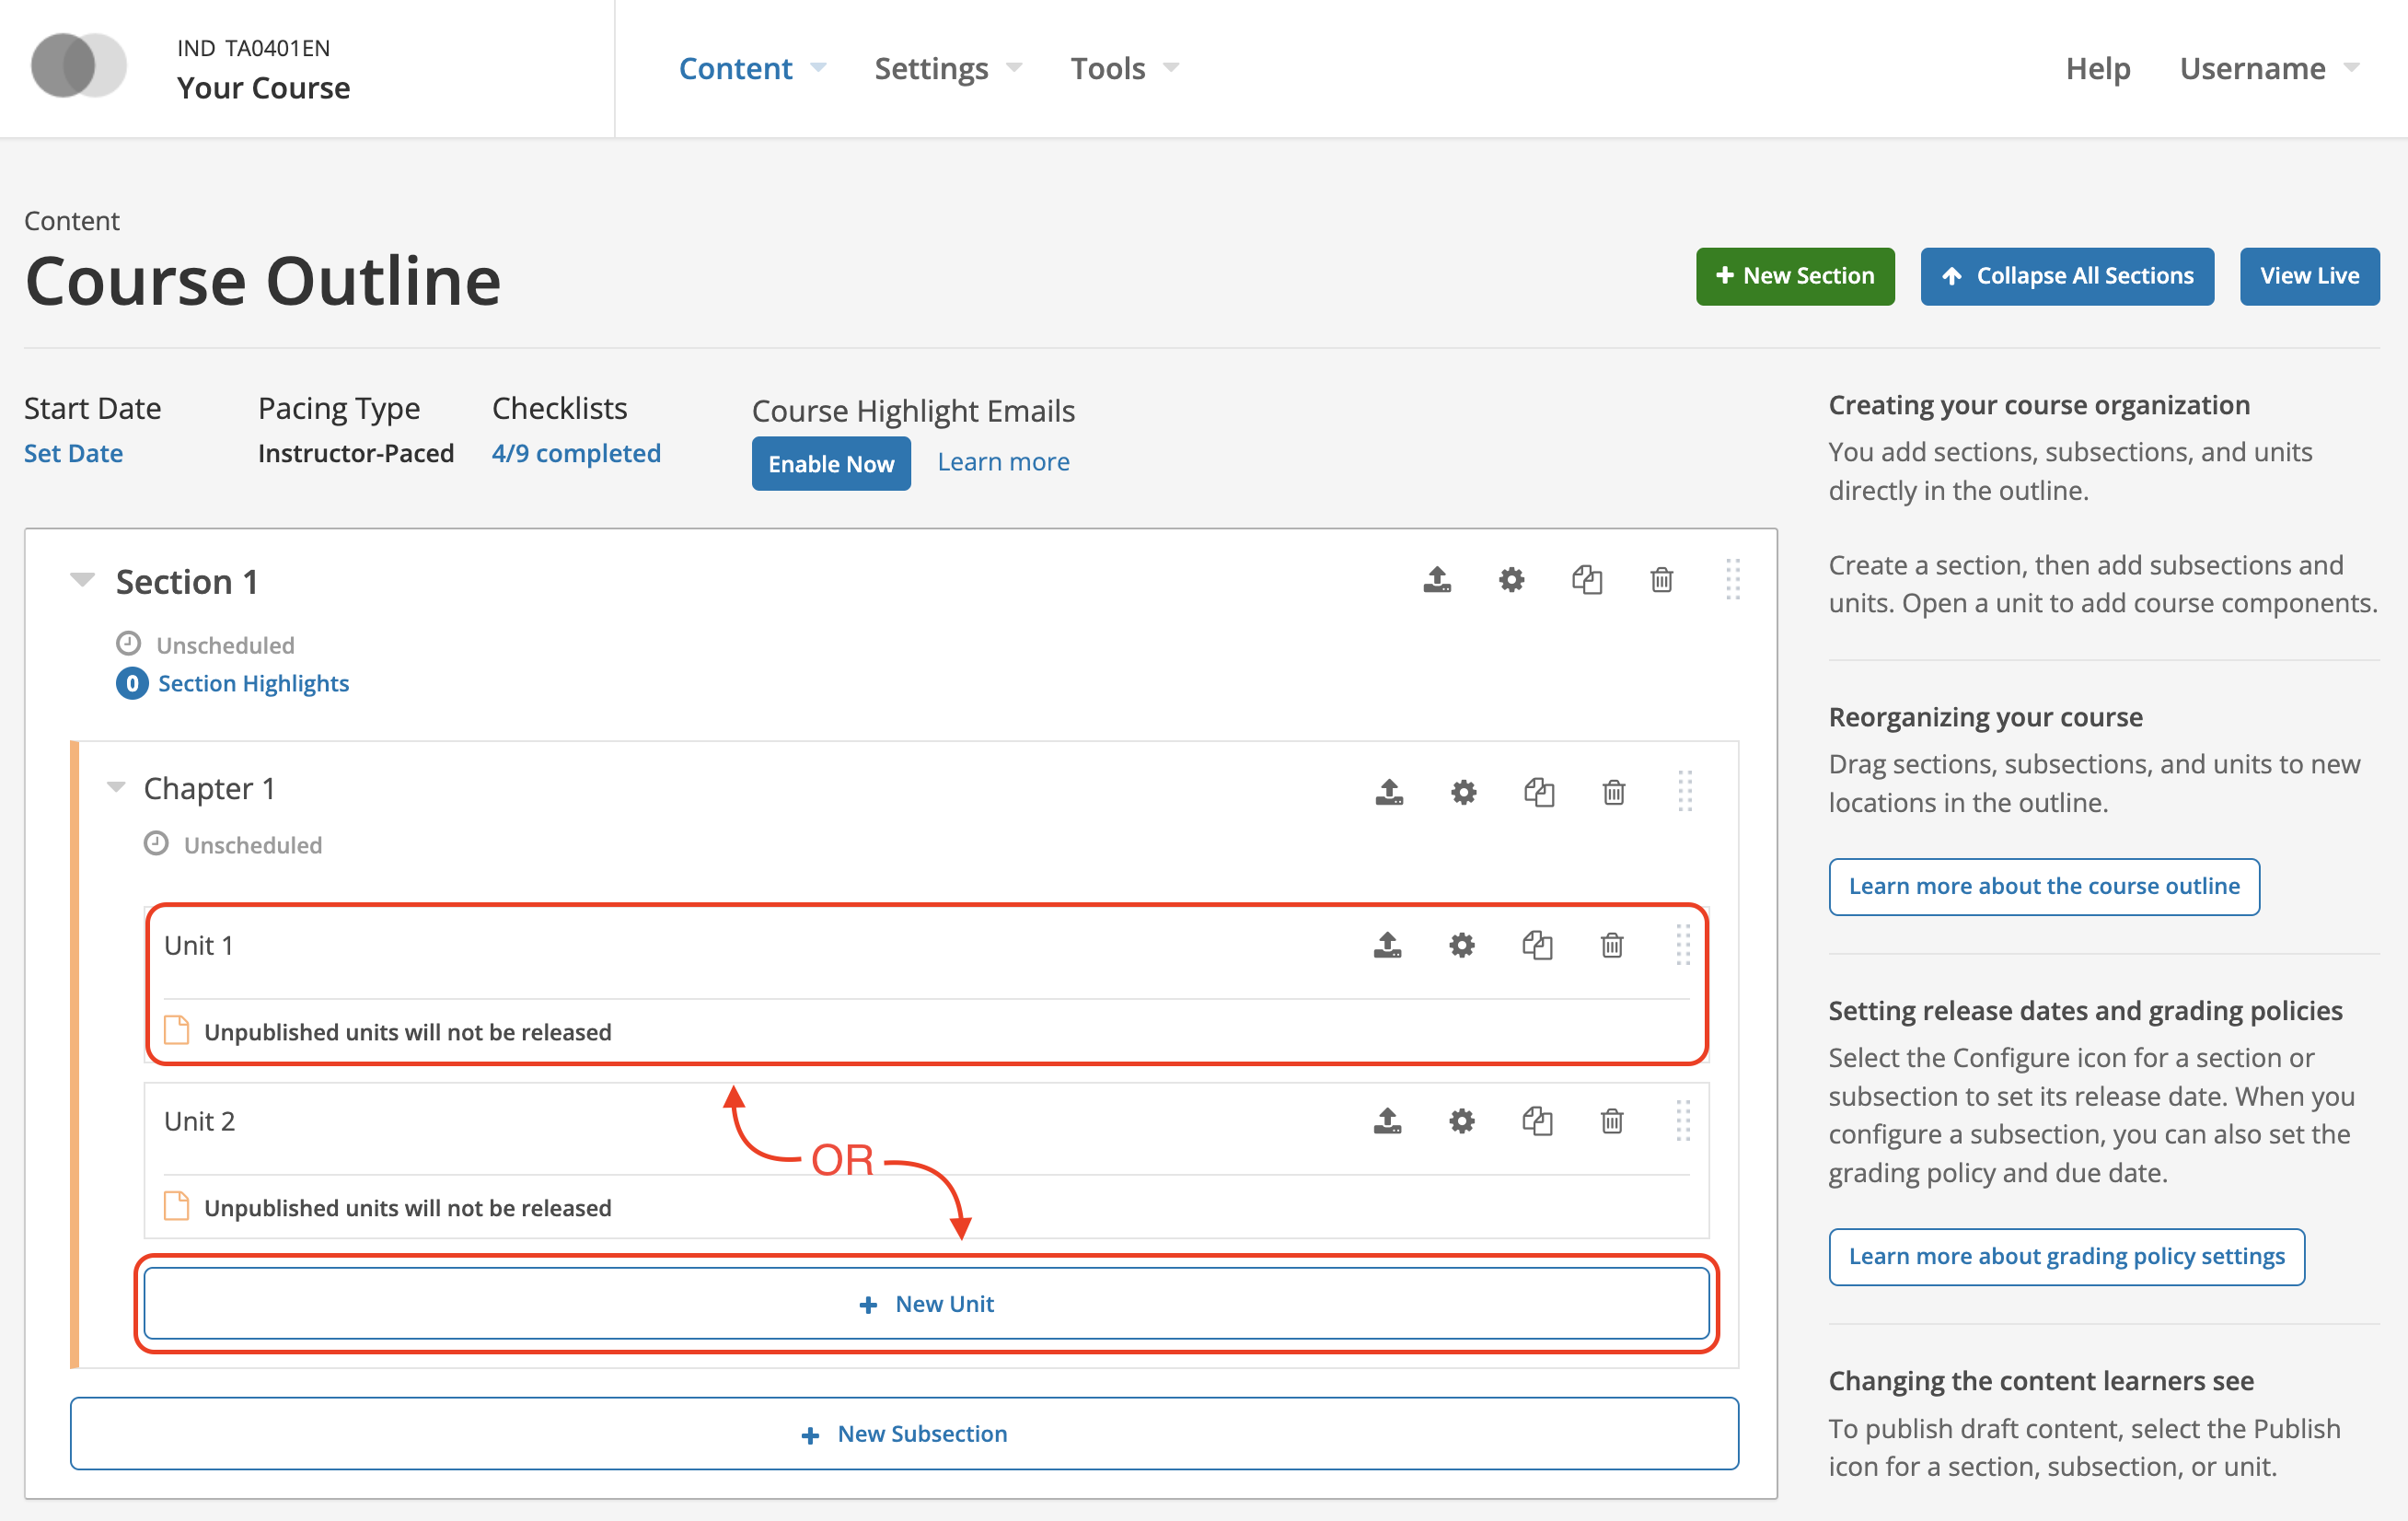
- Select the unit you want to add your lab in, or create a new unit if one doesn't exist yet
- Within your desired unit, add a new HTML component
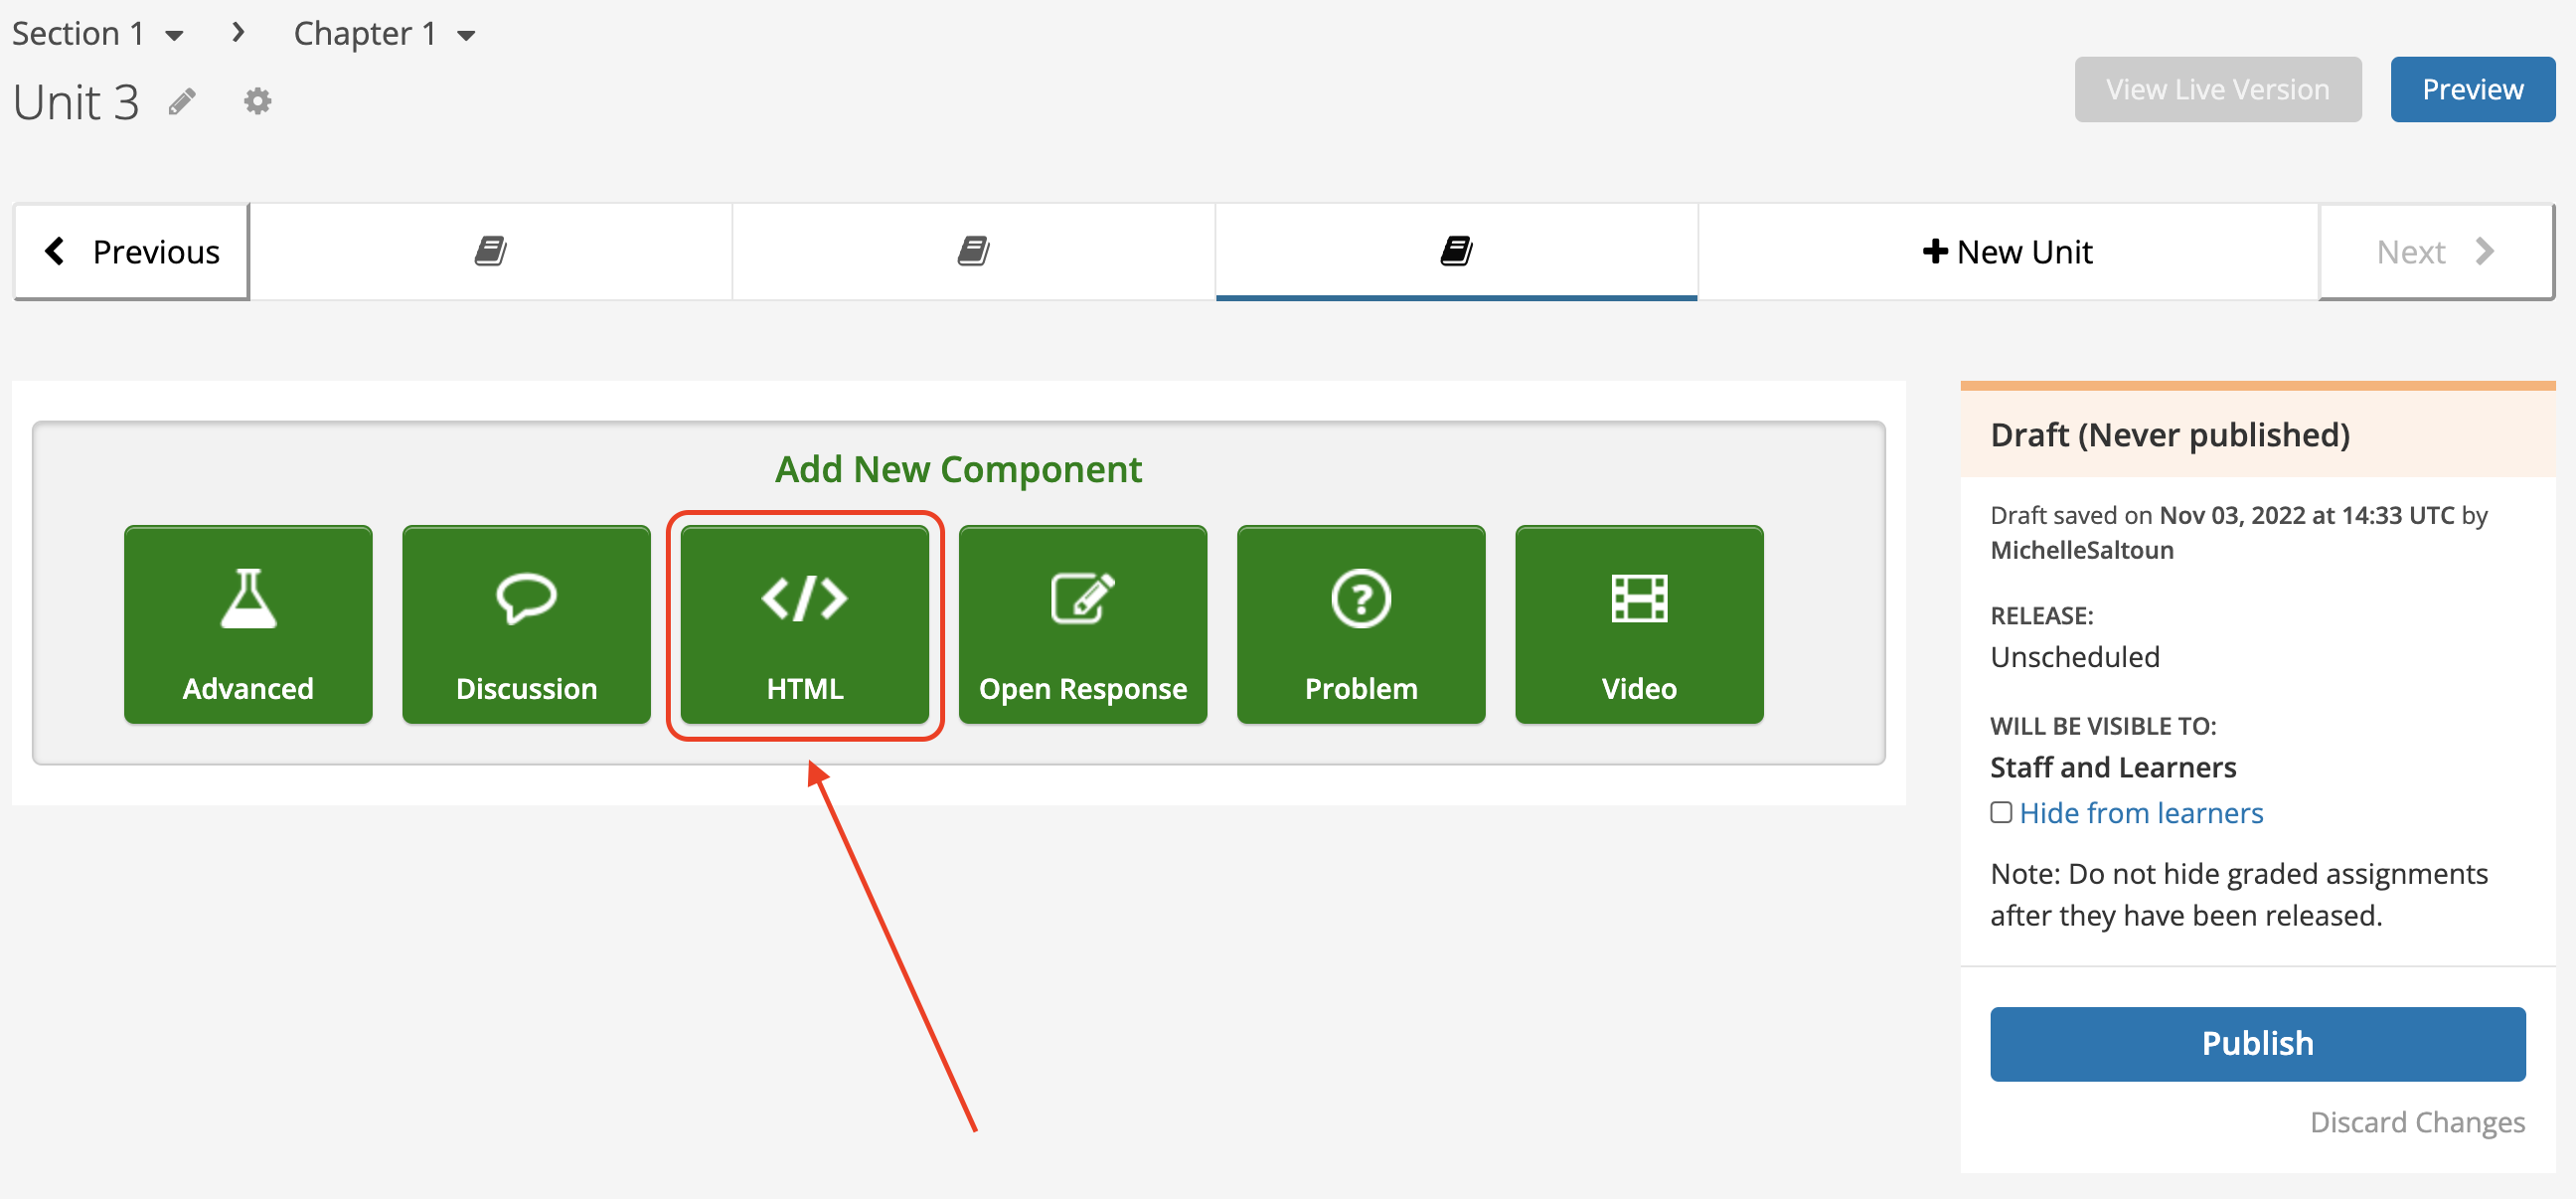
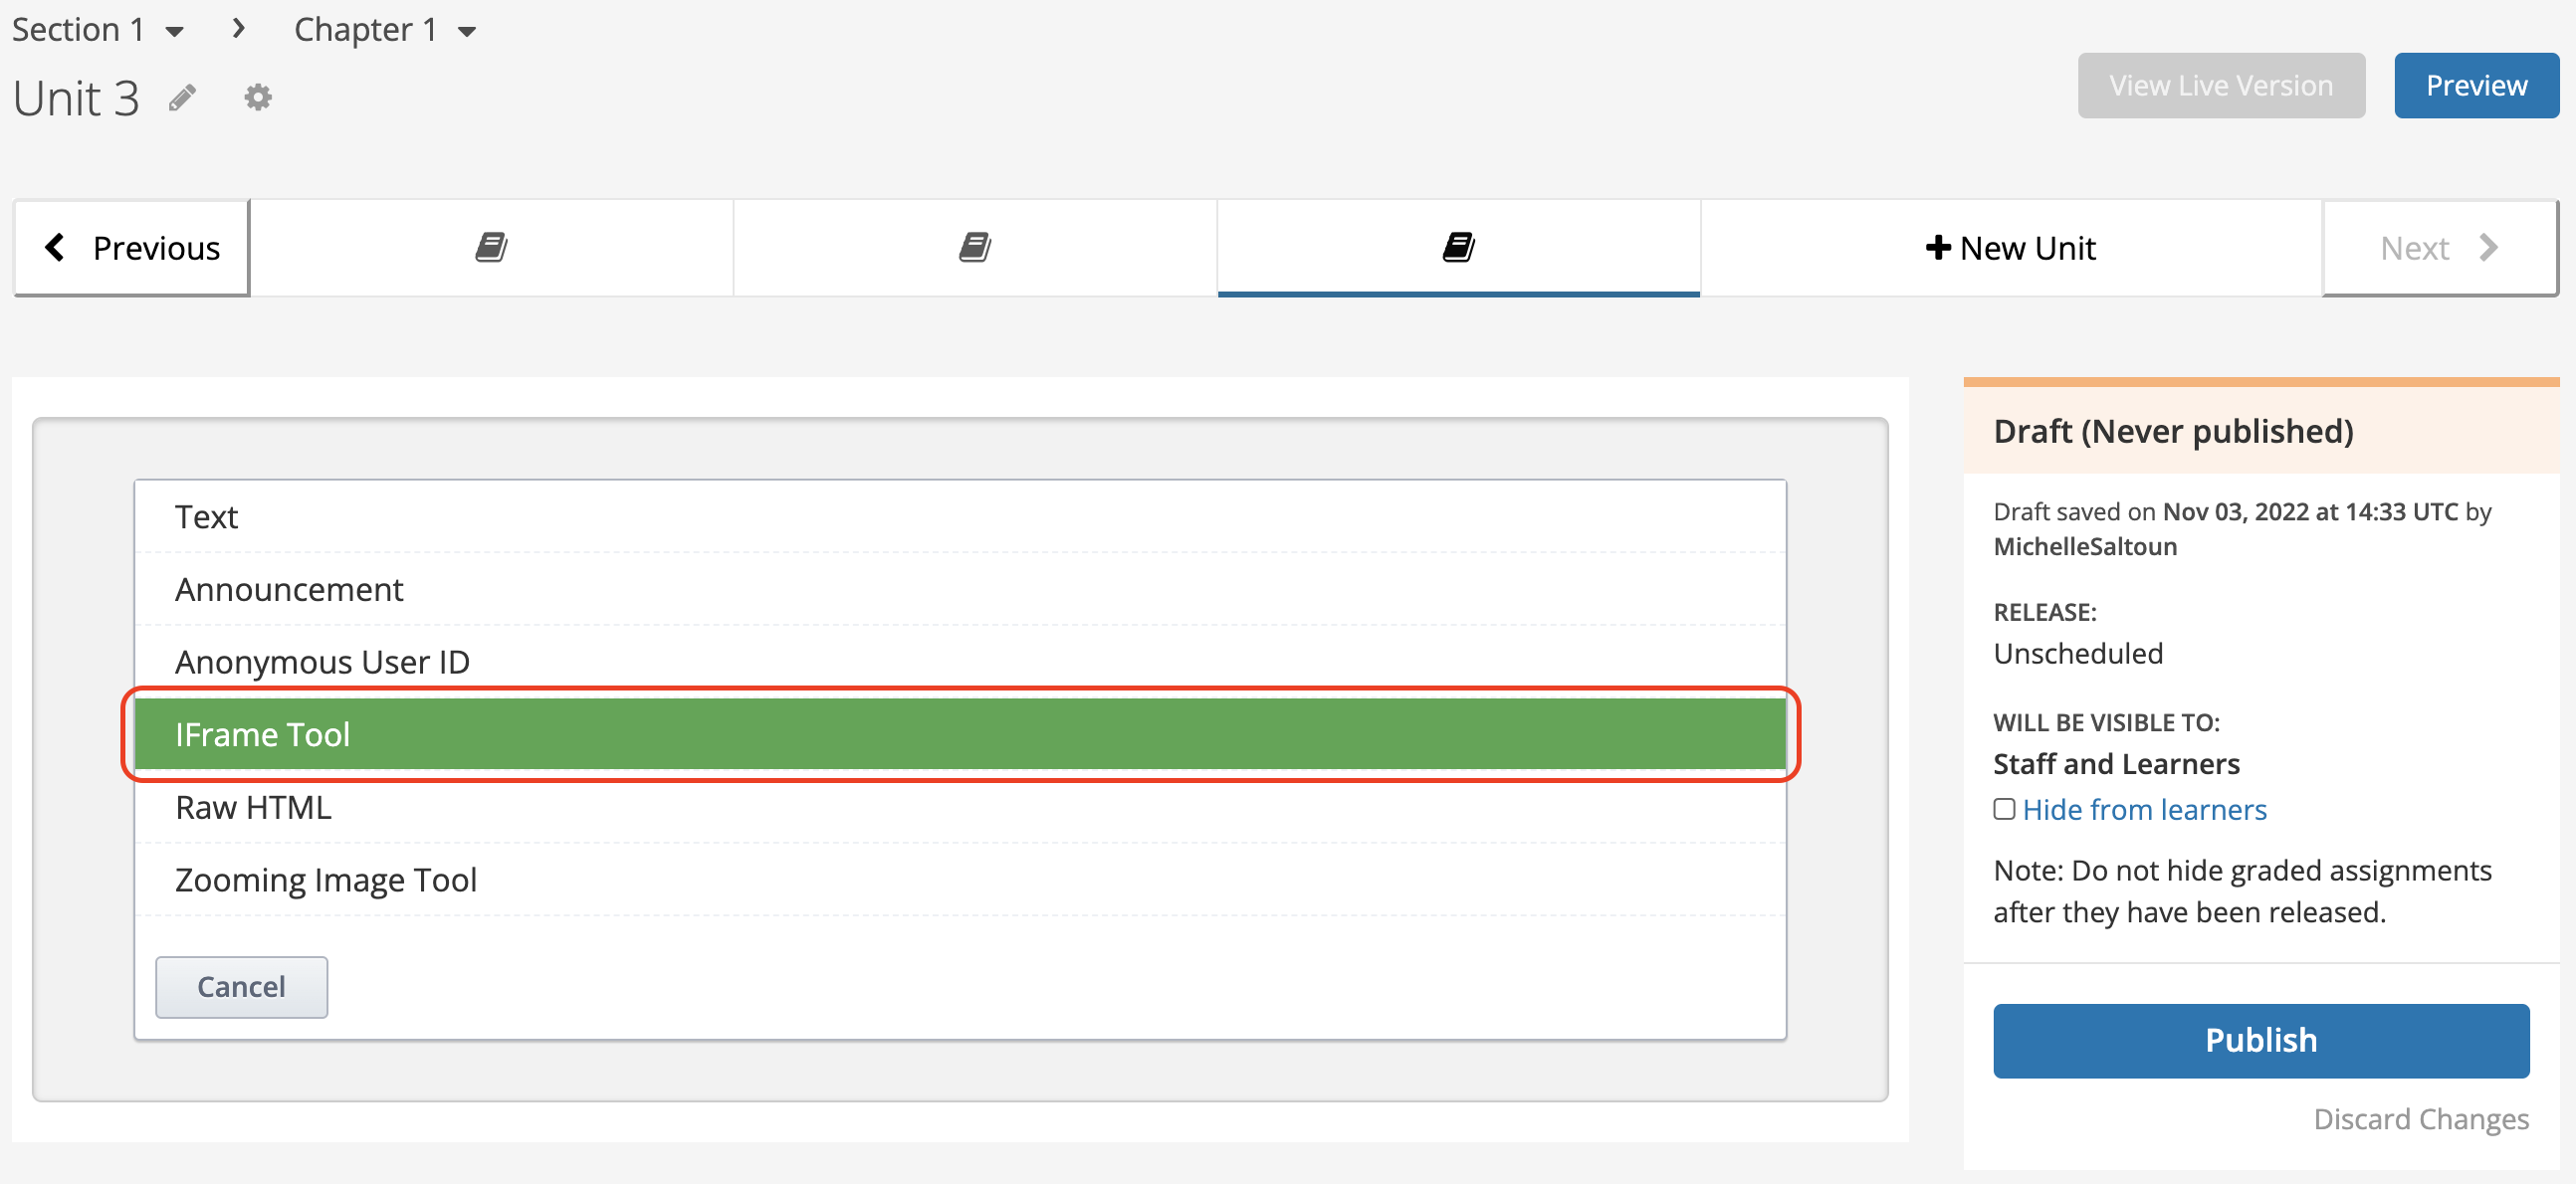
- Select iFrame Tool from the dropdown list
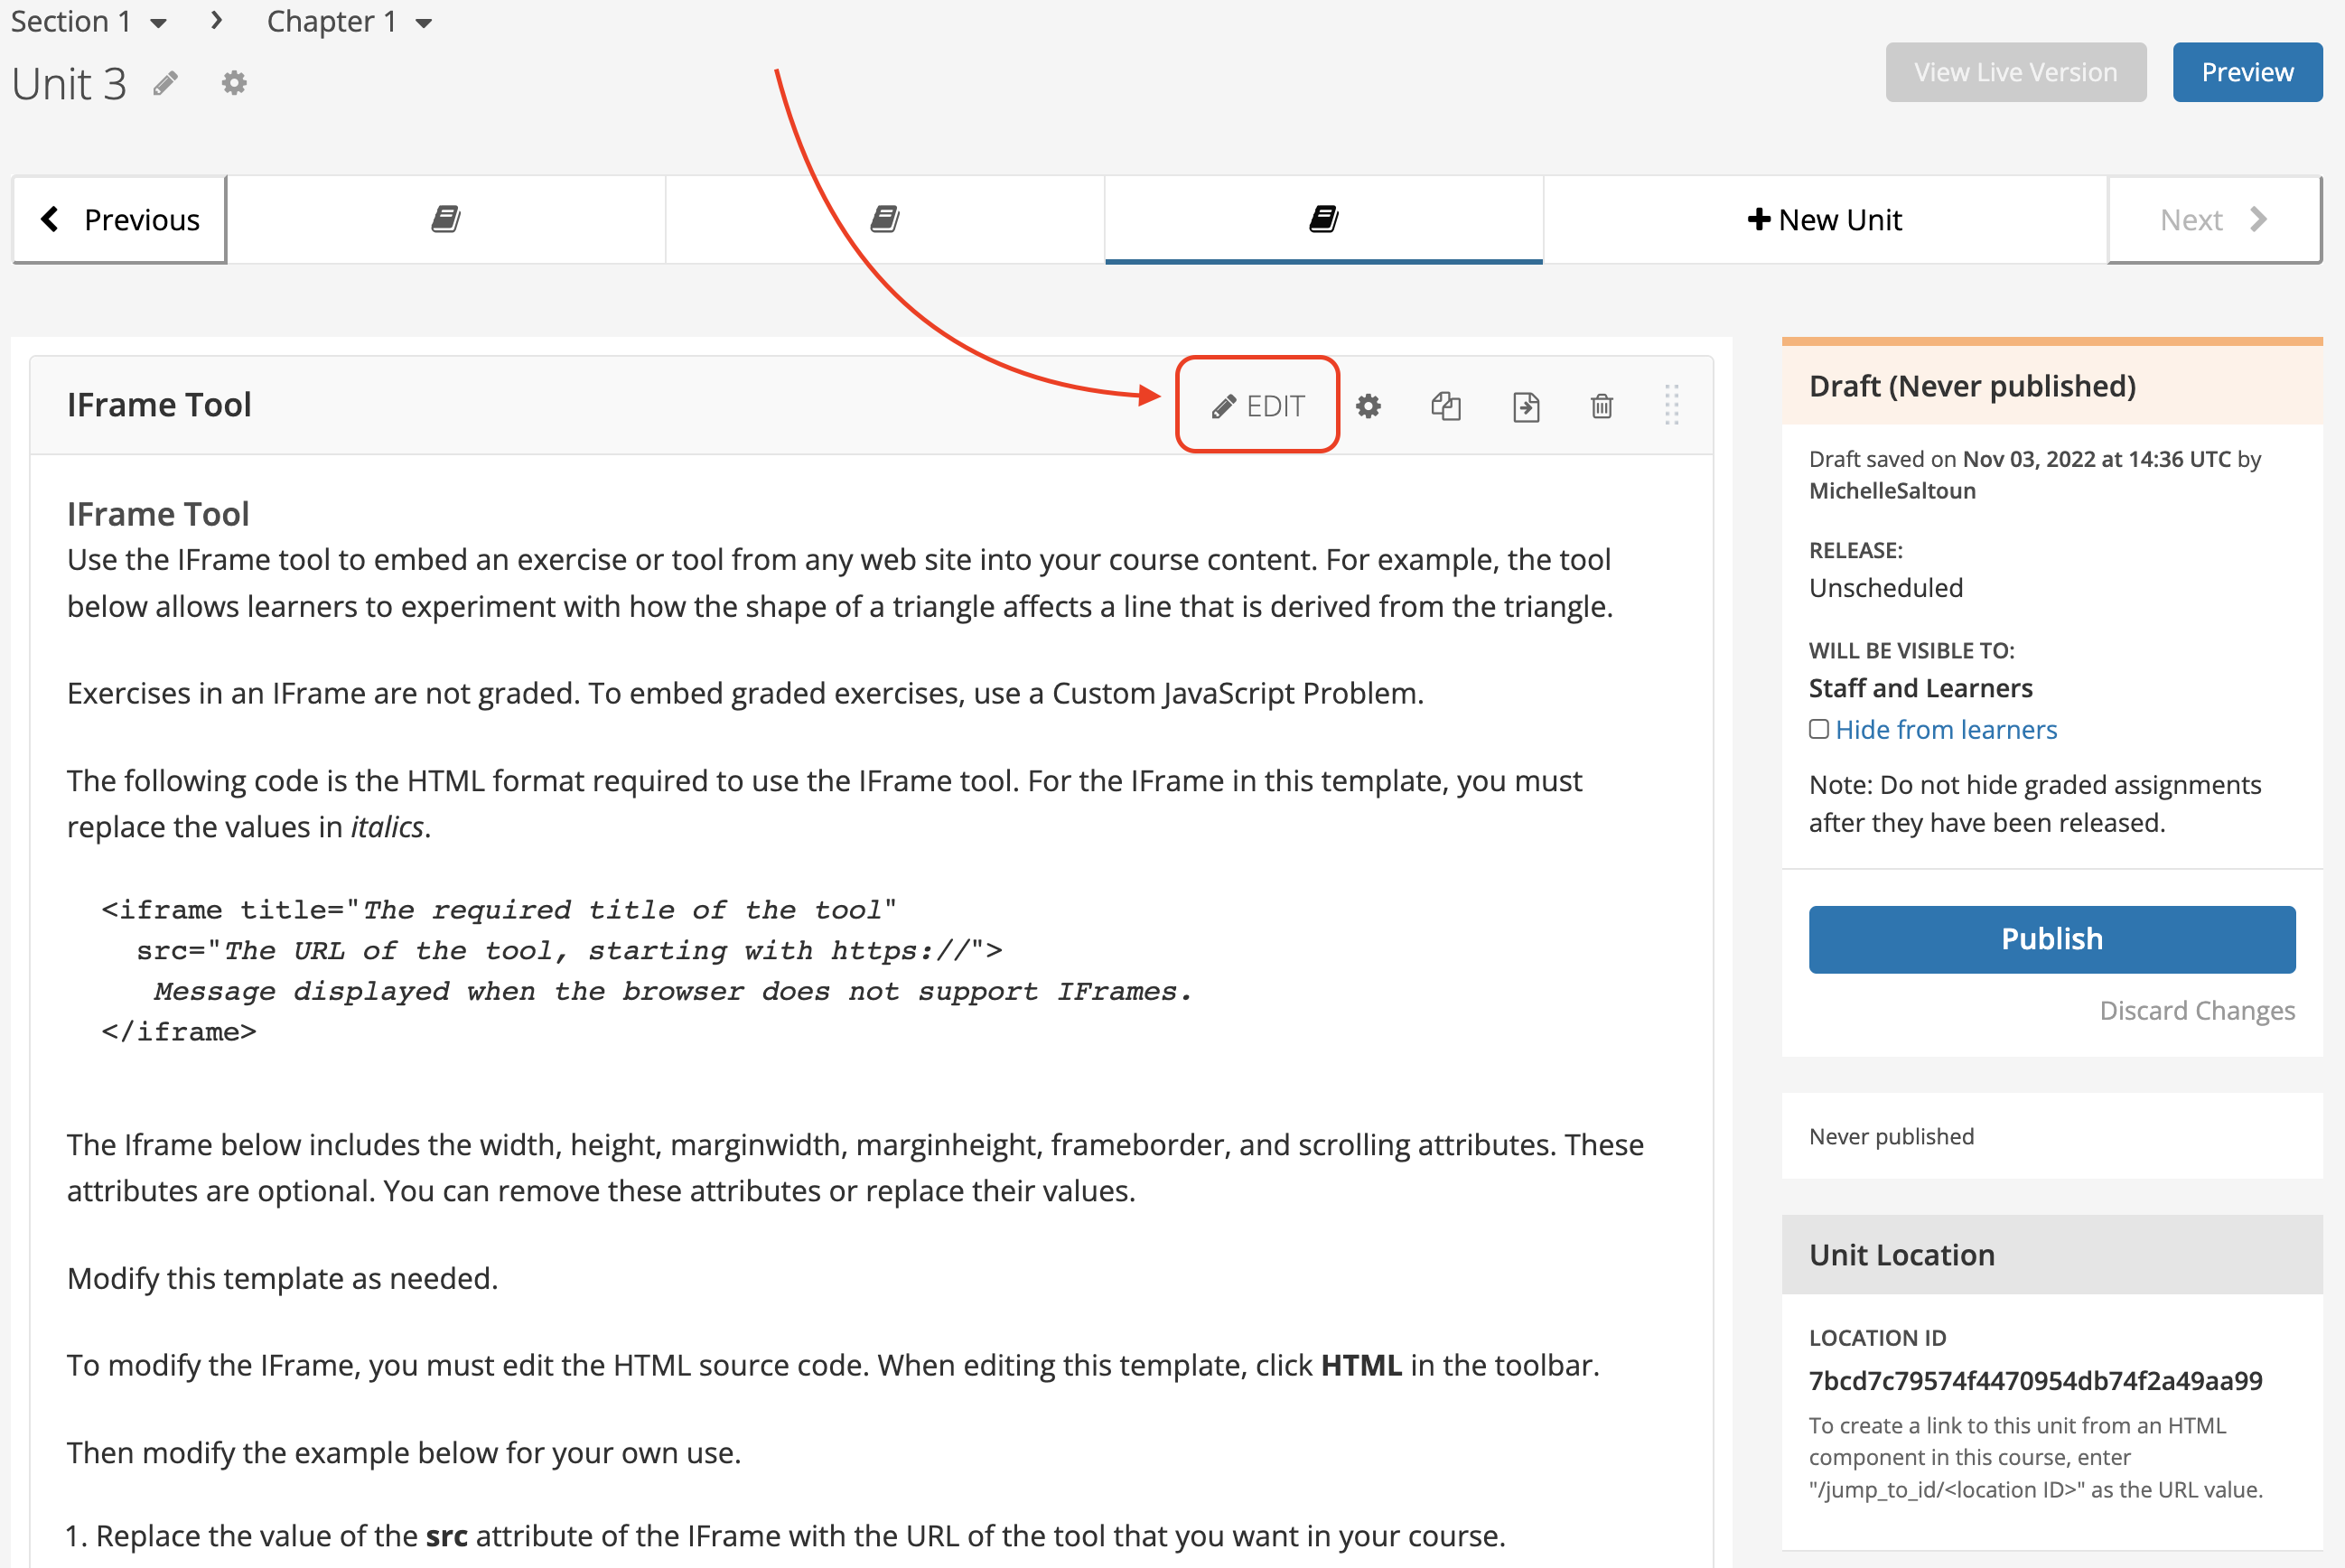
- Click on the Edit button
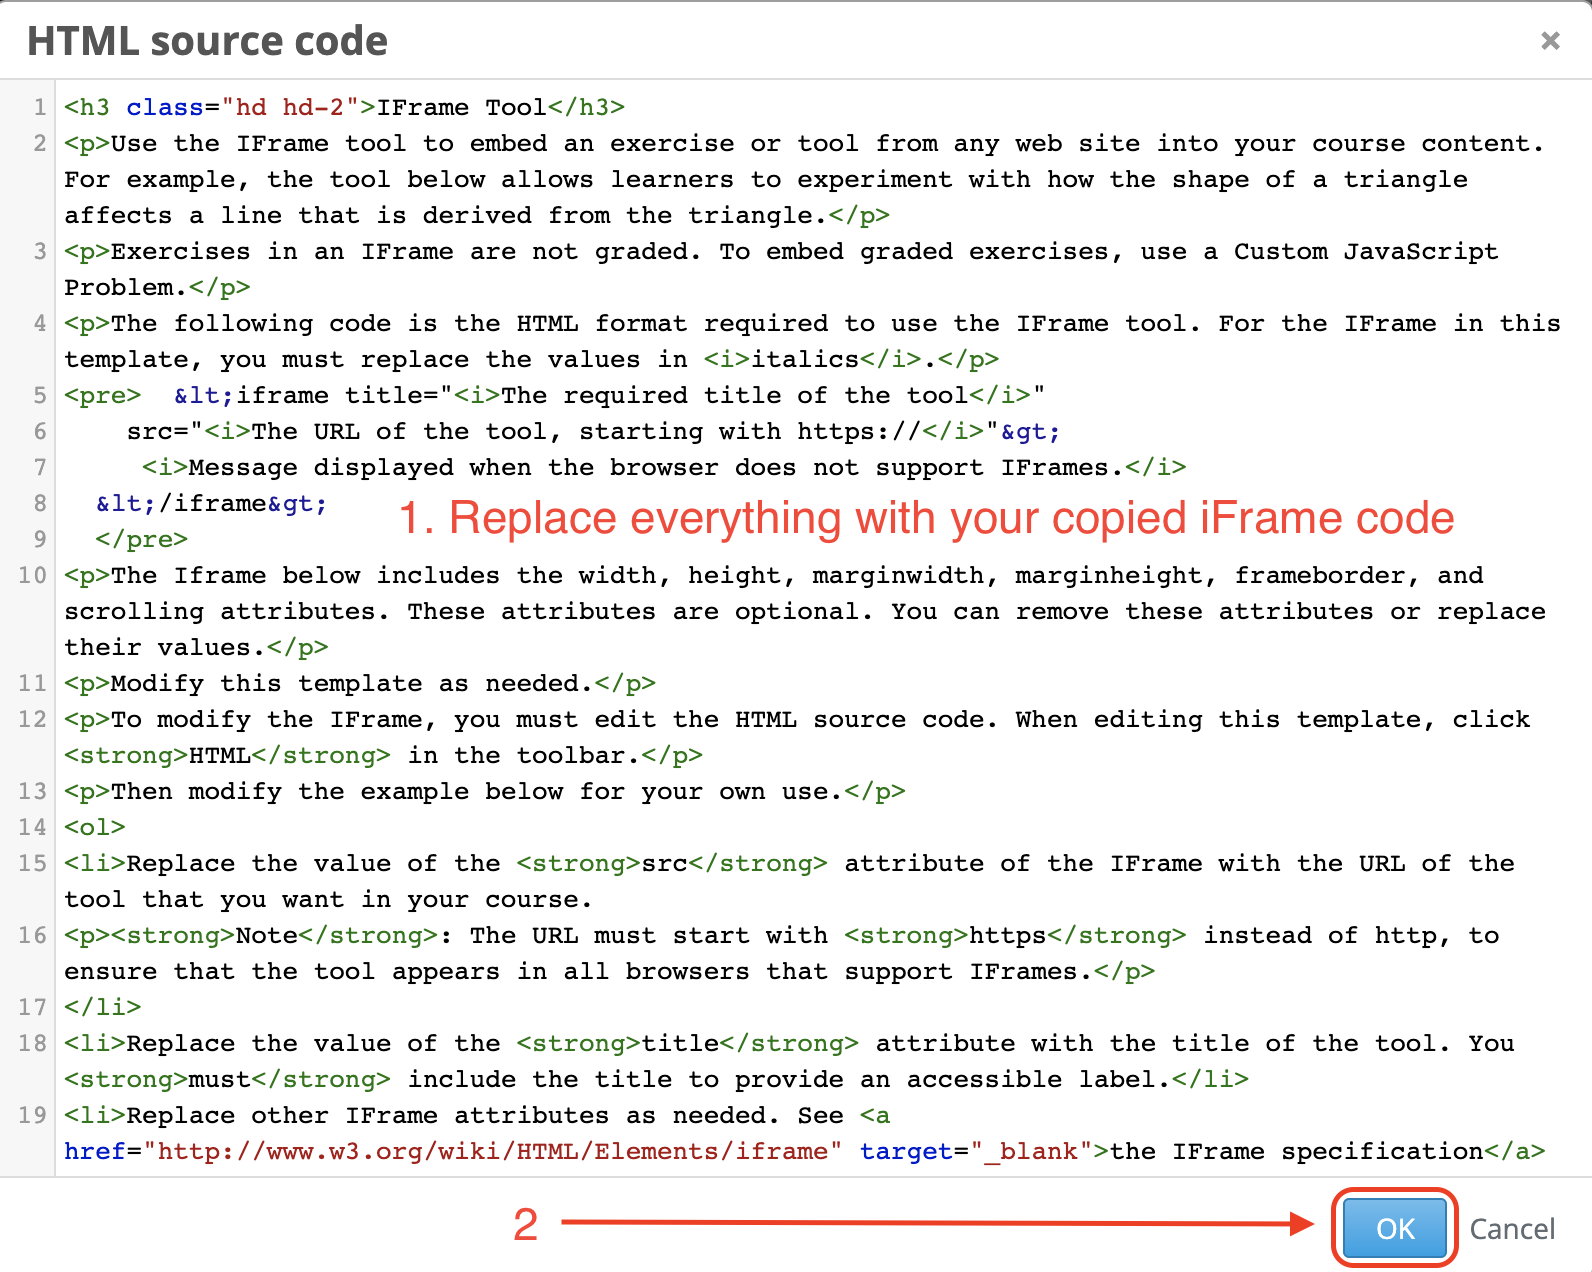
- Select the HTML option
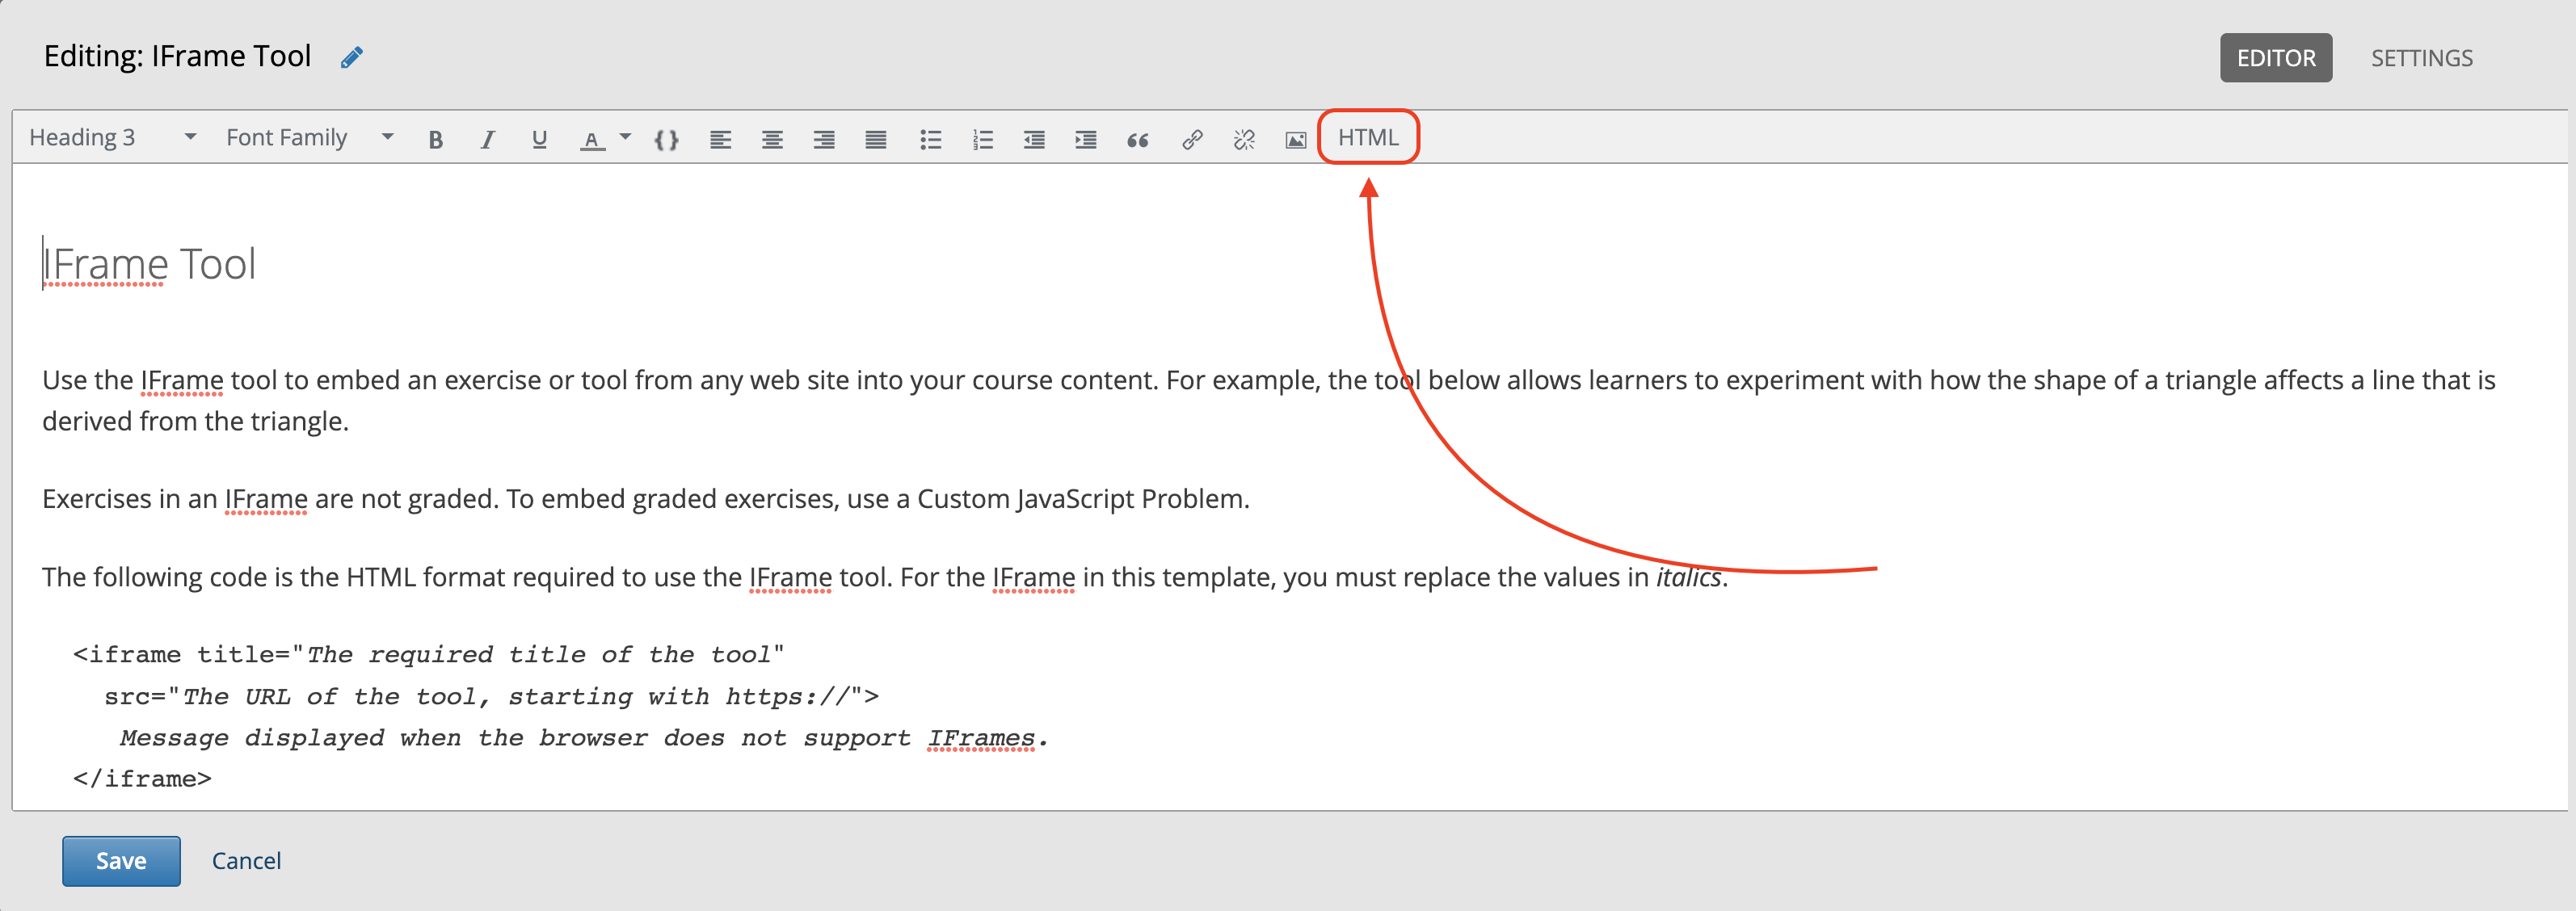
- Remove all existing content, and paste the iFrame code you obtained from step 2. Then click OK to exit the HTML editor.
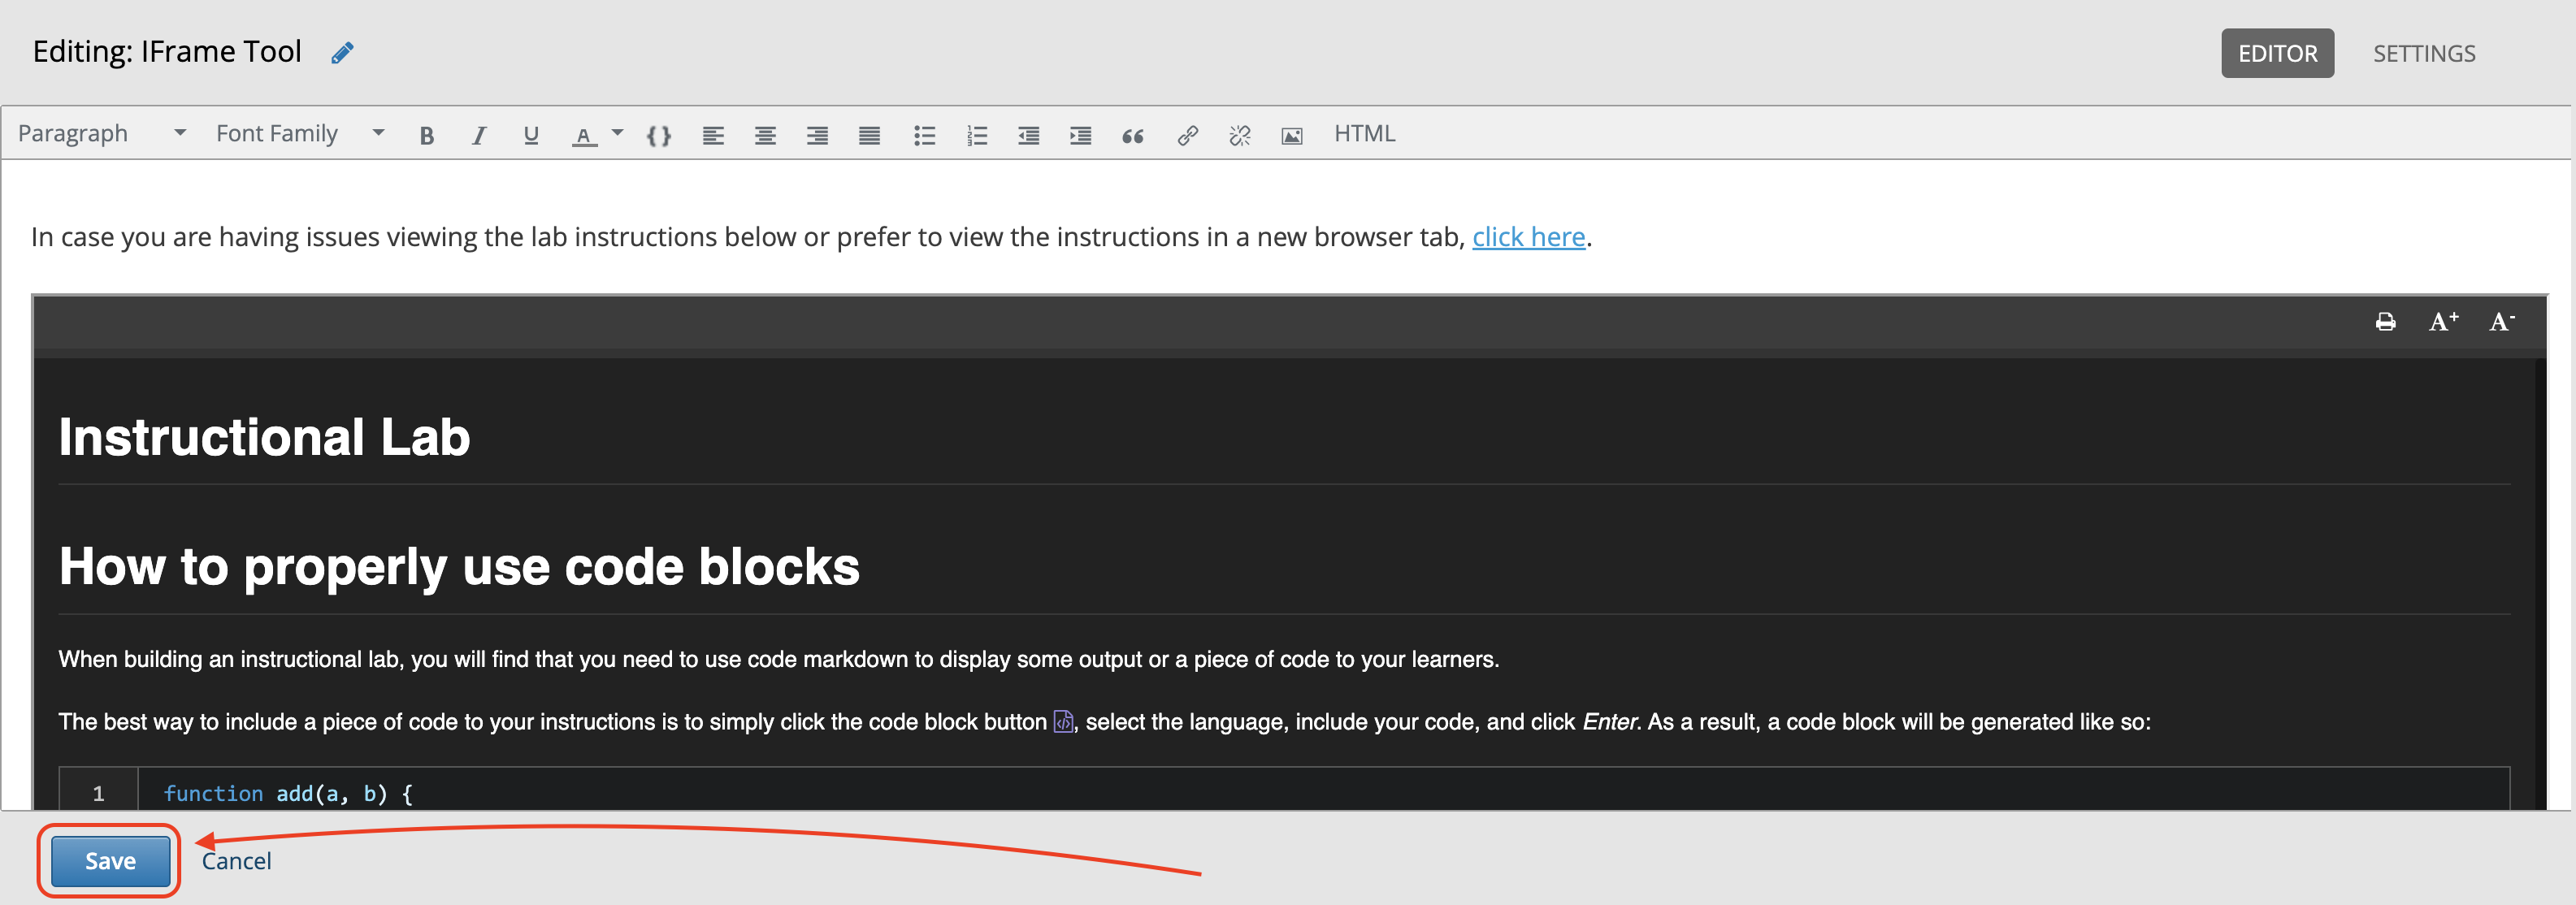
- Click Save to save your work.
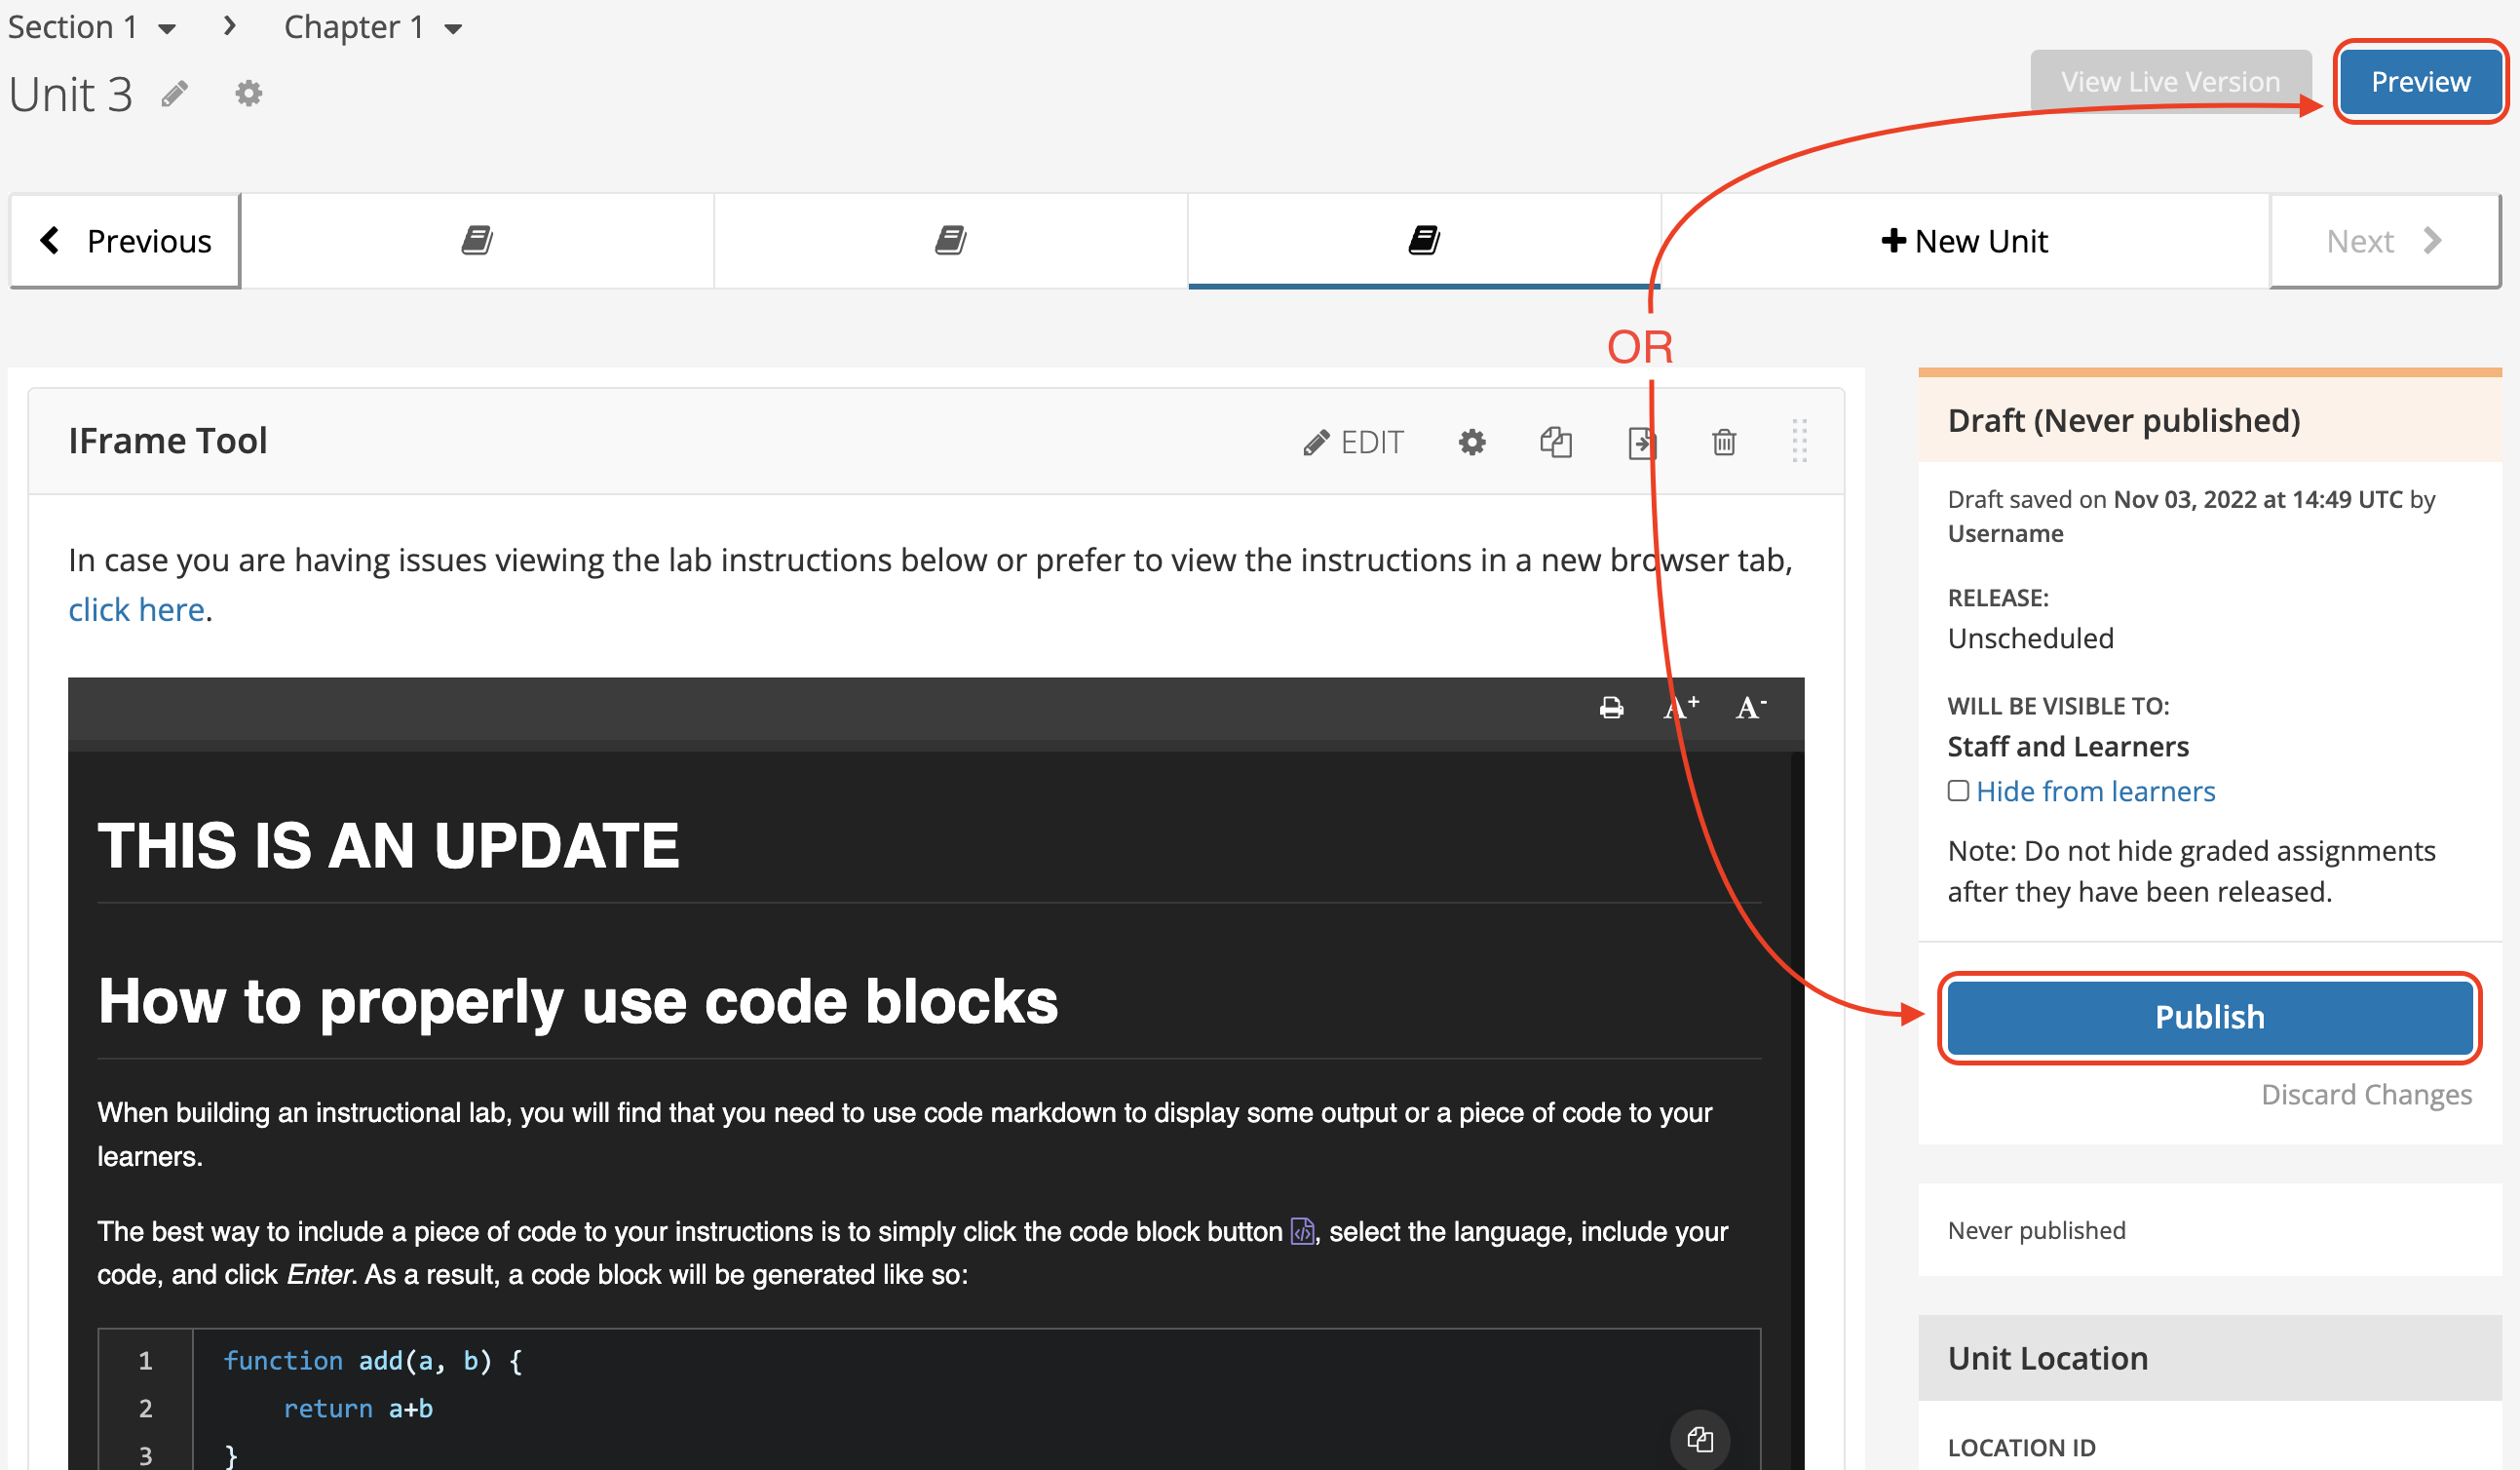
- Now, your instructional lab should be embedded into your unit. You can preview the unit by clicking the Preview button in the top right corner, or publish the unit if you are satisfied with everything.
Add a (Non-Instructional) Lab to your Course
This section is only applicable for any lab type other than an instructional lab. If you wish to add an instructional lab to your course, see the Add an Instructional Lab to your Course section.
To add a (non-instructional) lab to your course in Studio:
- In Skills Network Studio, go to the unit you want your lab to be in. If it doesn't exist yet, you can create a new unit.

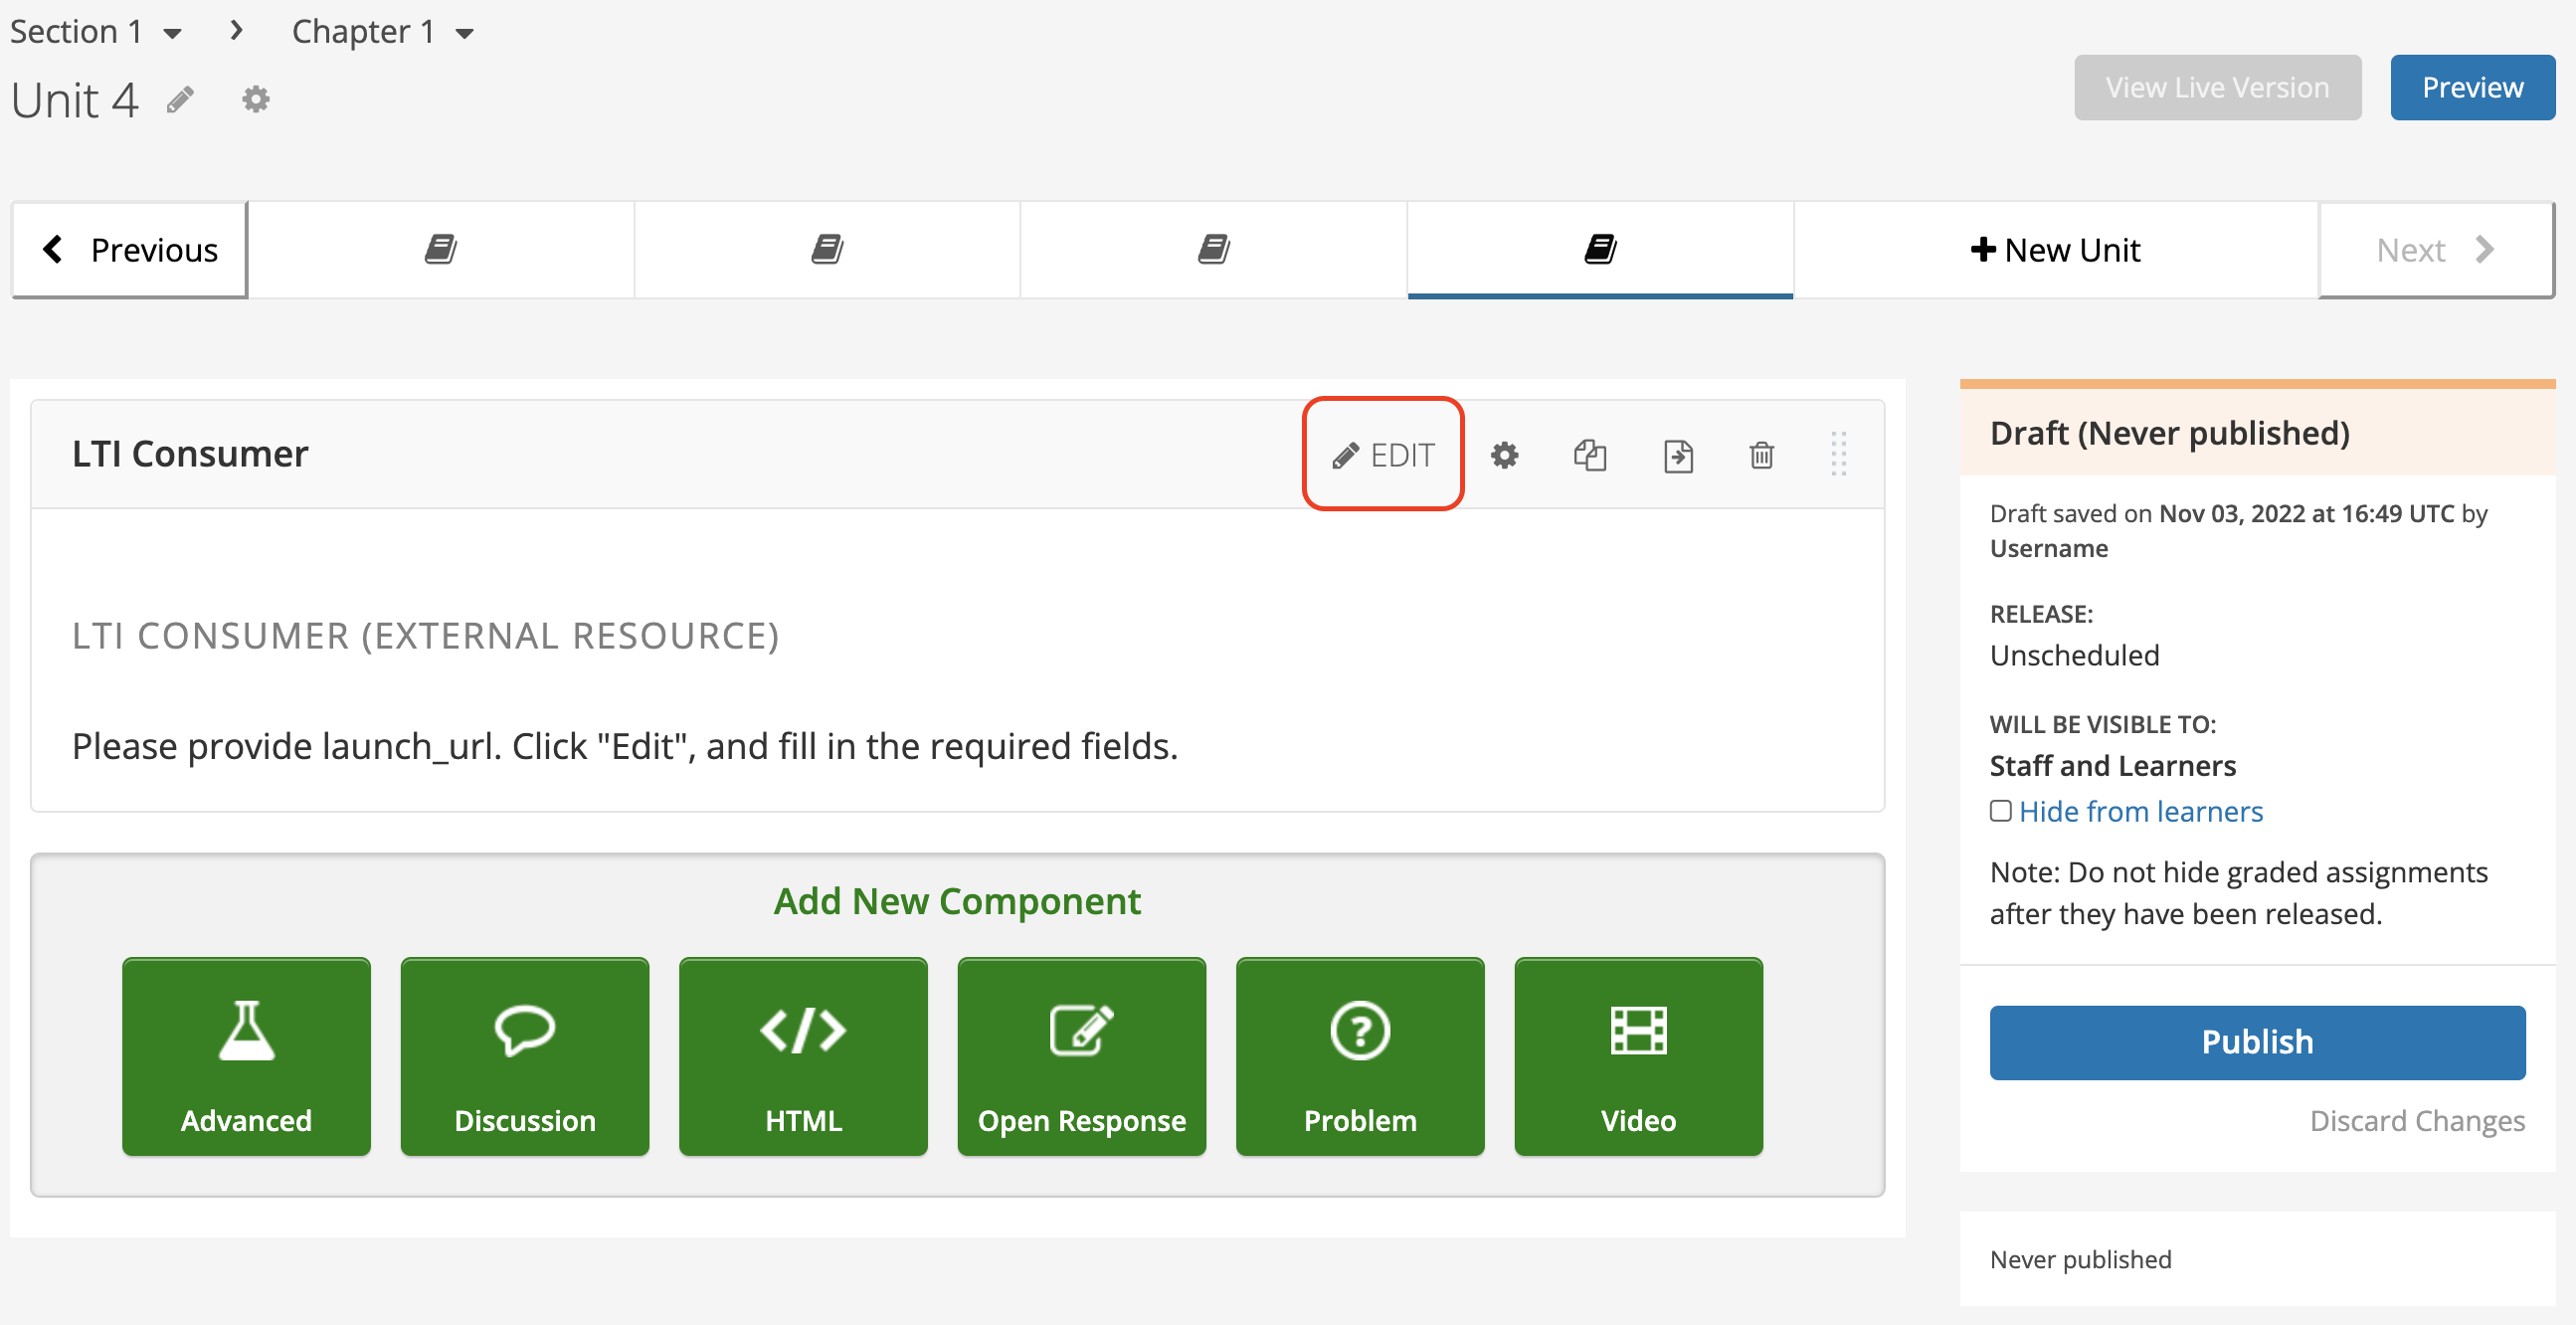
- Click the green advanced button and select LTI Consumer


- Edit the following properties of your LTI Consumer.
| LTI ID | sn_lti |
| LTI URL | See the Lab Launch Url section below. |
| LTI Launch Target | New Window |
| Request user's username | true |
| Request user's email | true |
| Send extra parameters | true |
Lab Launch Url
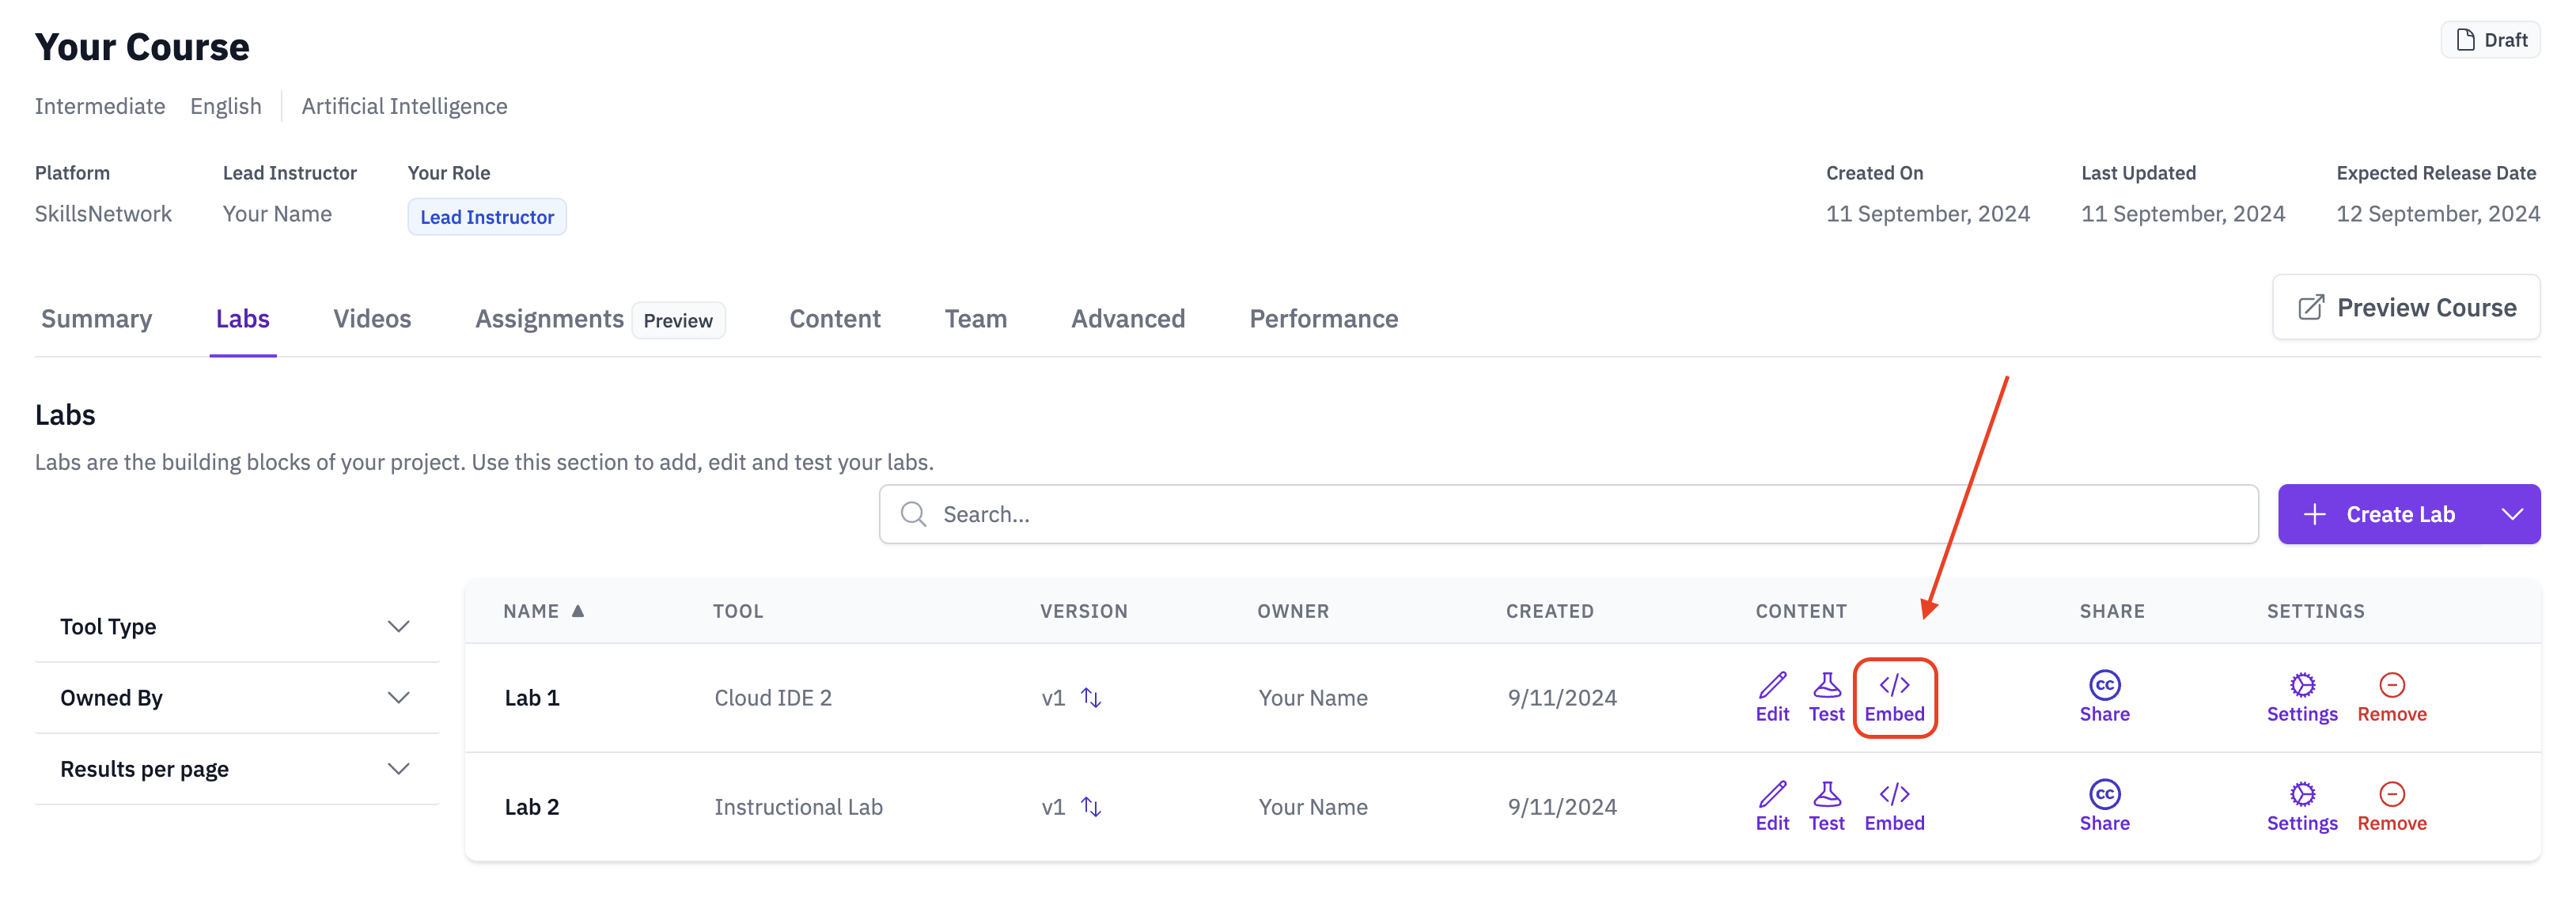
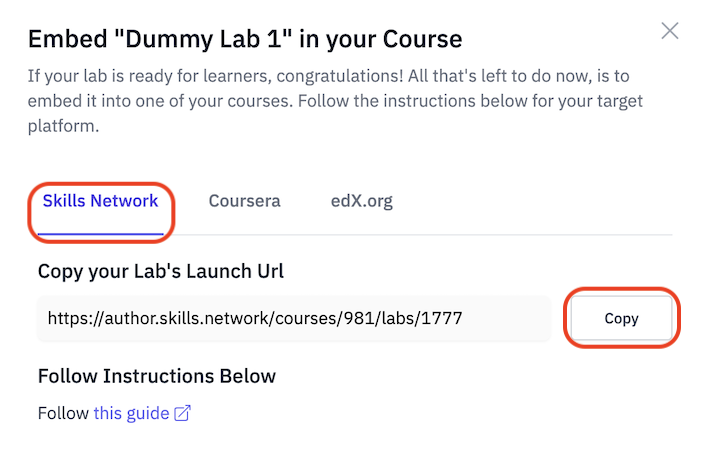
The Lab Launch url can be easily found in Author Workbench on your course page. Just follow these steps:
- On your course page, navigate to the lab you want (under the
Labstab) and click "Embed"
- Copy the the Lab's Launchg Url by clicking on the
Copybutton.
Once everything has been added, your final configuration should look something like this:


Add a Datasette Lab to your Course
Adding Datasette labs to your course involves a few steps. This guide will outline all the steps you must follow to successfully add a Datasette lab to your course or guided project outline.
Step 1. Add a lab to your outline
- In Skills Network Studio, go to the unit you want your lab to be in. If it doesn't exist yet, you can create a new unit.

- Click the green advanced button and select LTI Consumer


- Edit the following properties of your LTI Consumer.

| LTI ID | sn_lti |
| LTI URL | https://labs.cognitiveclass.ai/login/lti |
| Custom Parameters | See Step 2 |
| LTI Launch Target | New Window |
| Request user's username | true |
| Request user's email | true |
| Send extra parameters | true |
Step 2. Start writing your Custom LTI Parameters
Now you must create the Custom Parameters. The values you use in your Custom Parameters are very important.
Below are the parameters you will need. Some of the values will have to be obtained in the next steps.
We strongly recommend you give each lab a unique path in the sn_labs_filepath value
[
    "sn_labs_tool=datasette",
    "sn_labs_filepath=/labs/datasette/lab.db",
    "sn_asset_library_sqlite_db_url=<SEE STEP 3>",
    "sn_asset_library_instructions_url=<SEE STEP 4>"
]
Step 3. Upload your database file to the SN File Library
You must supply a database file as the value for sn_asset_library_sqlite_db_url in your Custom Parameters.
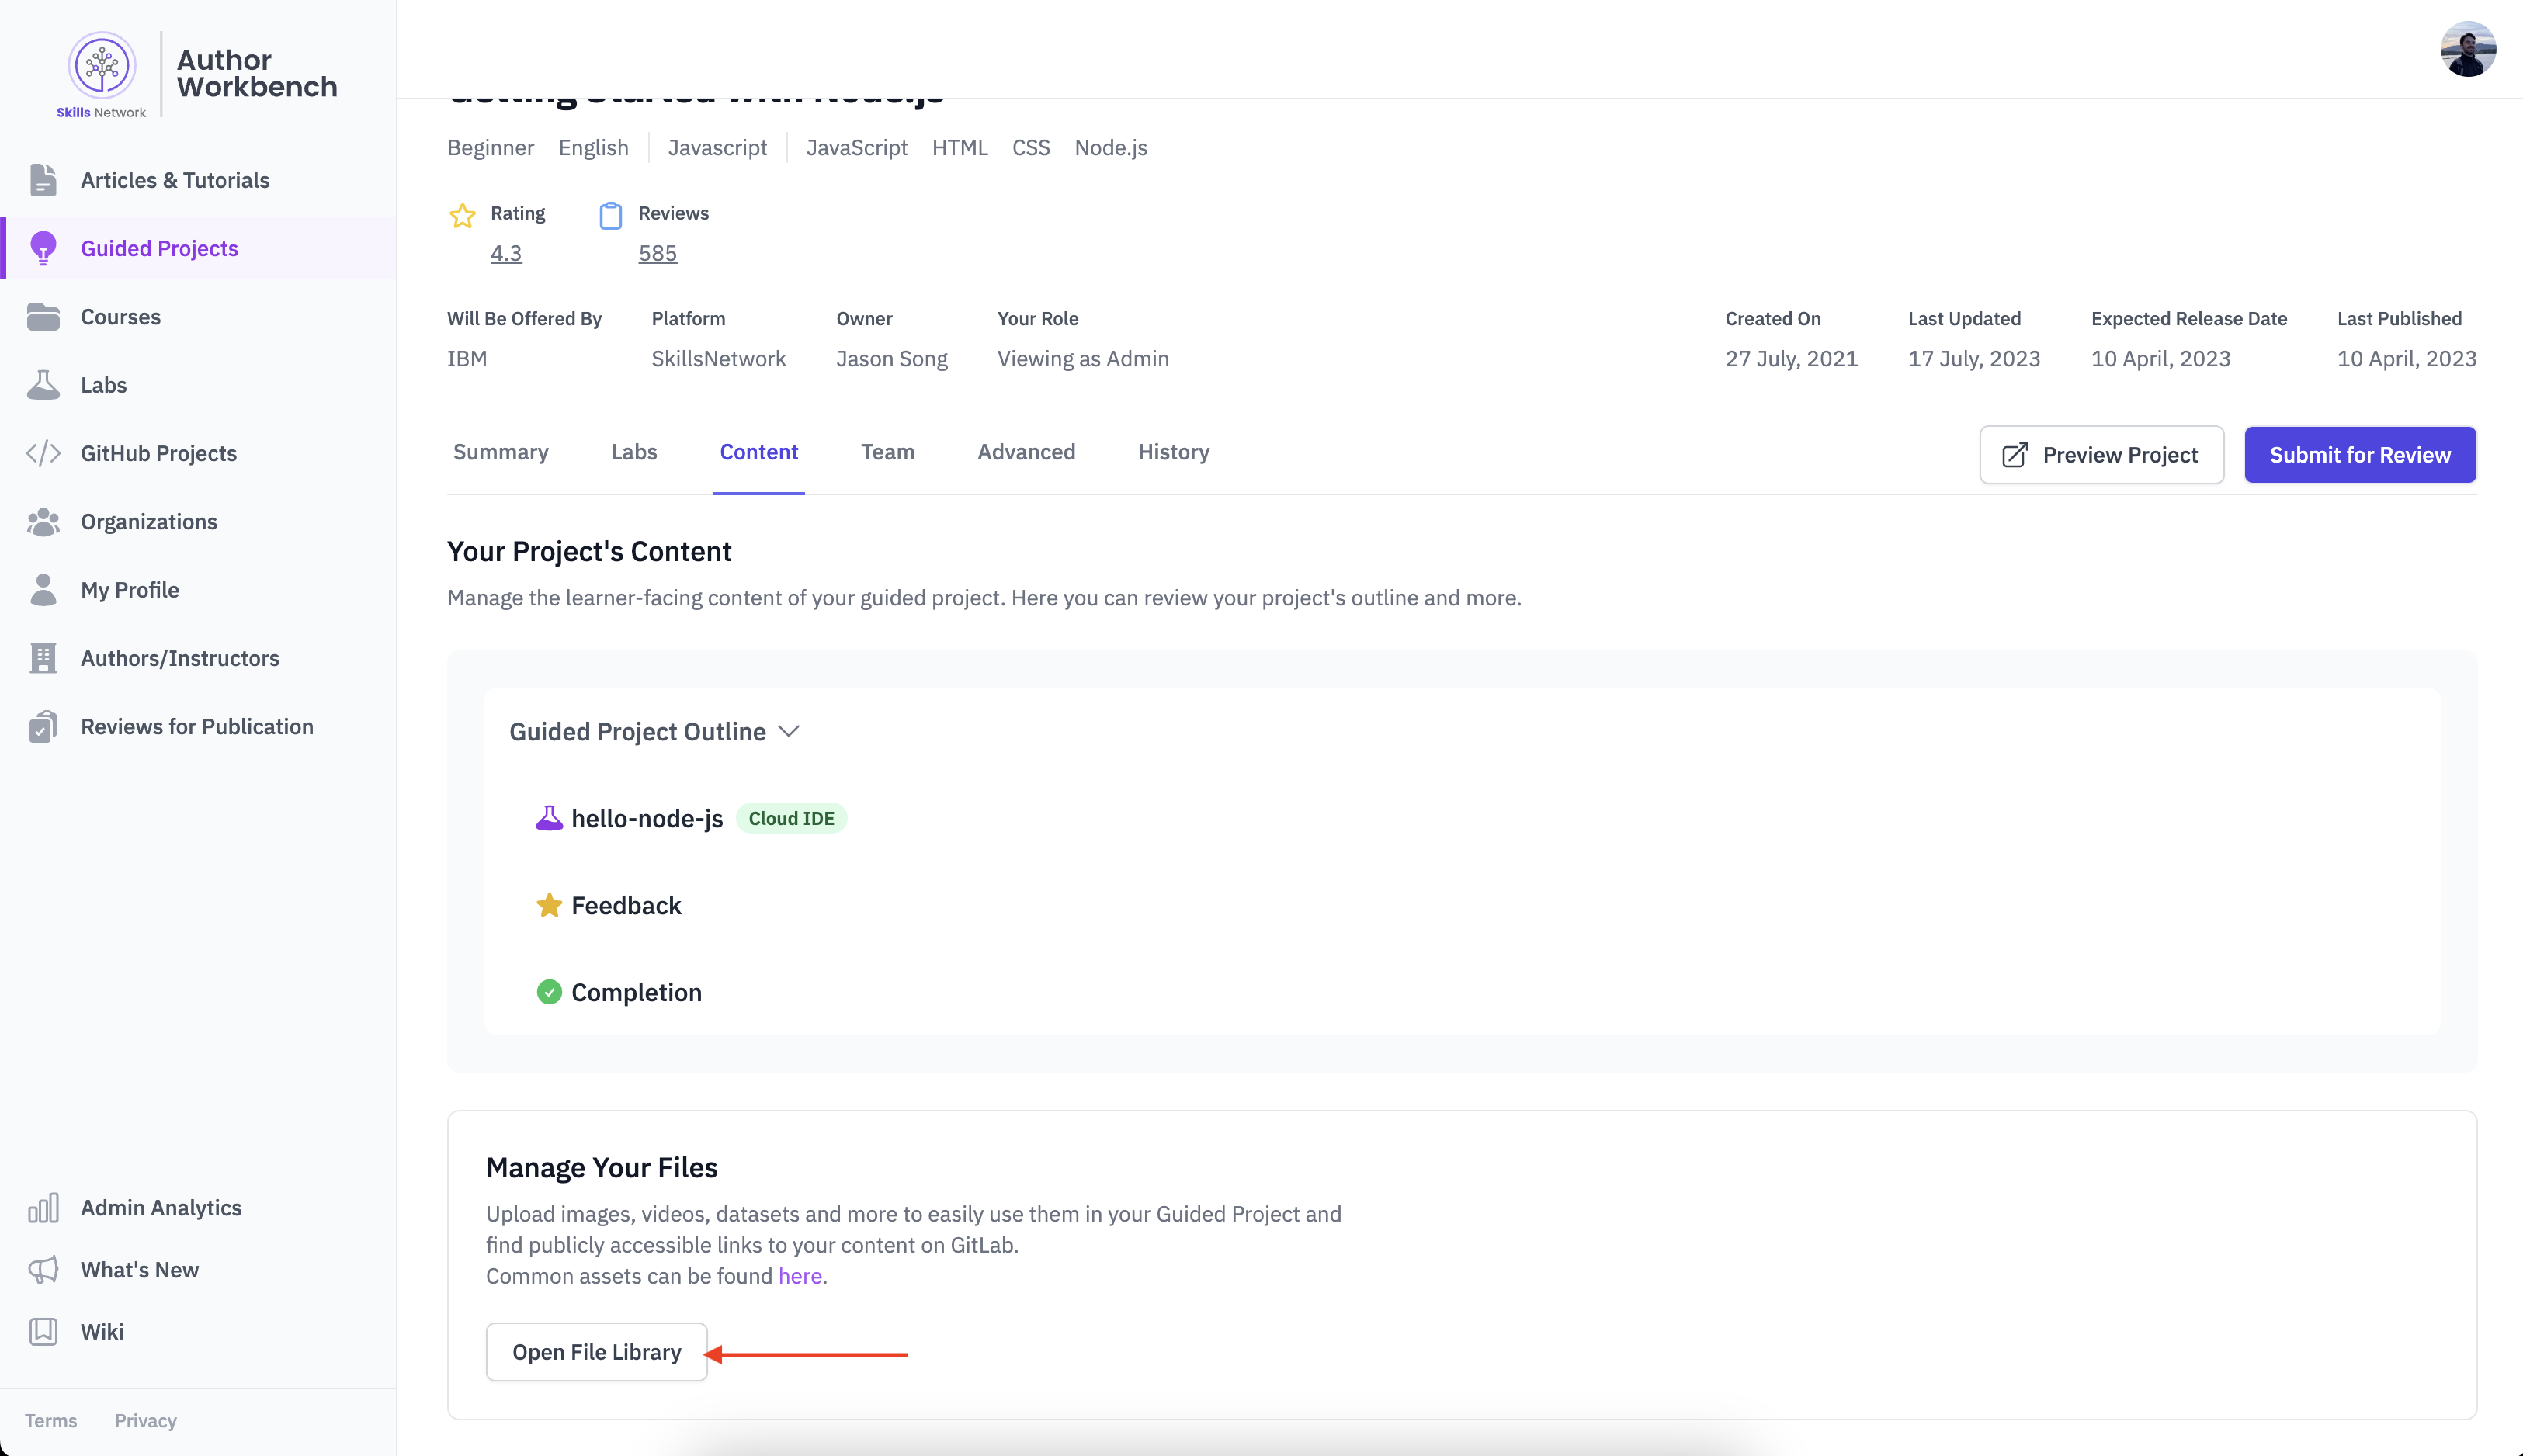
To do this, you should upload a .db or .sqlite file of your choice to the SN File Library. Head to the content tab of your course or guided project.
Here you can open the File Library and upload your database file.
Once you have uploaded your database file to SN File Library, select the file and copy the asset URL.
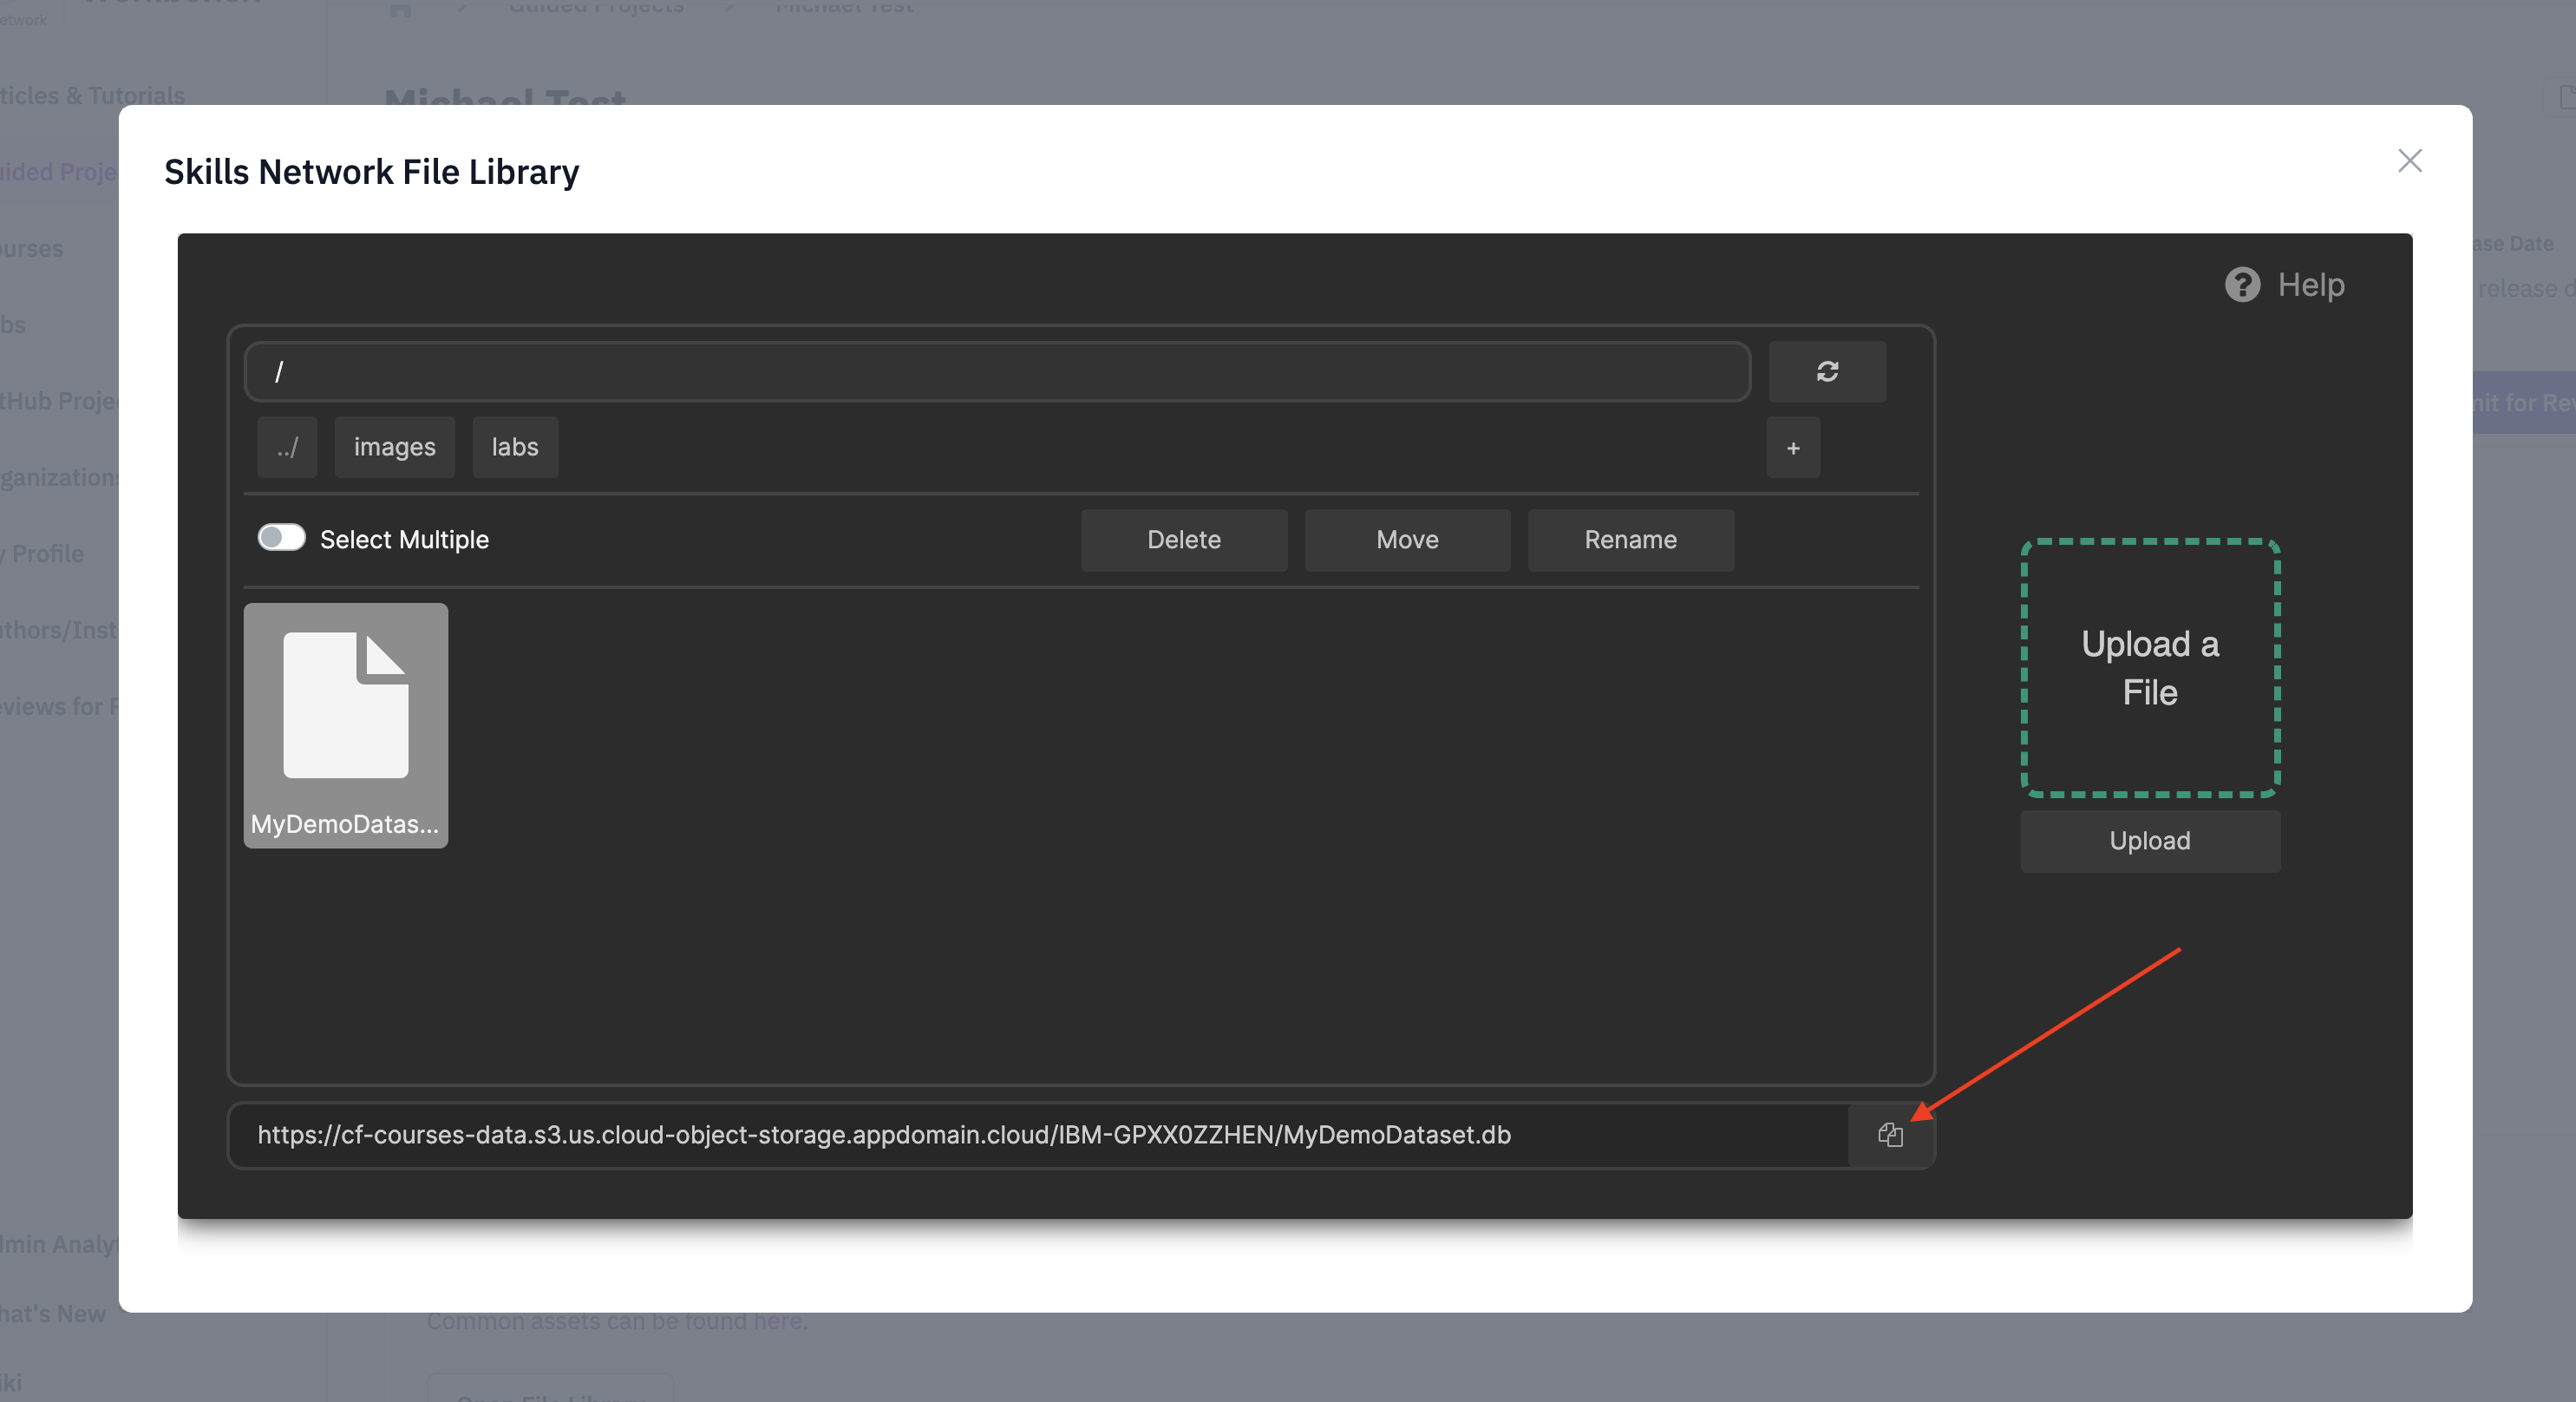
Now you can add this URL to your Custom Parameters like so
[
    "sn_labs_tool=datasette",
    "sn_labs_filepath=/labs/datasette/lab.db",
    "sn_asset_library_sqlite_db_url=https://cf-courses-data.s3.us.cloud-object-storage.appdomain.cloud/datasette-test/datasets/MyDemoDataset.db",
    "sn_asset_library_instructions_url=<SEE STEP 4>"
]
Step 4. Copy your instructions url
Finally, you just need an instructions URL.
This can be obtained by clicking opening the embed popup on your lab in Author Workbench.
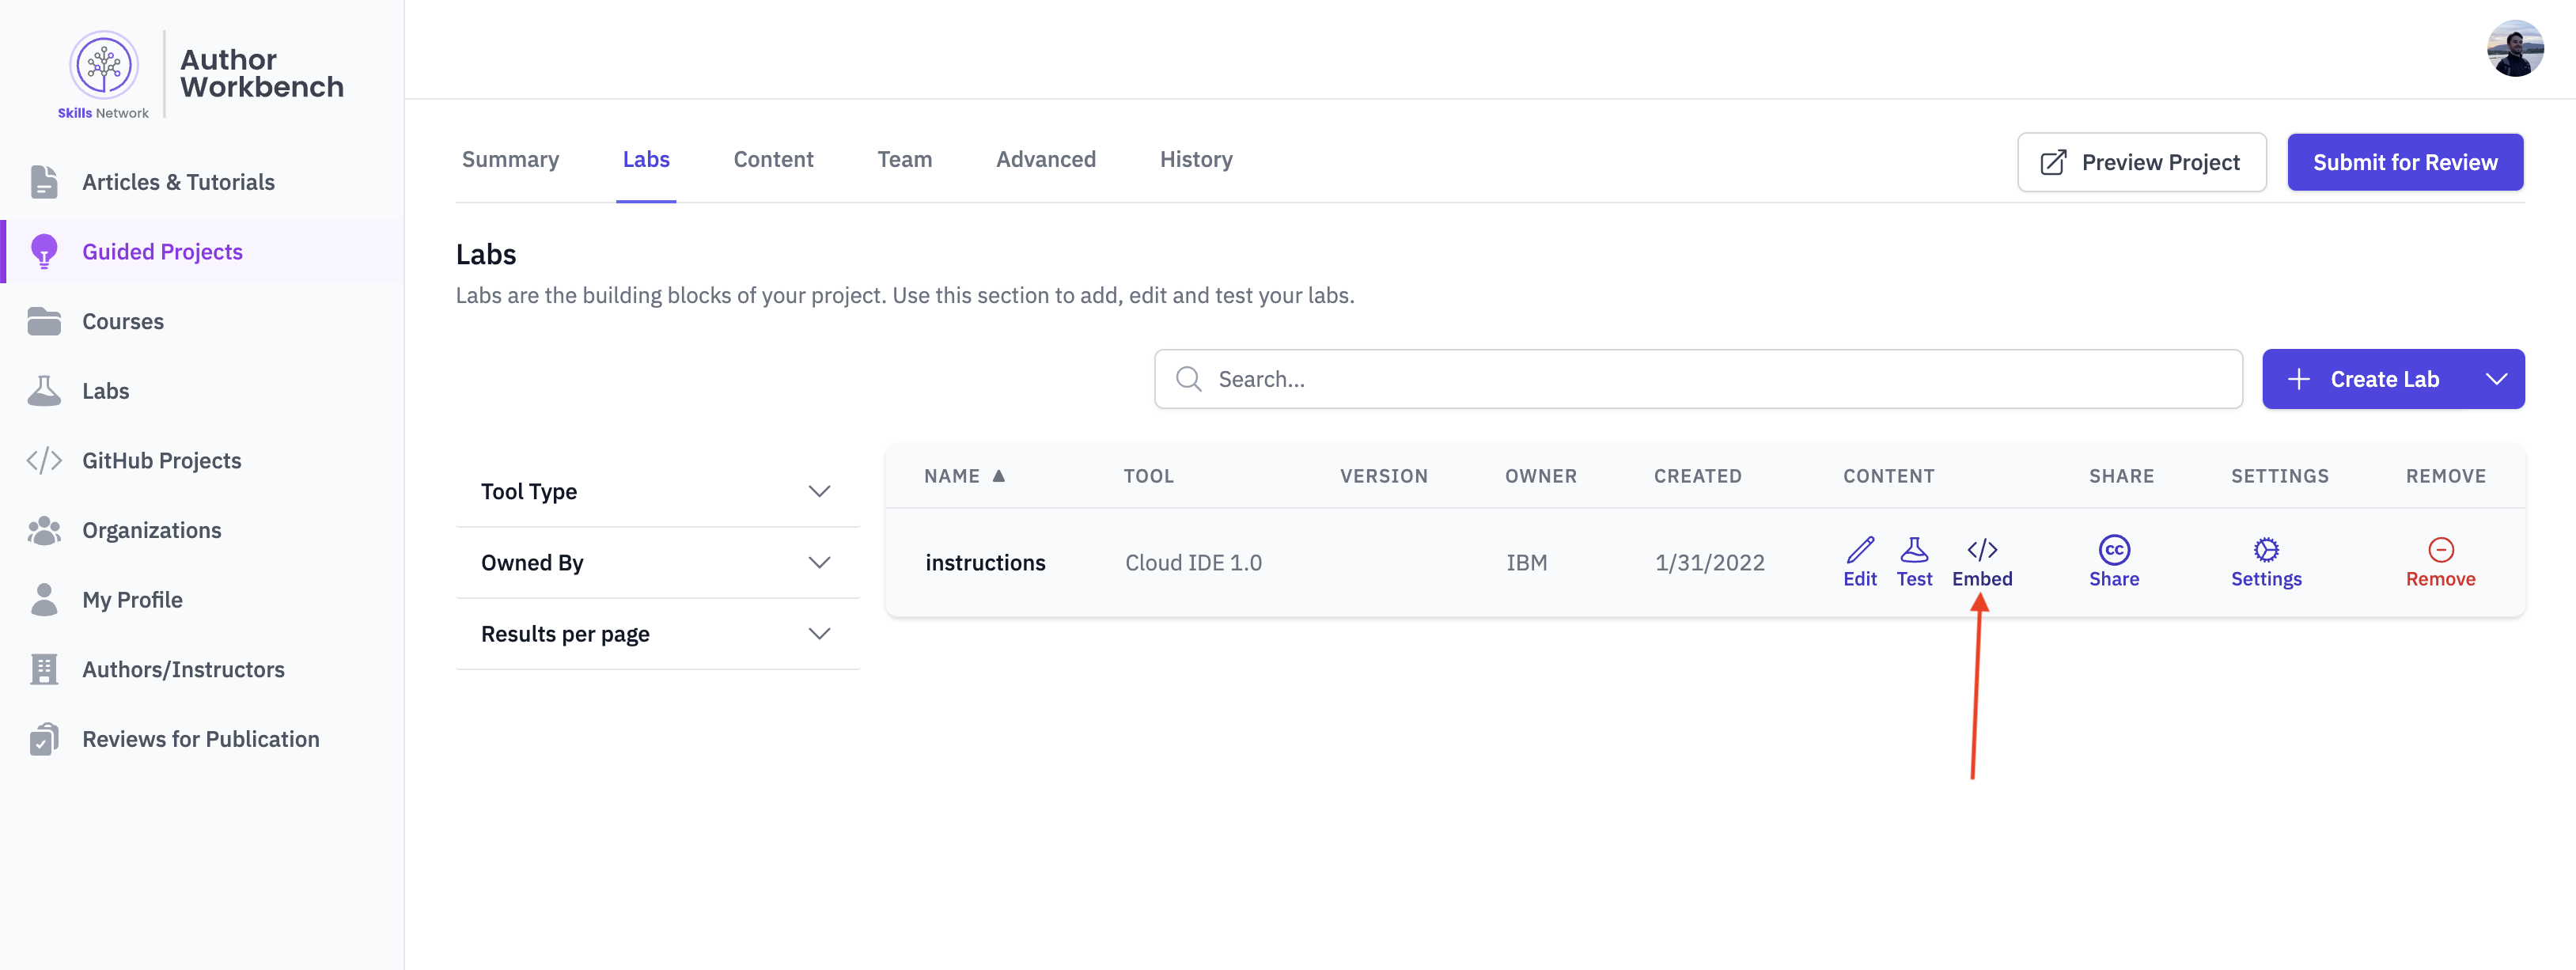
Now you can add this URL to your Custom Parameters like so
[
    "sn_labs_tool=datasette",
    "sn_labs_filepath=/labs/datasette/lab.db",
    "sn_asset_library_sqlite_db_url=https://cf-courses-data.s3.us.cloud-object-storage.appdomain.cloud/datasette-test/datasets/MyDemoDataset.db",
    "sn_asset_library_instructions_url=https://cf-courses-data.s3.us.cloud-object-storage.appdomain.cloud/datasette-test/instructions.md"
]
Step 5. Paste your Custom Parameters into studio and save
Now that you have completed the steps above, you should have all the right parameters to complete the set up of your lab in SN Studio.
You should paste the Custom Parameters you built in the previous steps to complete the LTI Consumer object.
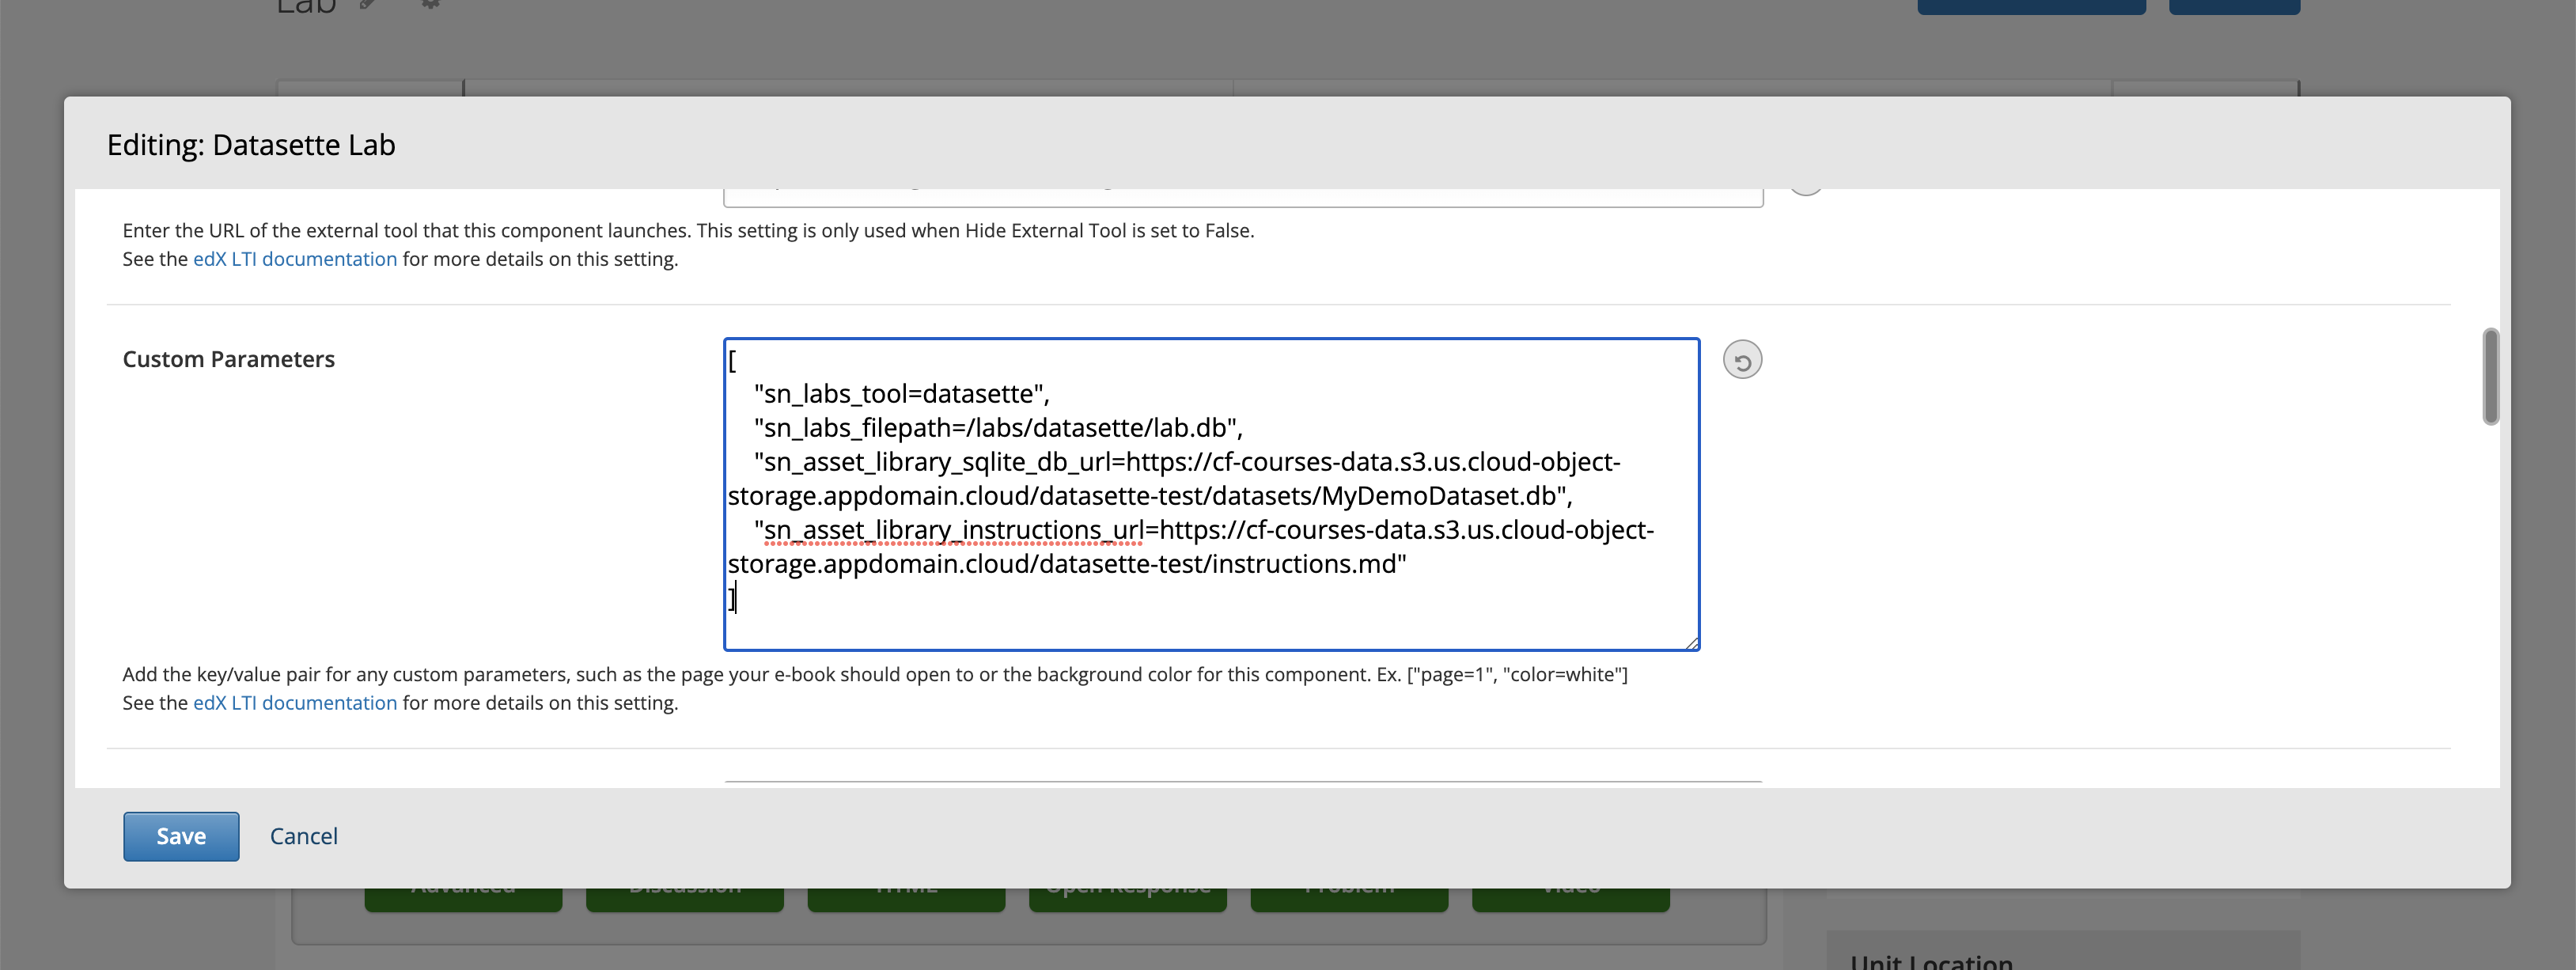
Now you can click Save.
Step 6. Test your lab
It is important to test to ensure you set everything up correctly.
Click the Publish button and then click View Live Version.
This will allow you preview the lab as a learner would see it.
If there are any issues, please double check that you followed all the steps above correctly.