Quick Start
This guide will walk you through the process of creating your first lab in Author Workbench.
What is a Lab?
Labs are interactive learning modules. They provide an in-browser environment for your learners to put what they've learned into practice. With labs, you can guide learners through a project, a tutorial, or a challenge and they can follow along without ever leaving the browser or installing any software.
You're encouraged to use labs in your courses and guided projects to provide a more engaging and interactive experience for your learners. Skills are best learned by doing, and labs are the best way to let your learners practice what they've learned.
Creating your first lab
It's easy to create a lab in Author Workbench. If you're doing this for the first time, we recommend you first create a course or a guided project so that you have a place to use your lab. Once you have a course or guided project, you can click on the "Labs" tab inside that course or guided project and then click "Create Lab". Here, you'll be asked for a title and description for your lab. Once you've done that, you will be able to select the tool you want to use for your lab.
Skills Network Labs has many lab tools to choose from. Each with their own unique features and use cases. It can be overwhelming to decide which tool to use for your lab as a new author. To help you get started, here are some of our most popular lab tools and their use cases:
- Try
Cloud IDEfor general purpose coding and web apps 🚀 - Try
Generative AI Classroomfor a teaching prompting and model comparisons 🧠 - Try
JupyterLitefor data science and machine learning with Jupyter Notebooks 🐍 - Try
Intructional Labfor writing basic readings and tutorials 💡
Some general tips anytime you're creating a lab:
- Think about what you aim to teach learners in your lab. Maybe you want to demonstrate how to get a JavaScript application to print Hello World. Or maybe you want to walk learners through training a Machine Learning model with PyTorch. Whatever it is, think about what you want your learners to be able to accomplish after completing the lab.
- Try to construct your lab to be fun and engaging for your learners, labs work best when learners feel like they're accomplishing something.
Creating a basic lab
Let's create a simple lab to get started. For this example, we'll be using our most general purpose tool, Cloud IDE, to guide a learner to build a Hello World application with JavaScript.
Click Create Lab and for the title, enter Hello World with JavaScript and for the description, let's say Learn how to print "Hello World" in Javascript. Continue to the next step and select Cloud IDE as the tool. Some tools have multiple versions with small differences. For this guide, select and continue with the latest version of Cloud IDE. Click "Create Lab" to finish. You'll be redirected back to your course or guided project where you can see your new lab.
Once you have created your lab, you will be able to edit the instructions, test your lab, and for courses, you'll see an "Embed" button which will help you add your lab to your course outline.
Writing your instructions
Let's continue by writing some instructions for our new lab. Click the "Edit" button on your lab. This opens a popup which lets you know if your lab is used in any other courses or projects -- this can help you prevent unintended changed to other courses or projects. Since this is a new lab, you can safely click "Edit Lab" and continue.
This will open a Markdown editor called Author IDE. This is where you'll write the instructions your learners will follow. You can write rich markdown with easy-to-use features like pagination, code snippets with 1 click execution, and more.
When you first open your lab instructions, there will be some useful text already in the editor. It will walk you through Author IDE's features and help you get familiar with the environment.
For the purposes of this short guide, let's replace all the text in the editor with the below text.
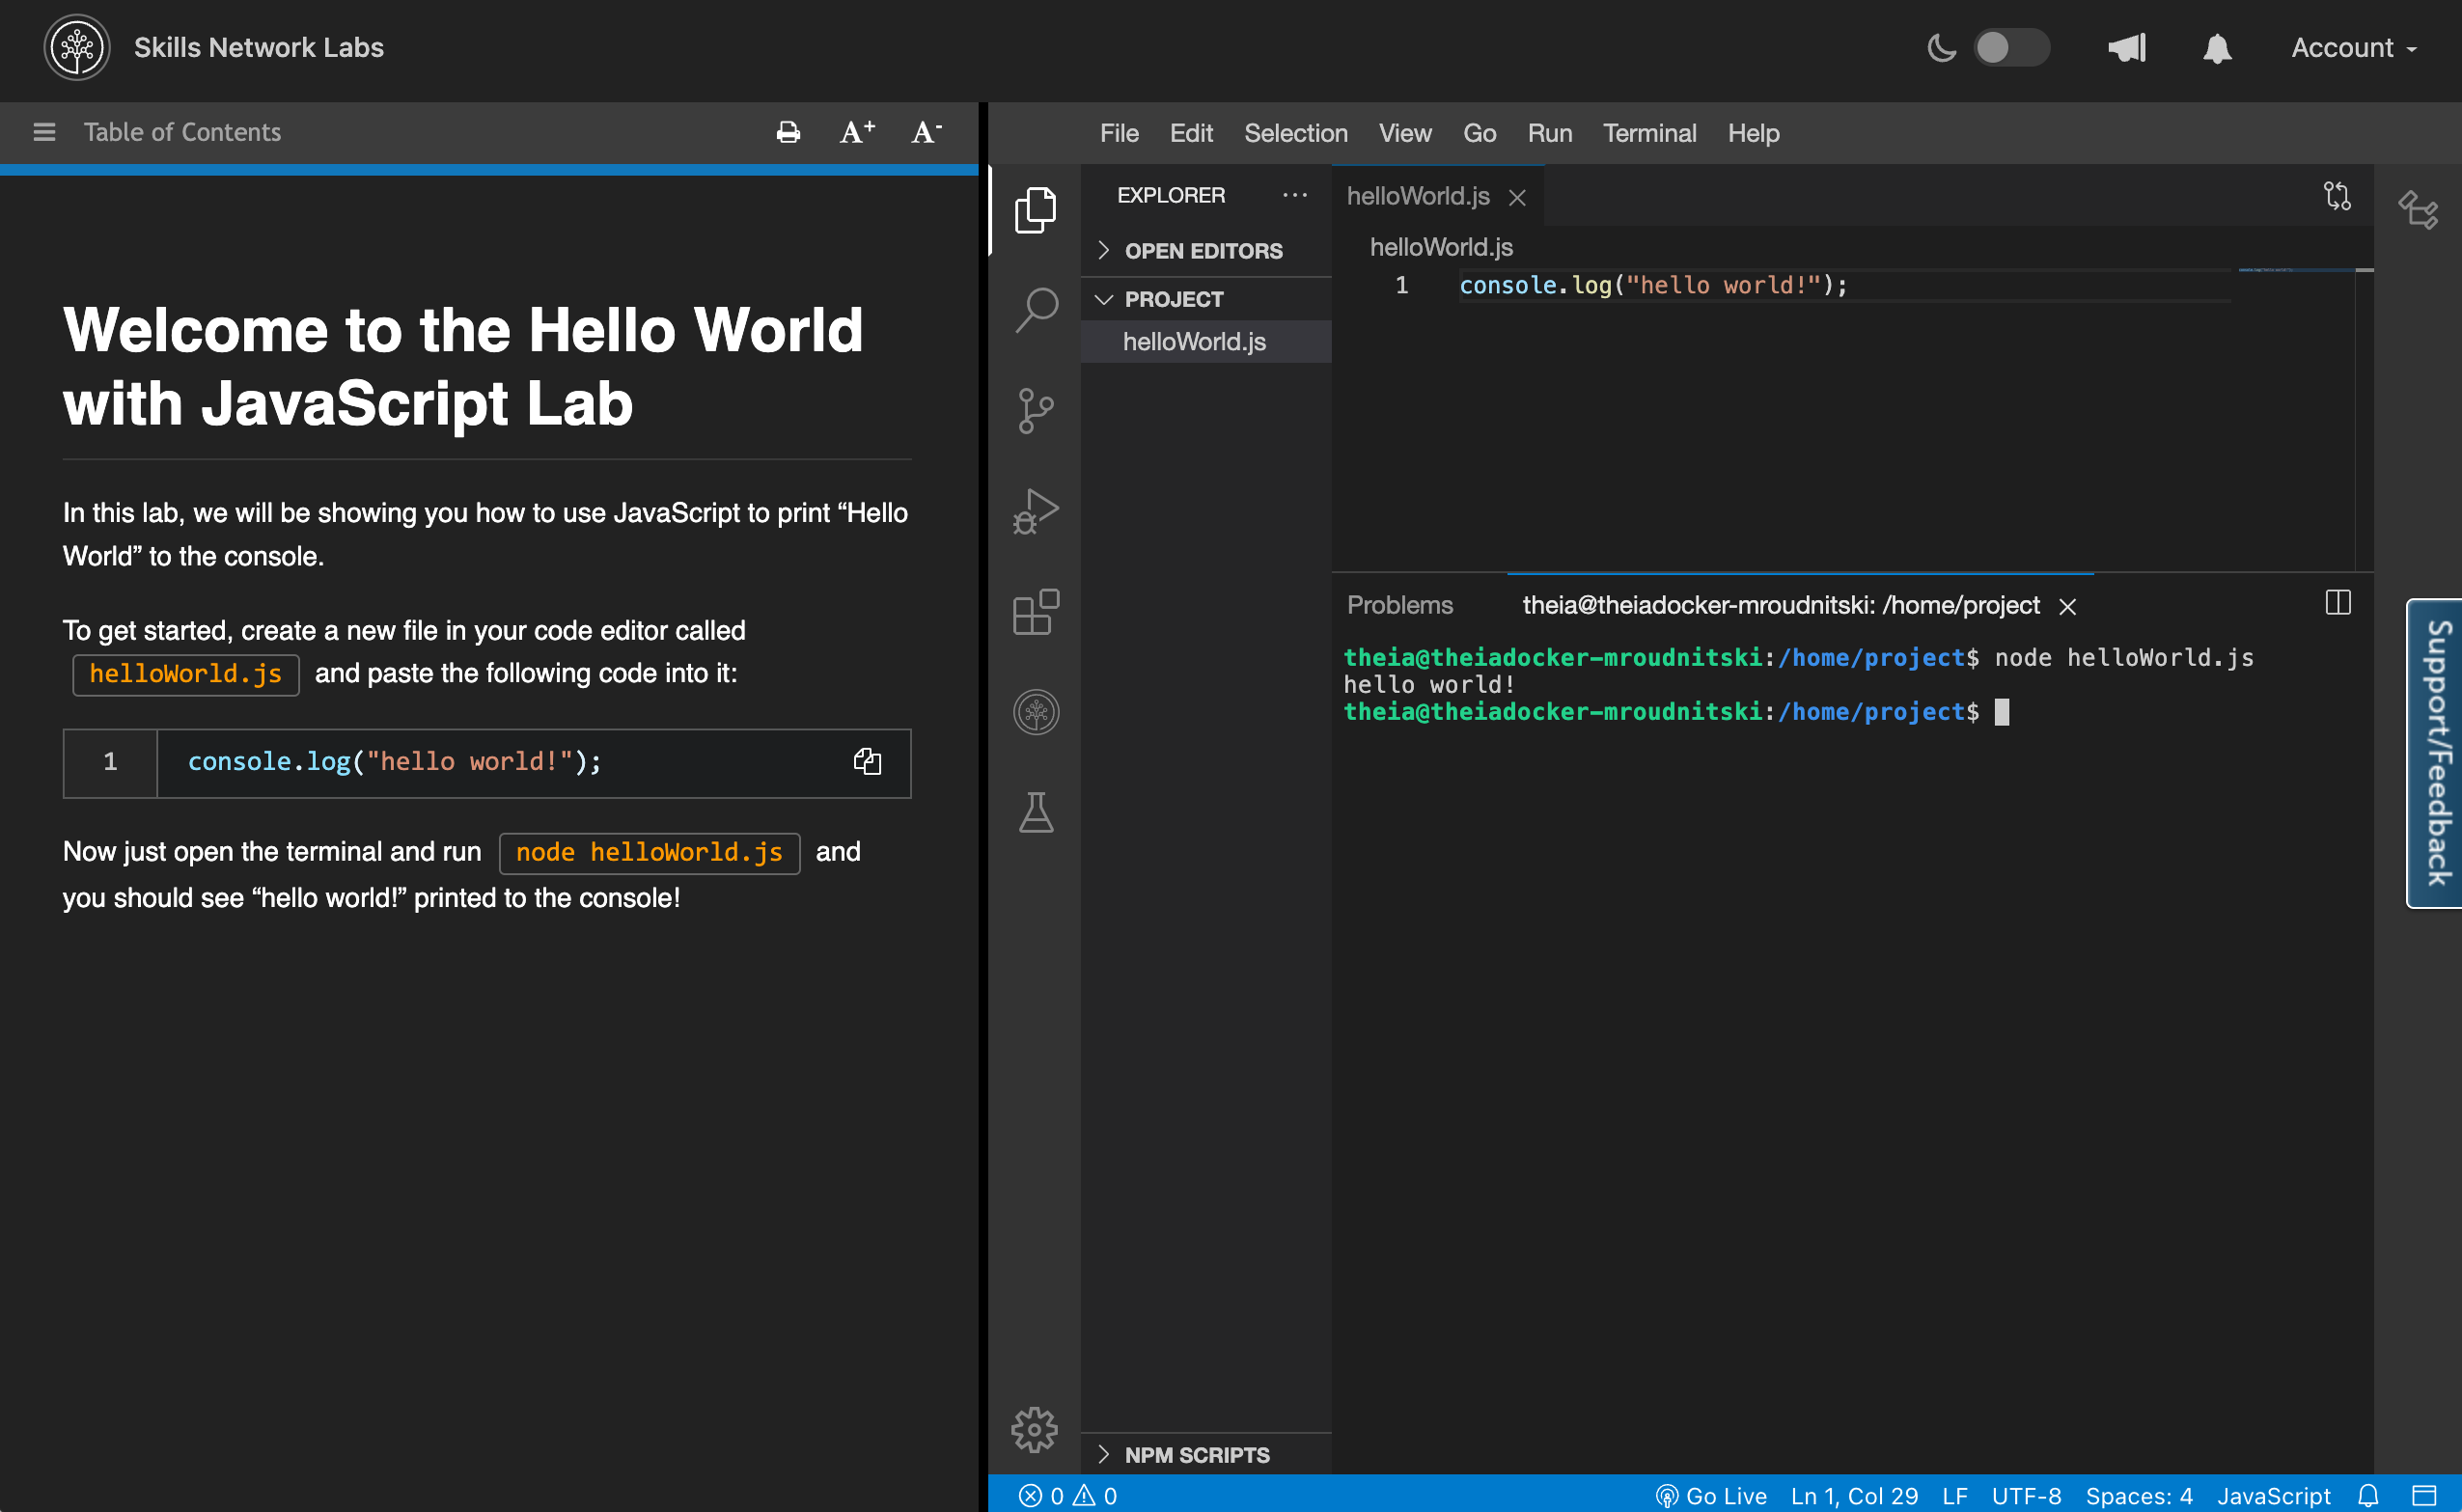
::page{title="Welcome to the Hello World with JavaScript Lab"}

In this lab, you will learn how to use JavaScript to print "Hello World" to the console.

To get started, create a new file in your code editor called ::openFile{path="helloWorld.js"}. Then, paste the following code into this file:

```javascript
console.log("hello world!");
```

Now just open the terminal and run the below command:

```
node helloWorld.js
```

You should see "hello world!" printed to the console!
You should see the preview updating on the right -- this is a live preview of how your instructions will look to your learners.
Now that we have some instructions, click "Save and Publish" in the top right corner of the screen to save your progress and finalize your changes.
Alternatively, if you just want to save your progress, you can click "Save" in the top right corner. This will save your progress but not publish it. This is very useful if your lab is part of a live course and used by learners, allowing you to save changes without affecting the live lab.
That's it! We've created our first lab and it should be ready to be used in our course or guided project.
Testing your lab
Before we add our lab to our course outline, it's a great idea to test it from a learner's perspective. Author IDE makes it easy to test your lab after each change you make. After clicking Save, simply find the Test button just to the left of the Save button and click it.
You don't need to be in the editor to test your lab. You can also test it from back in the Labs tab of your course or guided project. Simply click the "Test" button next to the "Edit" button on the lab.
Once we click Test, we should see the Cloud IDE environment open up. This is the same environment that your learners will use when they complete your lab. Try following the instructions and see if you can complete the lab!
Adding your lab to your course
You can skip this step if you're creating a lab as part of a Guided Project. Guided Projects use a "Simple" outline by default -- this means we take care of this step for you!
If the lab we just created is part of a course, our final step should be to add it to the course outline. Like any other course resource, a lab must be inserted into the course outline for learners to access it. Back in the "Labs" tab of your course, you should see the lab. Click "Embed" on the lab and you'll see detailed instructions on how to add the lab to your course outline.