Coursera
Once you have created a lab, you then need to add it to your course via Coursera. When you are adding a lab to your course, you embed your lab into a unit of your course. This way, learners will naturally progress through the course, and complete your labs as they go.
Add an Instructional Lab to your Course
This section is only for instructional labs. If you wish to add a different lab type to your course, see the Add a (Non-Instructional) Lab to your Course section below.
As a Skills Network author, you can create "instructional labs". These are labs that include step by step instructions for working with tools external to Skills Network Labs, such as services on IBM Cloud.
HTML files will be automatically generated from instructional labs so they can be easliy embedded or linked to from your course. To embed an instructional lab in your course, follow the steps below.
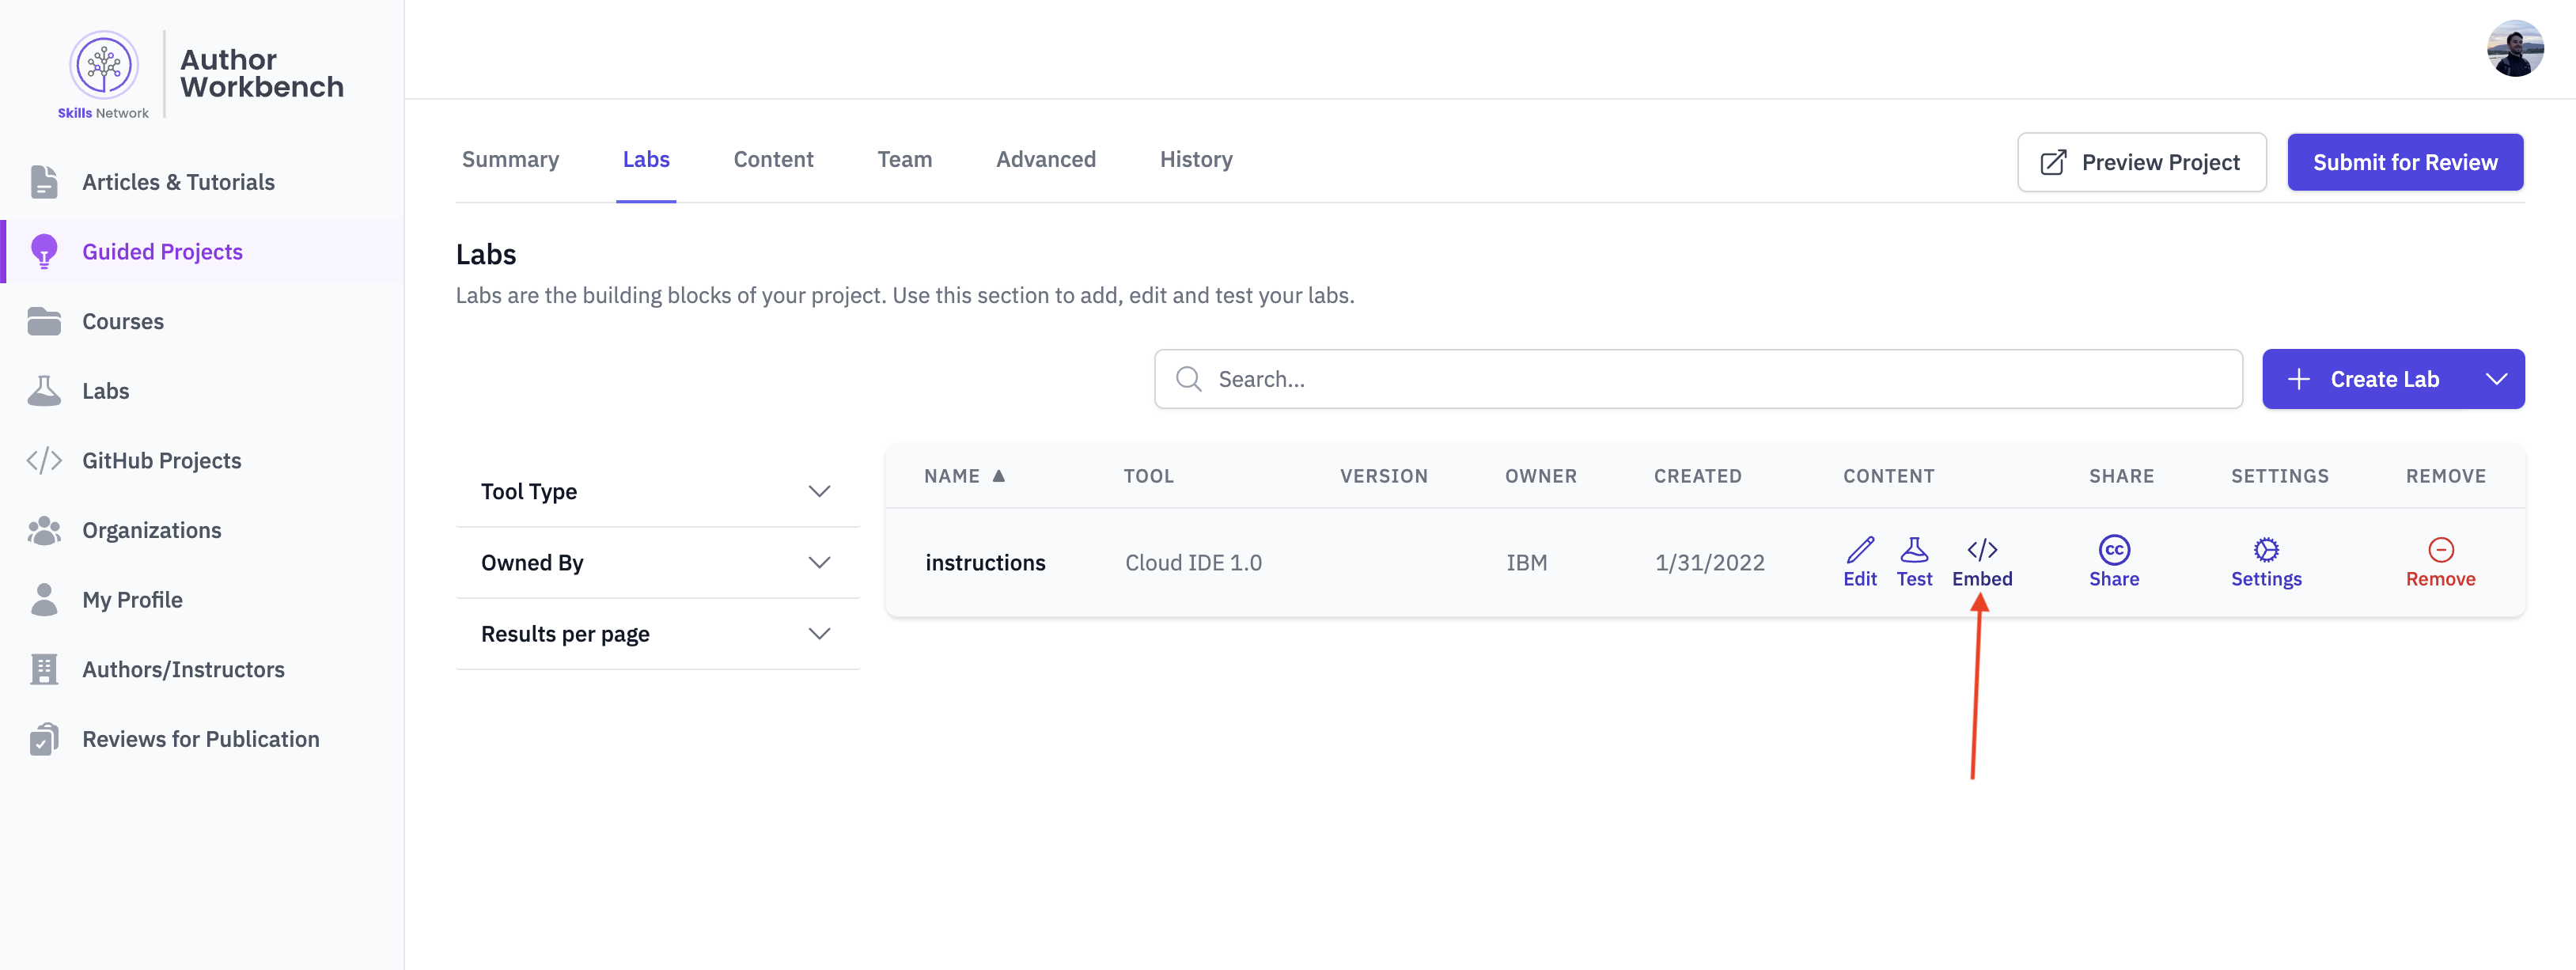
- On your course page, navigate to the lab you want (under the
Labstab) and click "Embed"
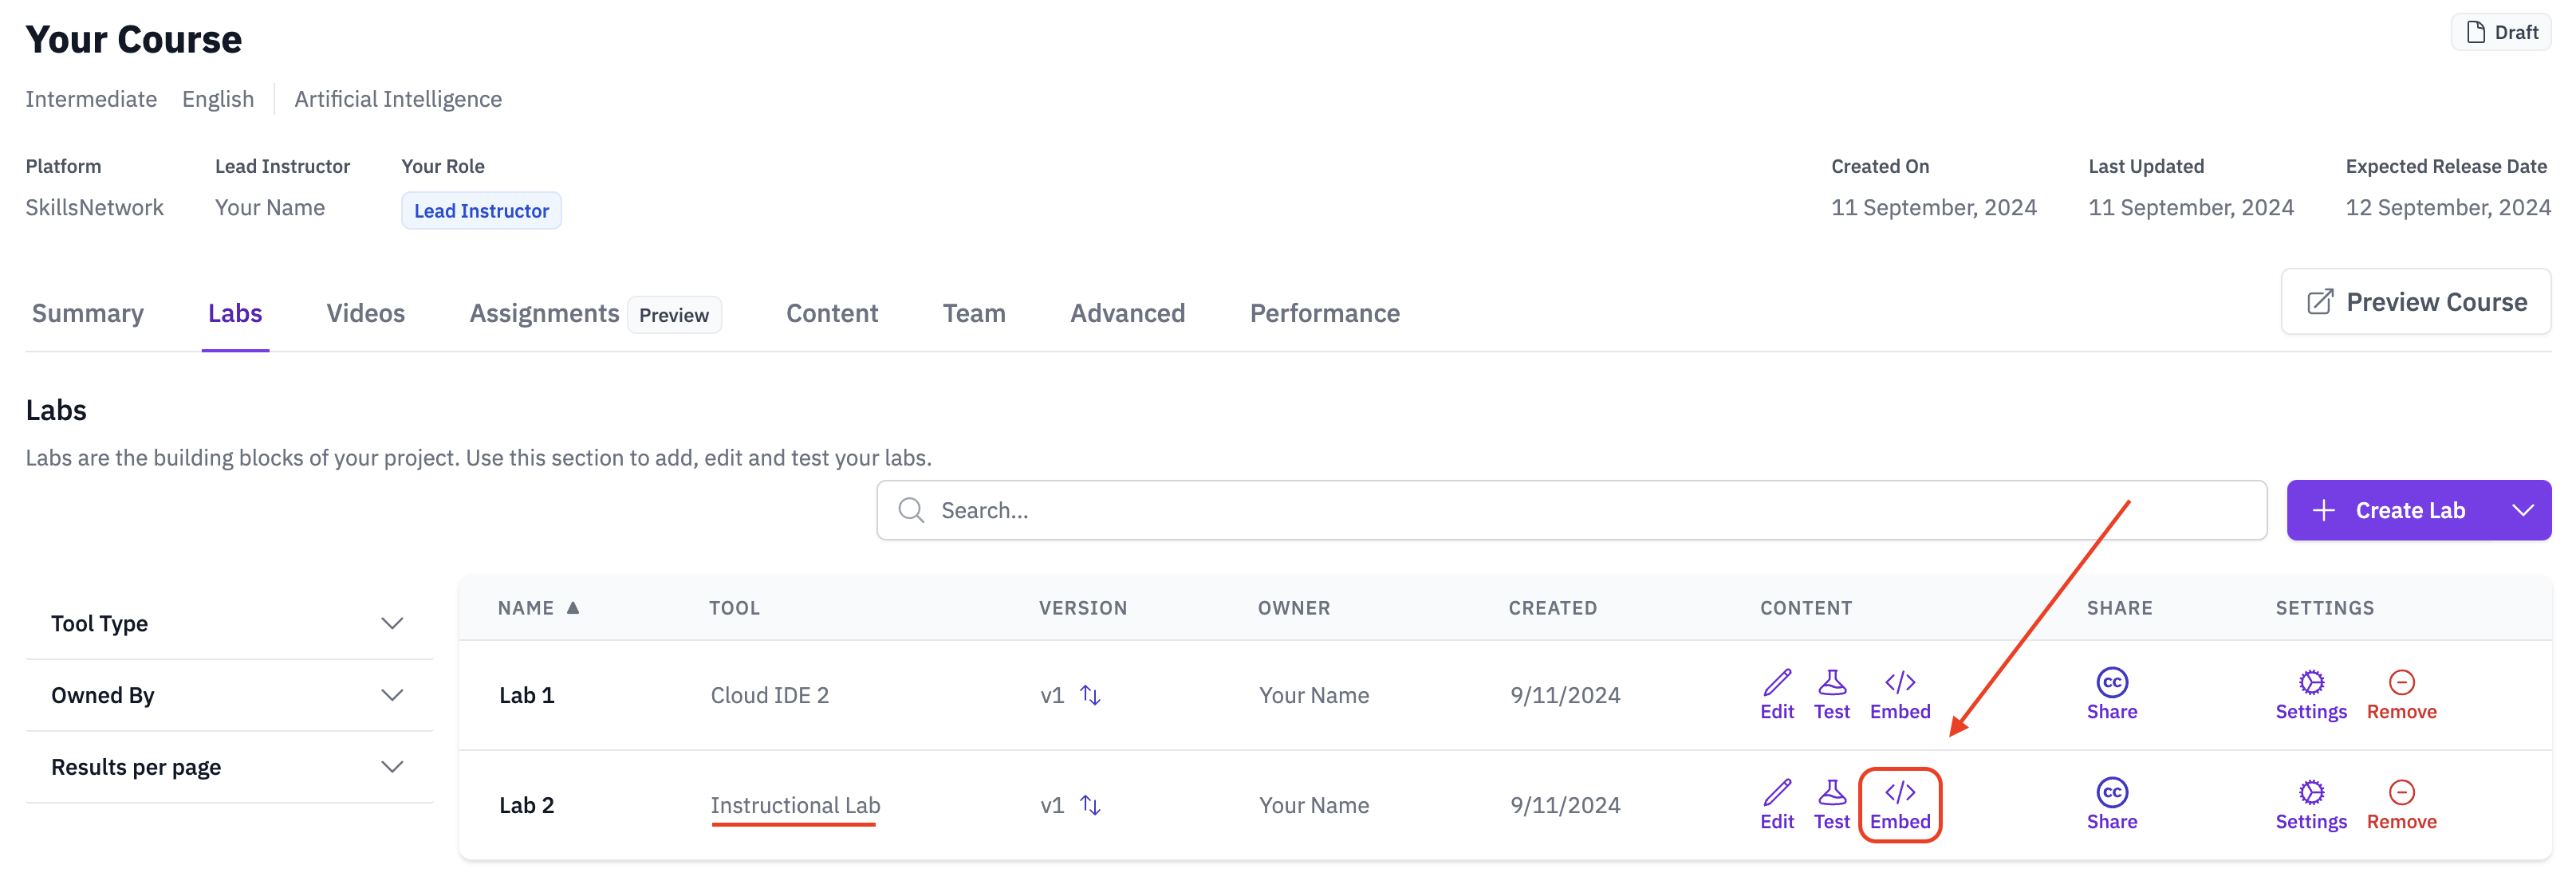
- Copy the JSON configuration provided
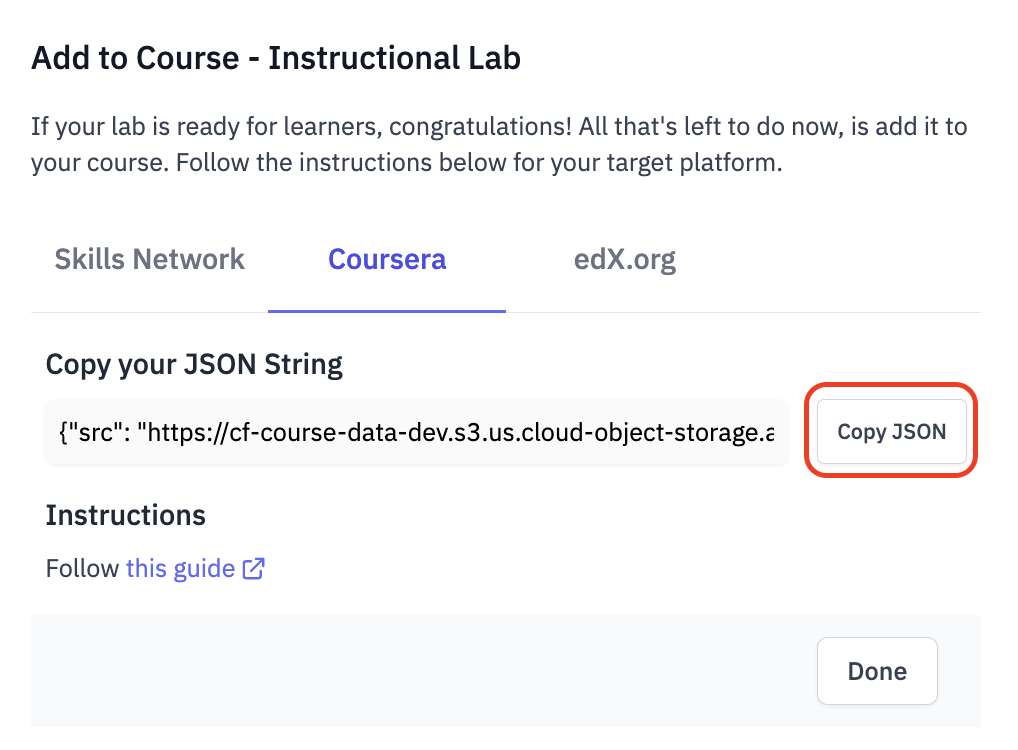
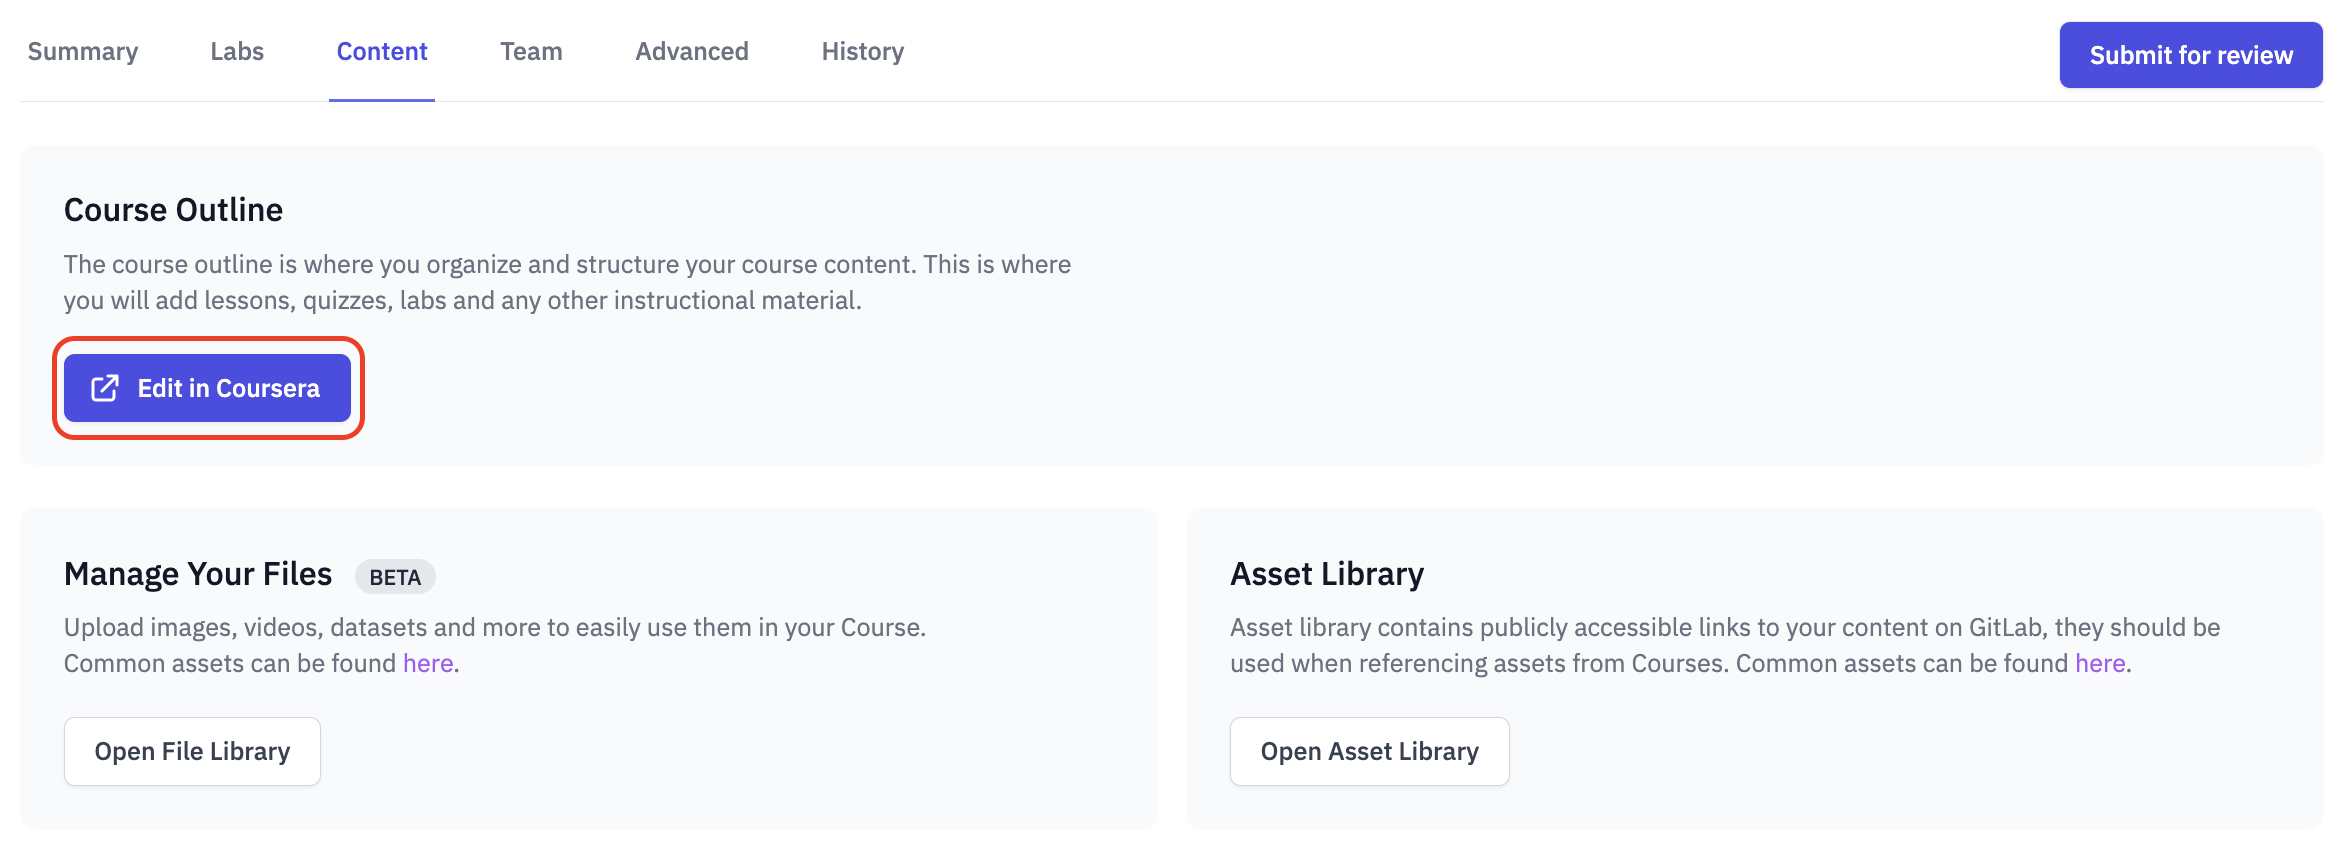
- Close the pop-up and navigate to your Course Outline in the
Contenttab on your course page. Press the "Edit in Coursera" button to open the outline in Coursera
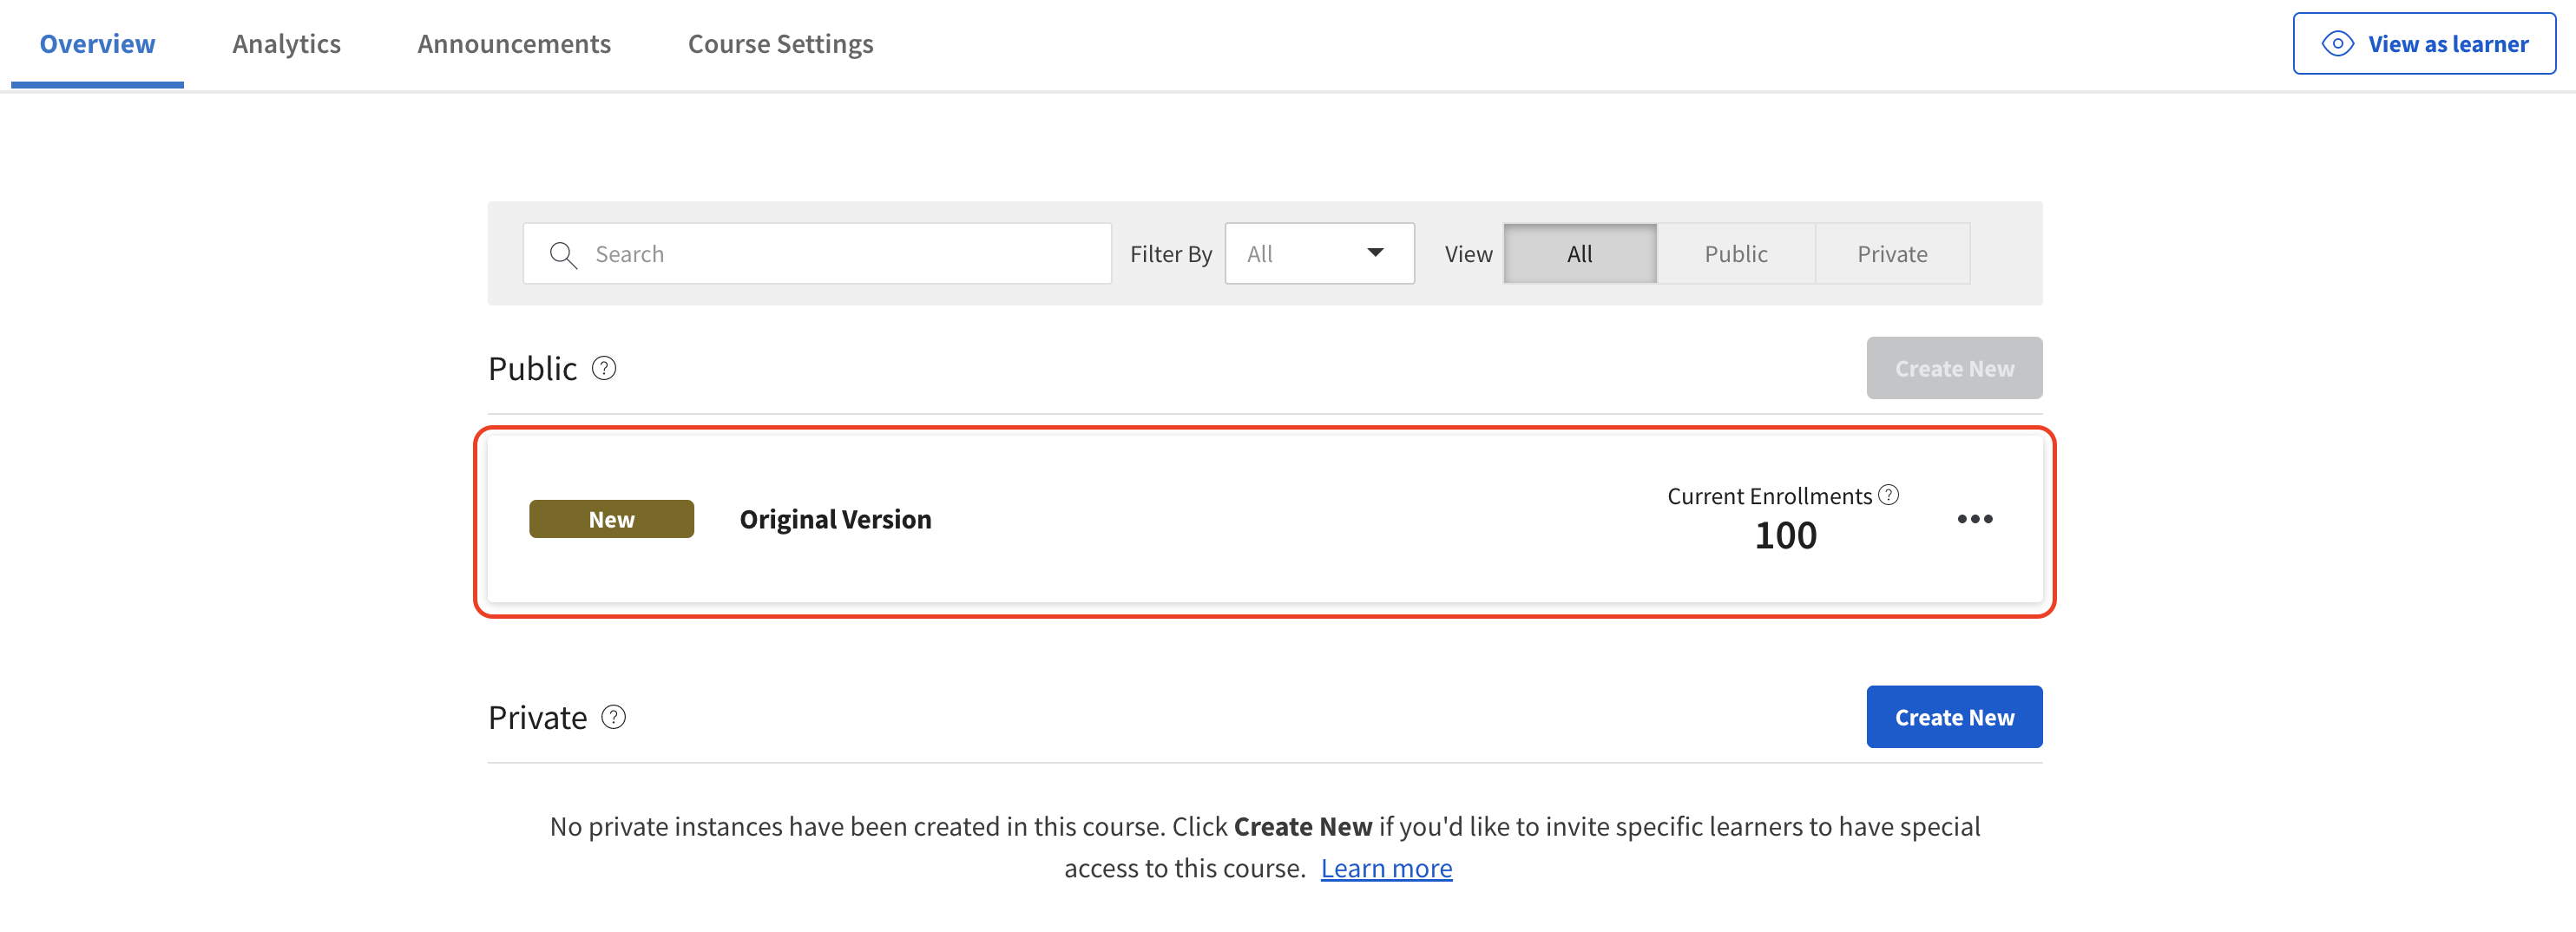
- Select the version of the course you want to add your instructional lab to
- Navigate to the week and unit you wish to add your instructional lab in, and insert an ungraded plugin
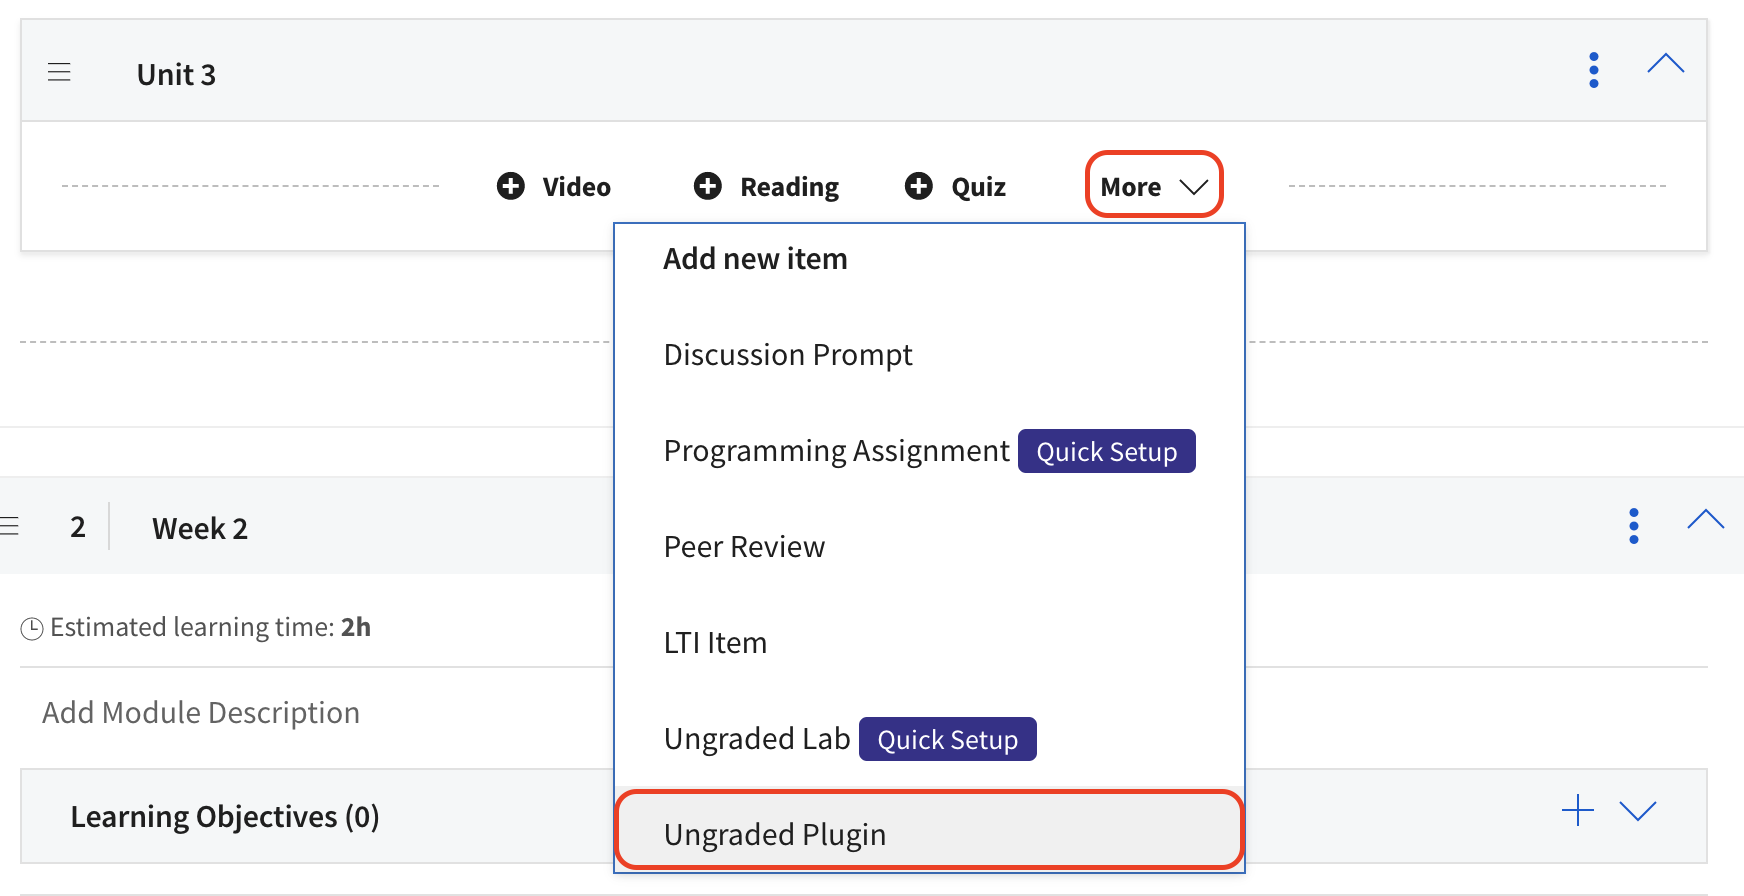
-
After naming your plugin as desired, click on the item to edit it
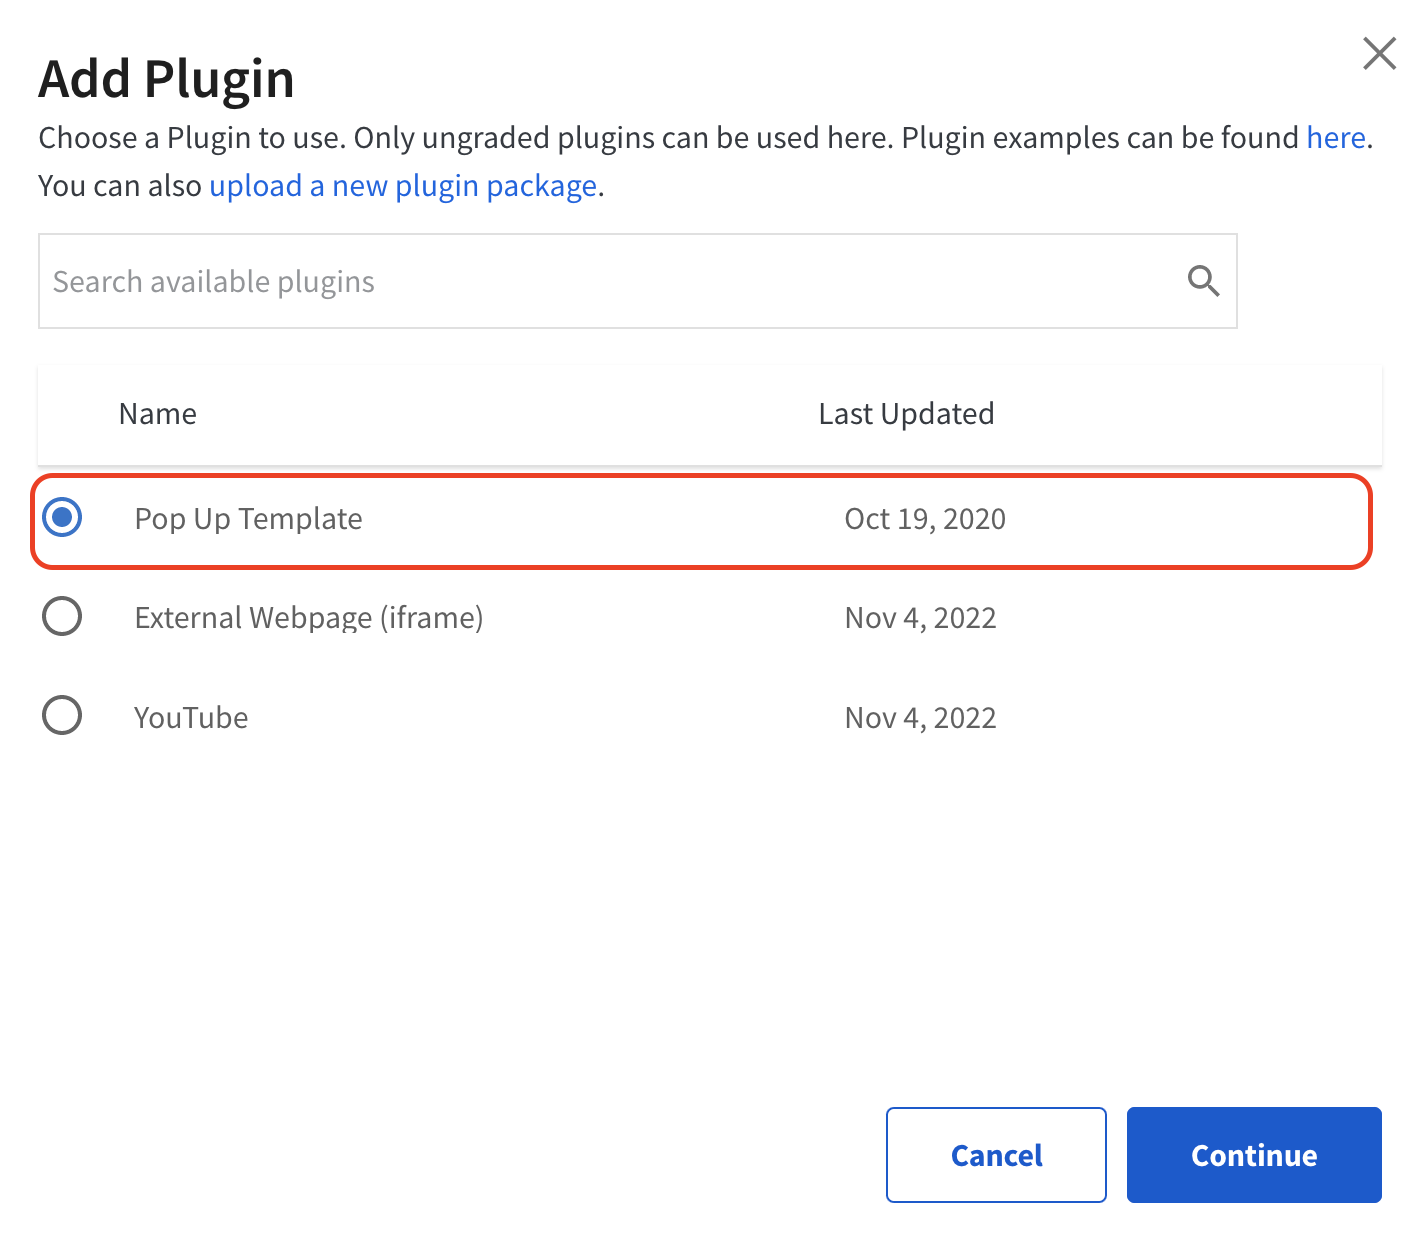
-
Click on the "Choose Plugin" button and select "Pop Up Template"

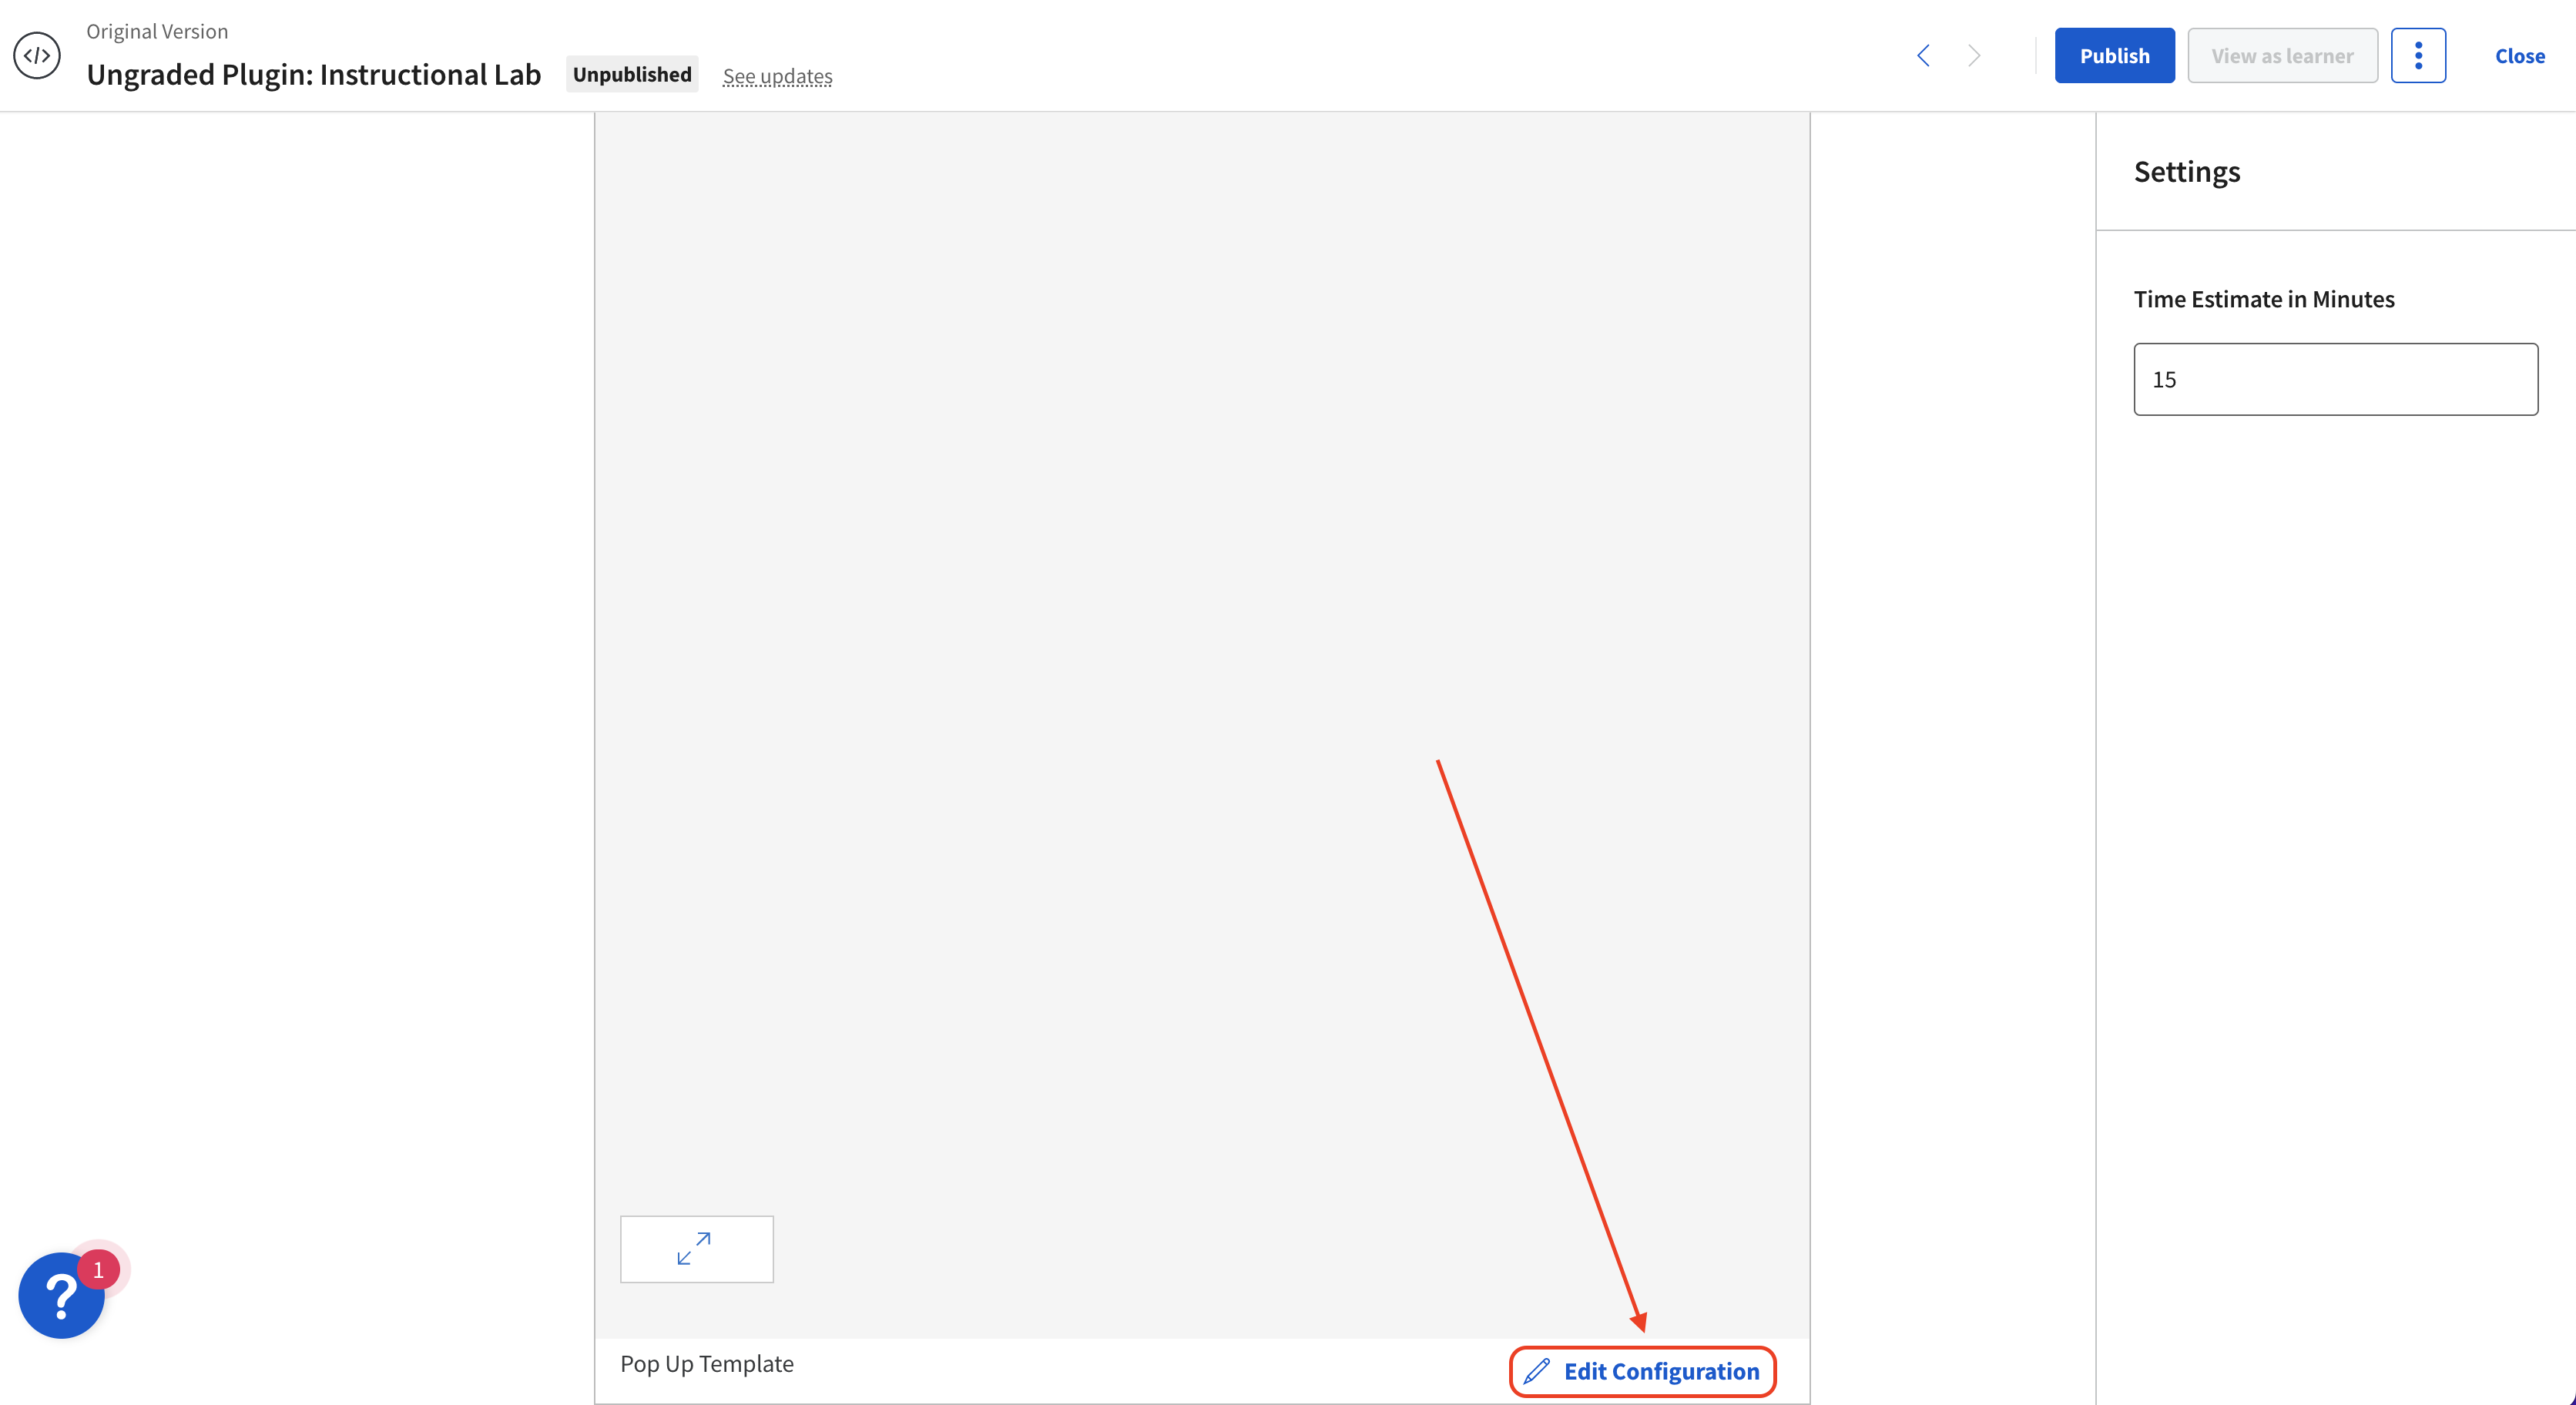
- After pressing "Continue", scroll down to the bottom of the page and select "Edit Configuration"
- Replace all existing content with the JSON you copied in step 2 and click "Save Configuration"
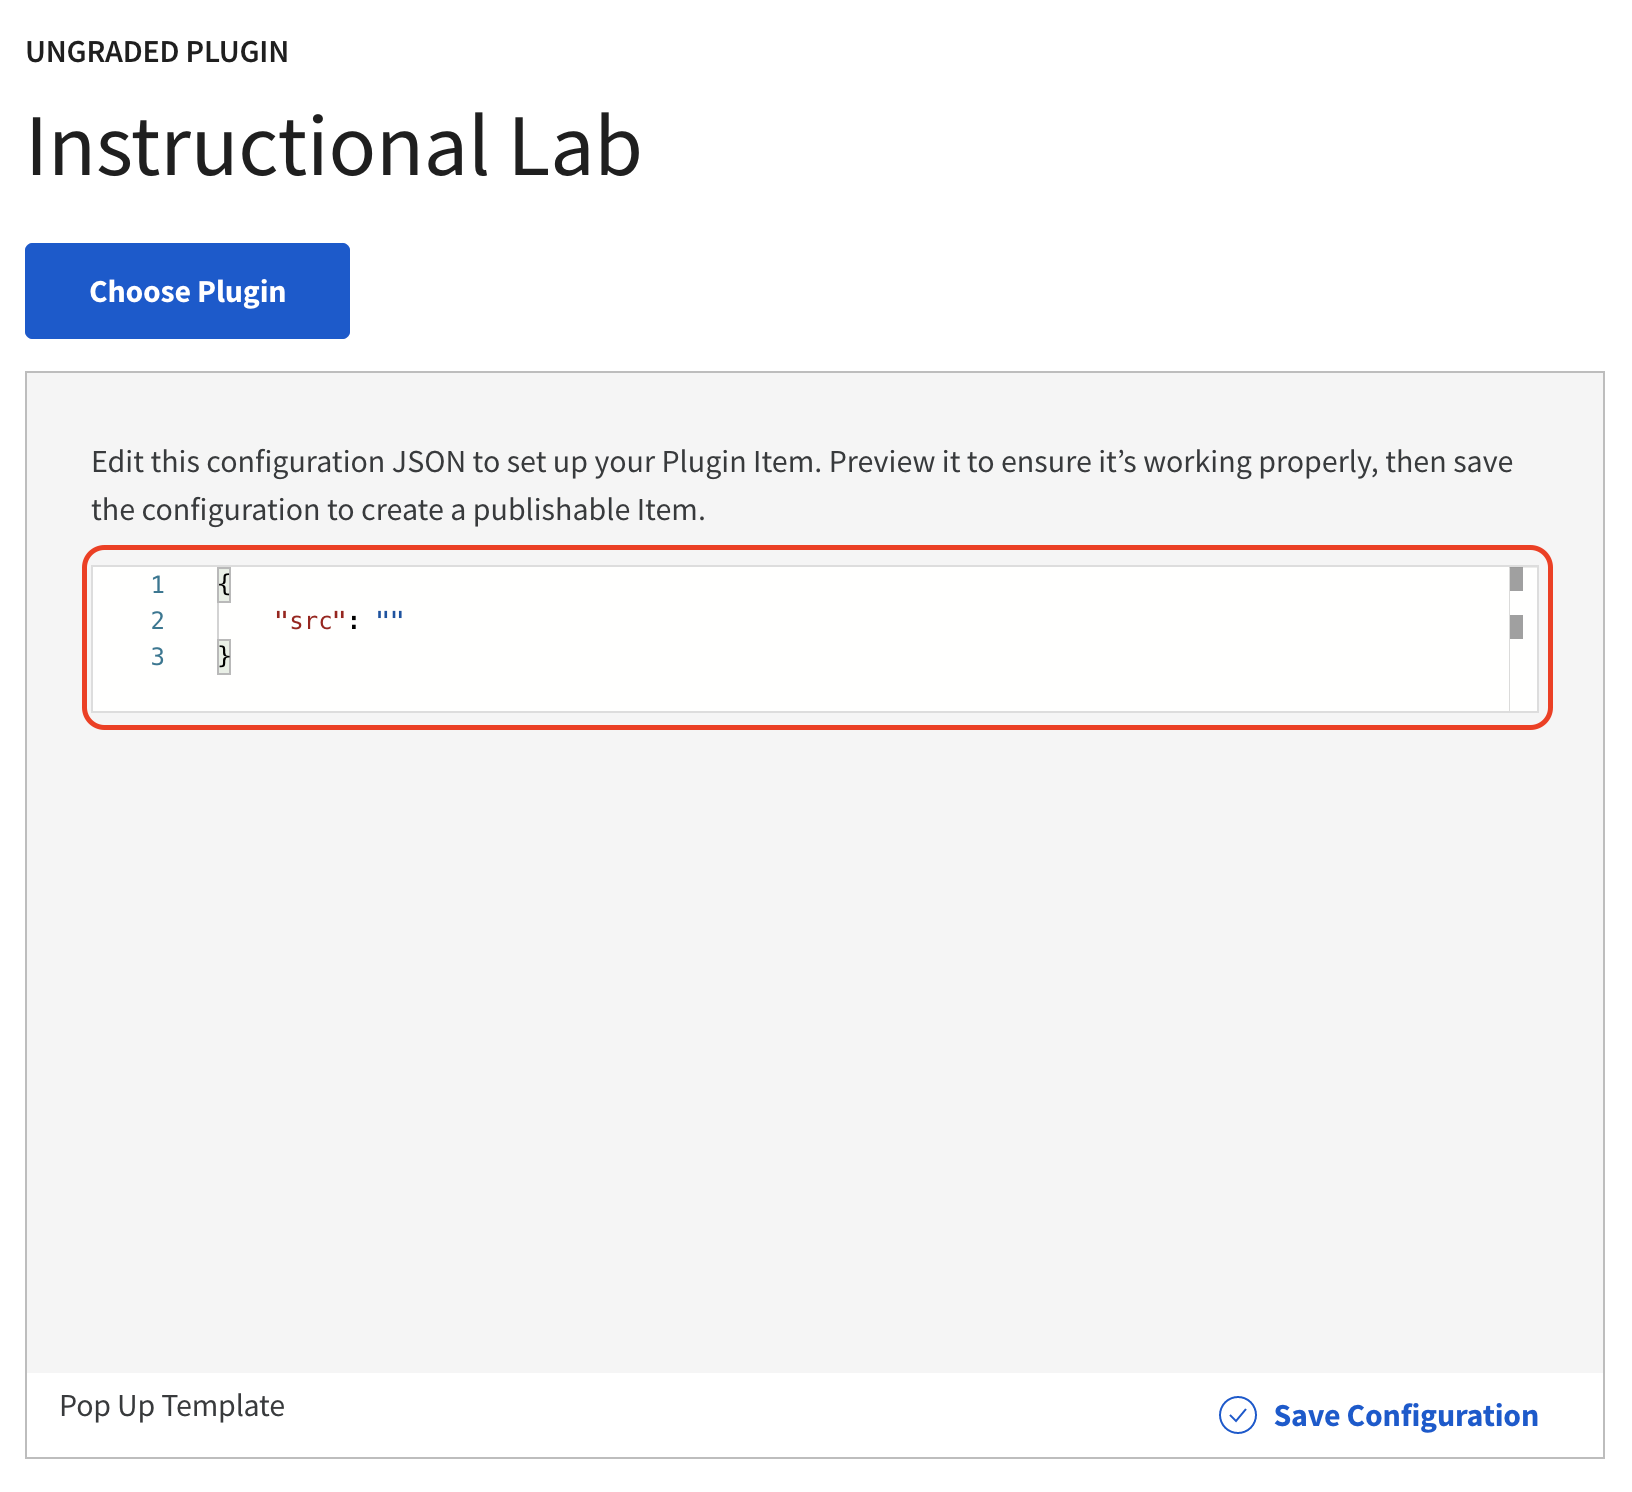
- Now, your instructional lab should appear in the plugin. You can now publish your changes, or view your instructional lab as a learner.

Add a (Non-Instructional) Lab to your Course
This section is only applicable for any lab type other than an instructional lab. If you wish to add an instructional lab to your course, see the Add an Instructional Lab to your Course section.
To add a (non-instructional) lab to your course in Coursera:
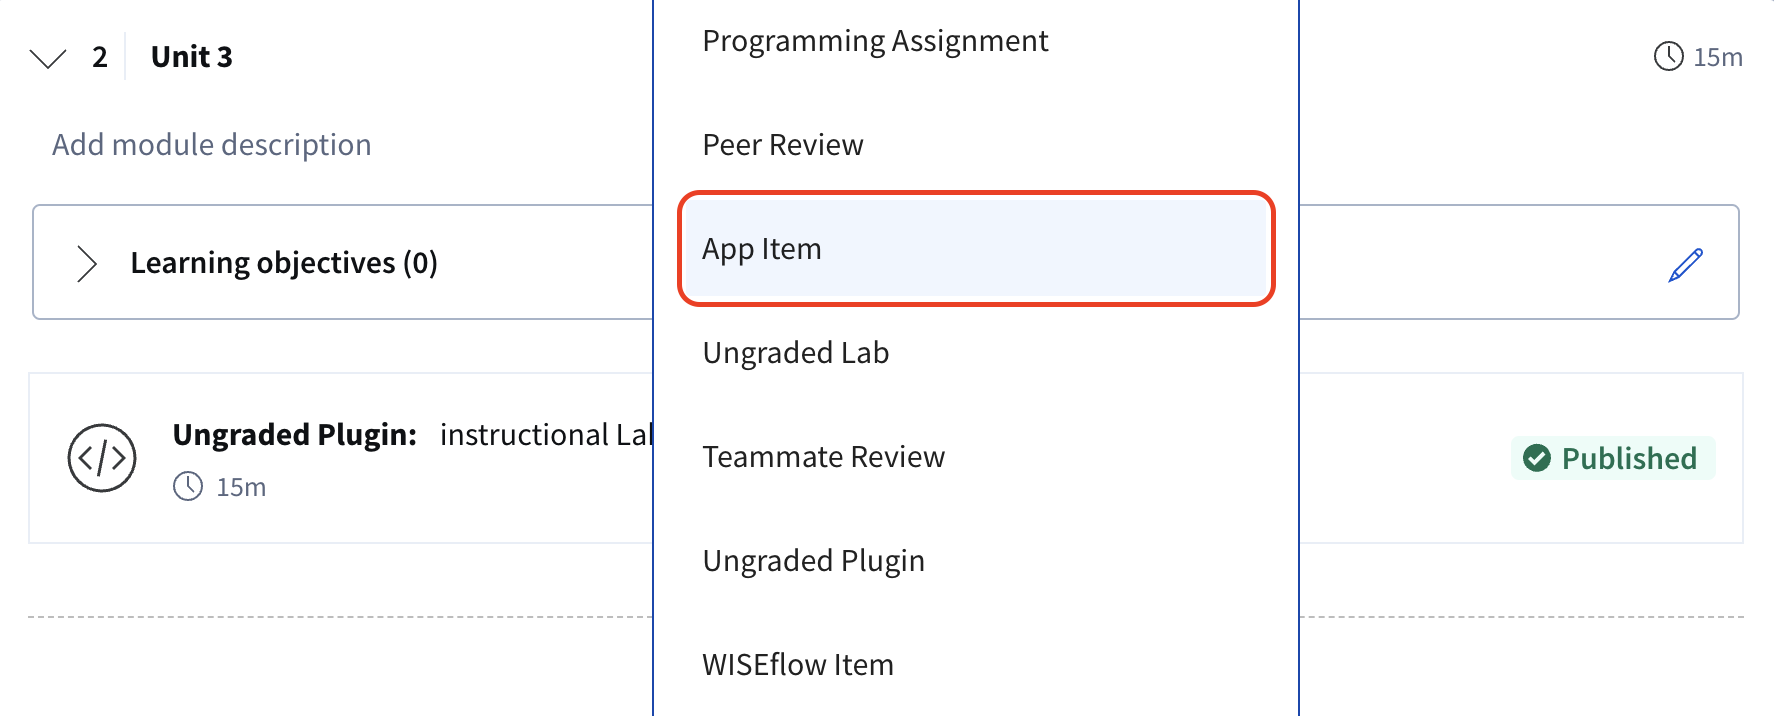
- In Coursera, go to the week and unit you want your lab to be in and add a new App Item.
- Add the following values to the corresponding fields within the App Item
| Launch URL | See the Lab Launch Url section below. |
| Consumer Key | See the LTI Credentials section below. |
| Secret | See the LTI Credentials section below. |
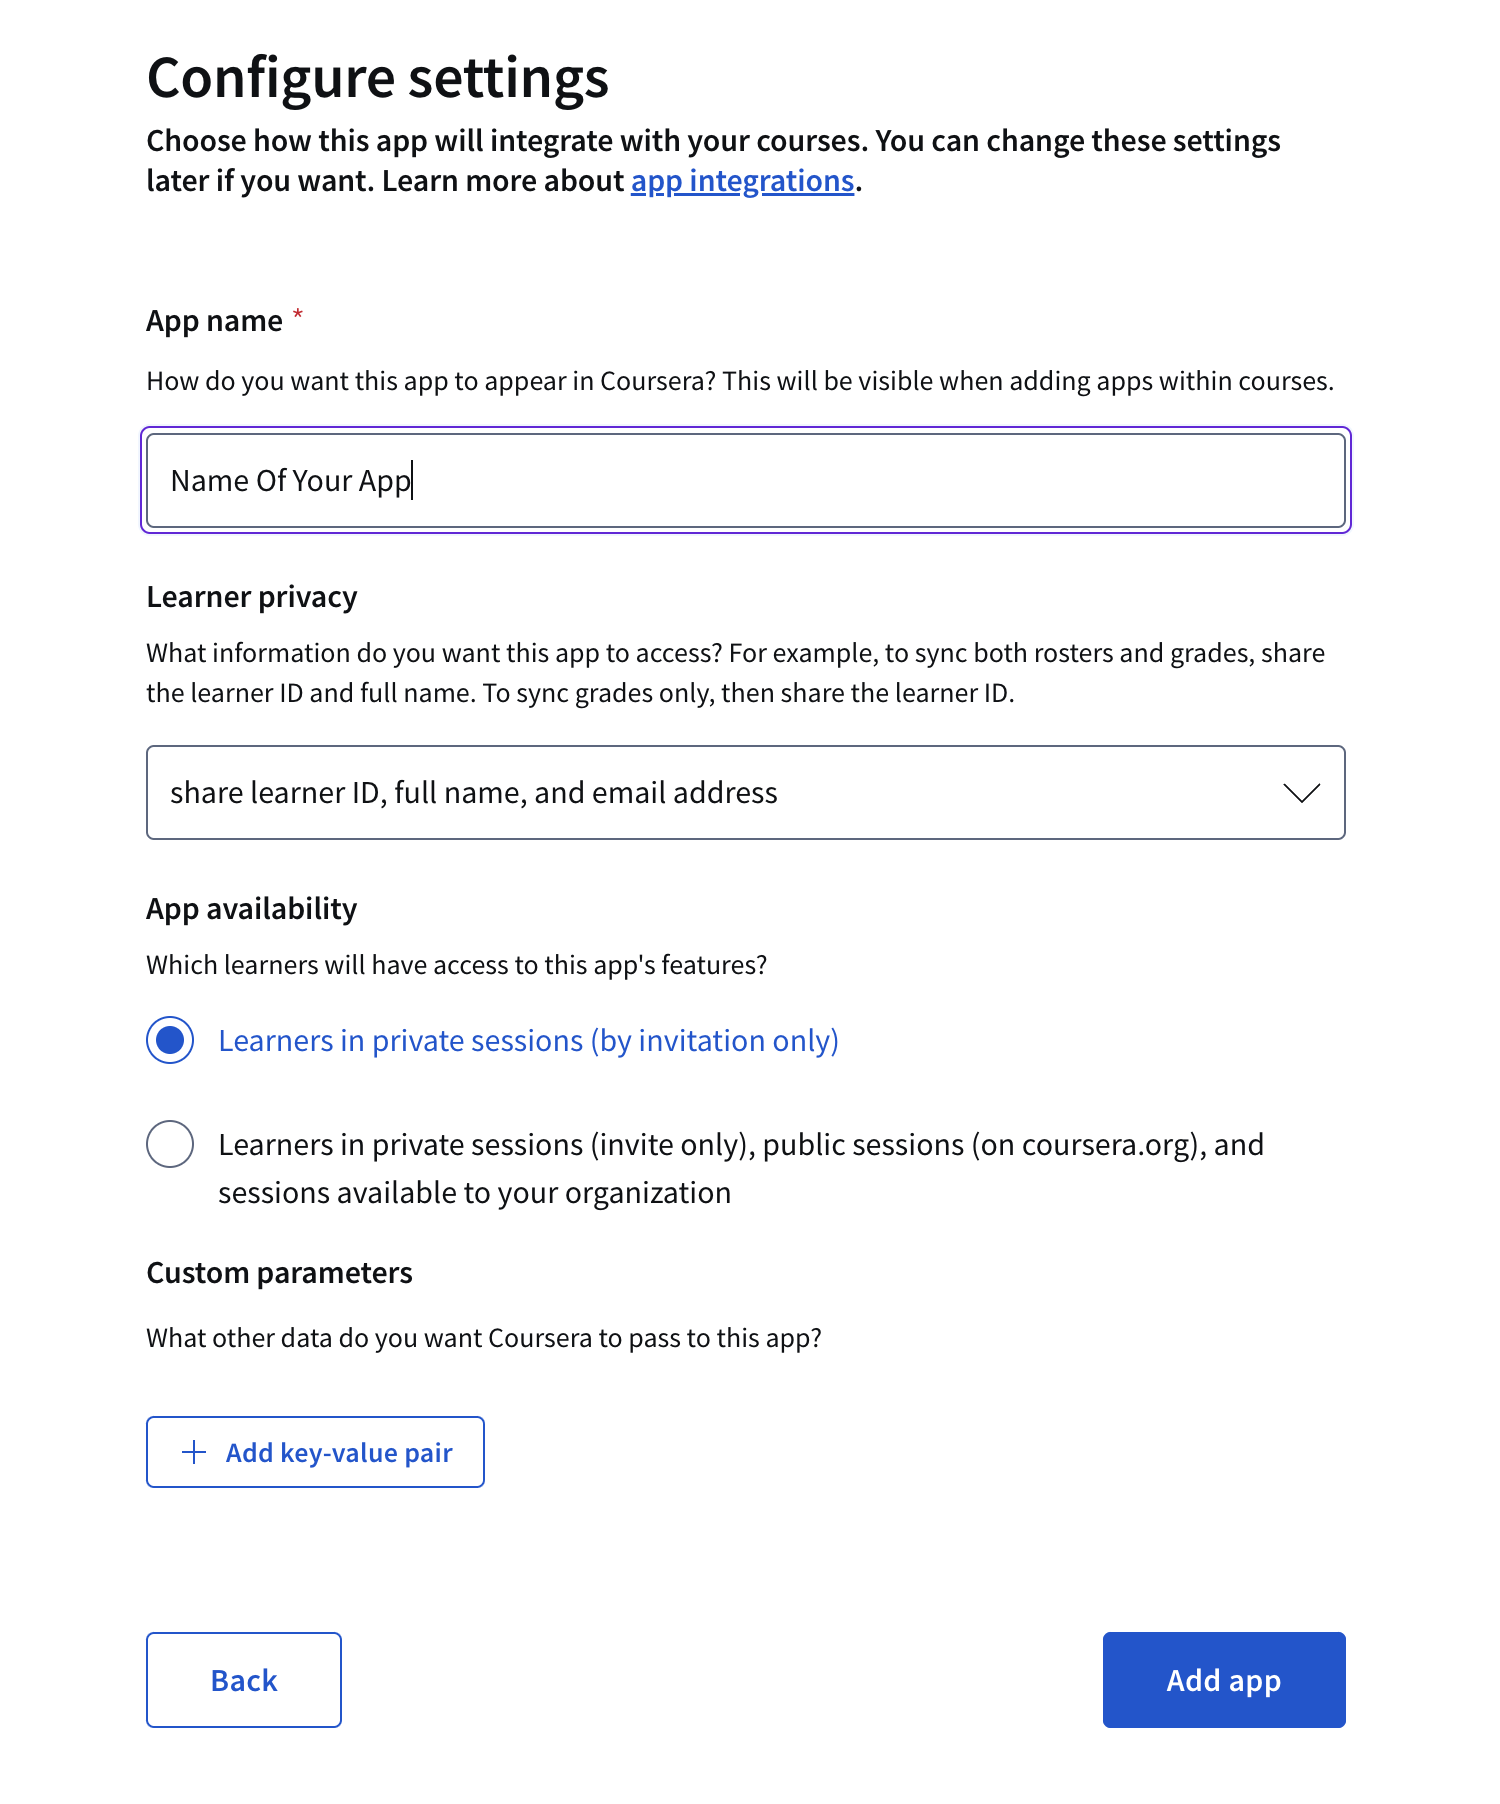
| Learner Privacy | Share learner ID, full name, and email address |
Lab Launch Url
The Lab Launch url can be easily found in Author Workbench on your course page. Just follow these steps:
- On your course page, navigate to the lab you want (under the
Labstab) and click "Embed"
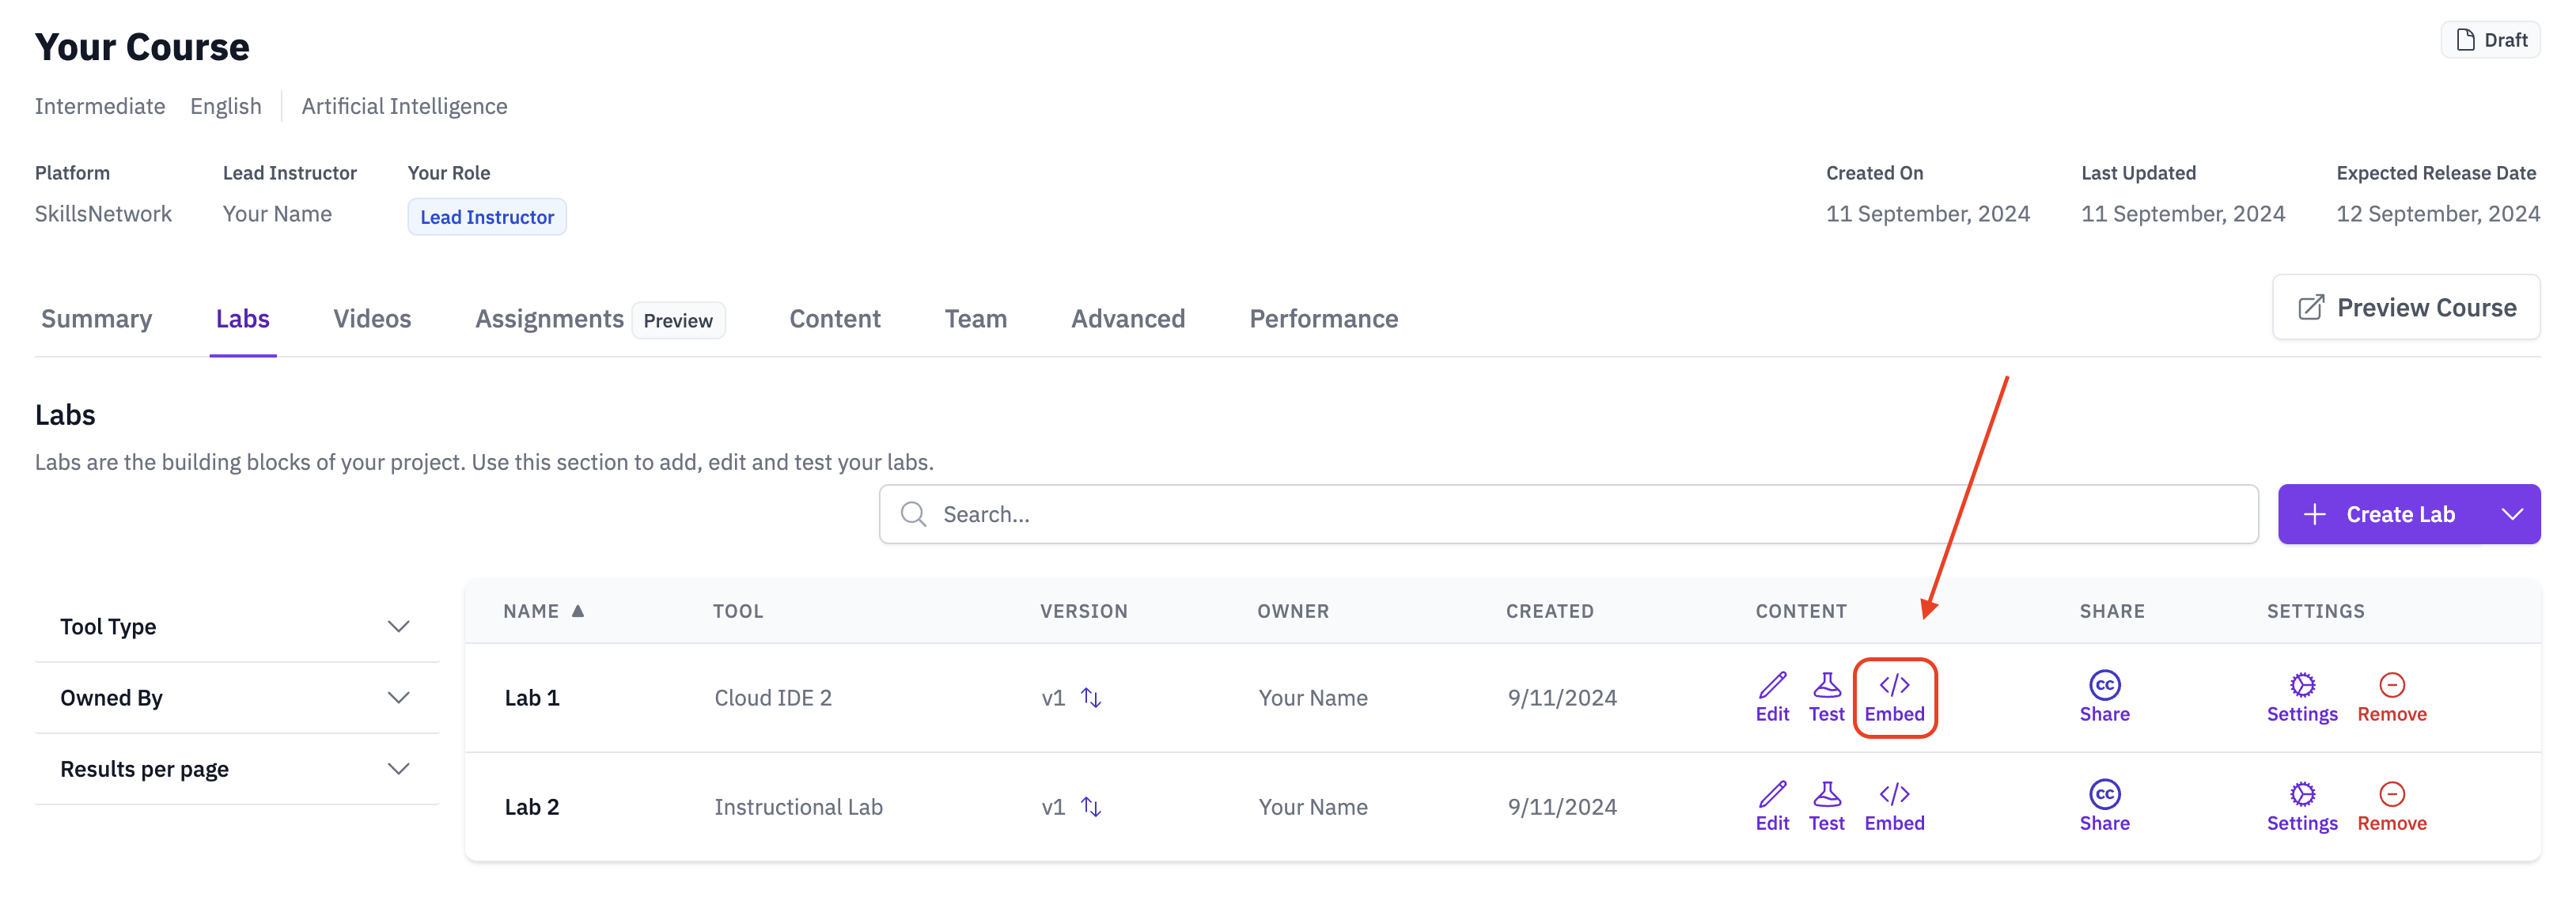
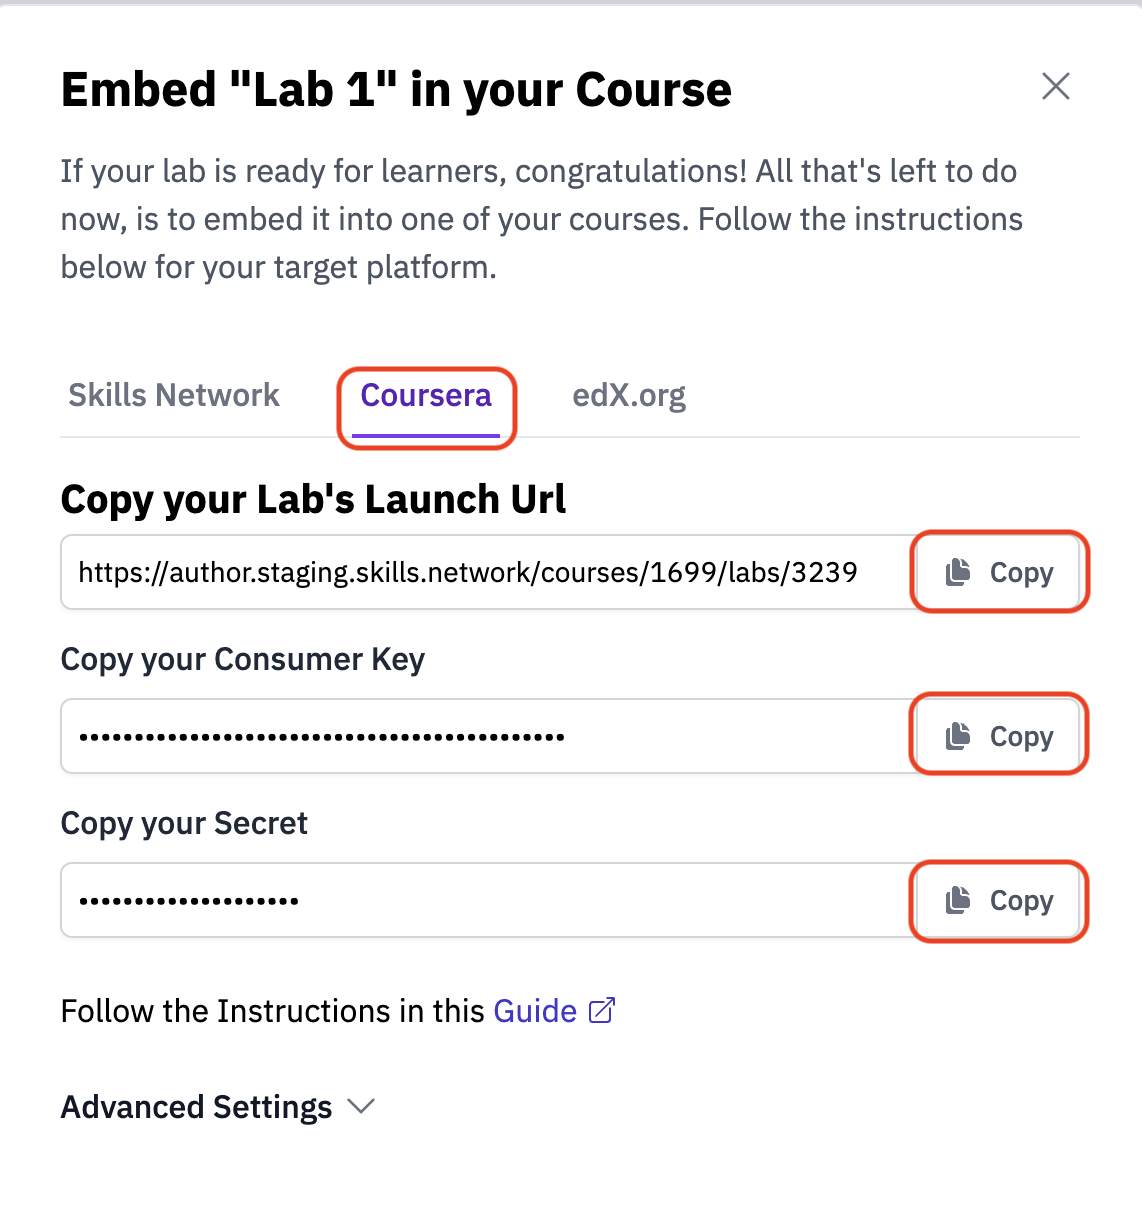
- Copy the the Lab's Launchg Url by clicking on the
Copybutton.
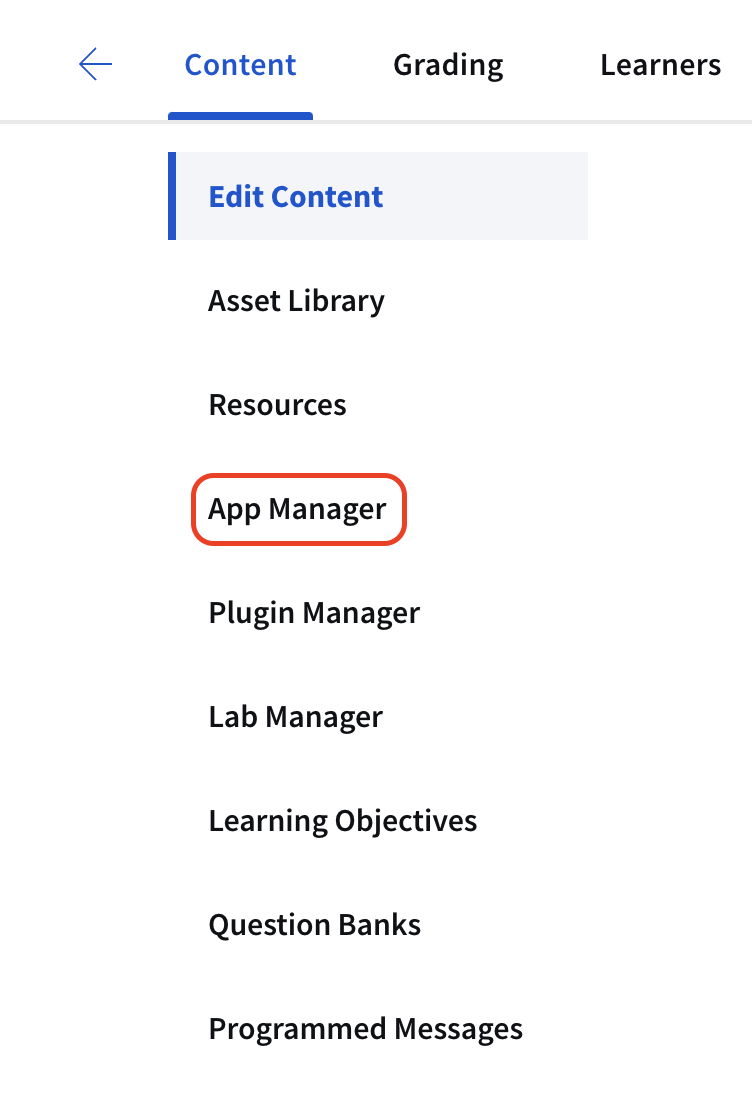
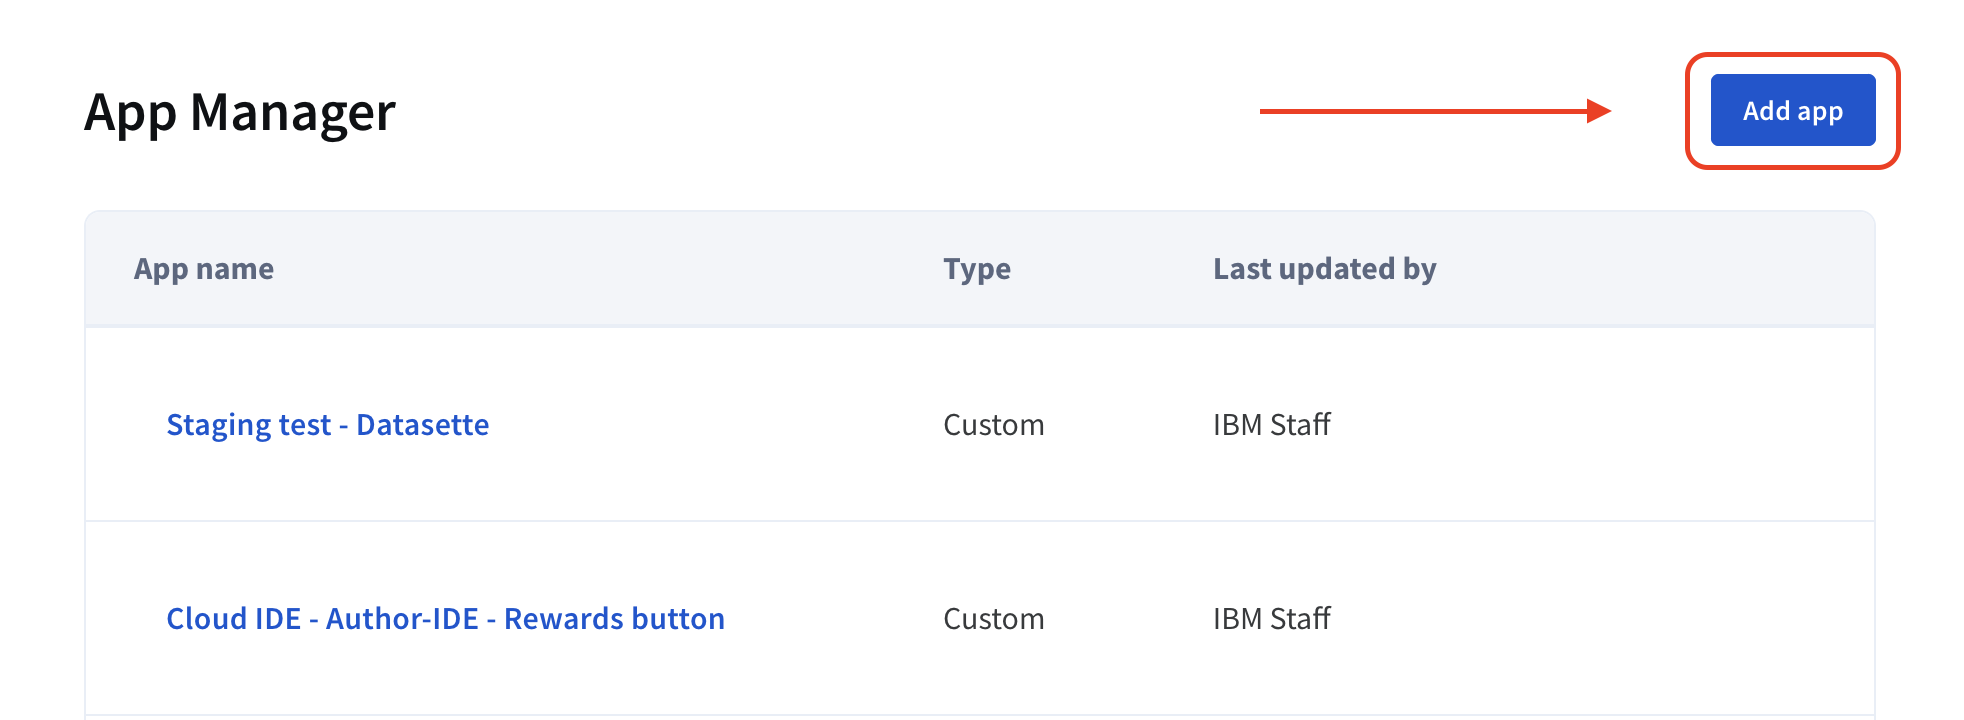
- Now, go back to Coursera and click on
App Manageron the left side of your screen to create a new app name and configuration.
- Click on
Add app
- Now, select
LTI 1.1and enter the Coursera credentials you copied earlier from the Author Workbench.
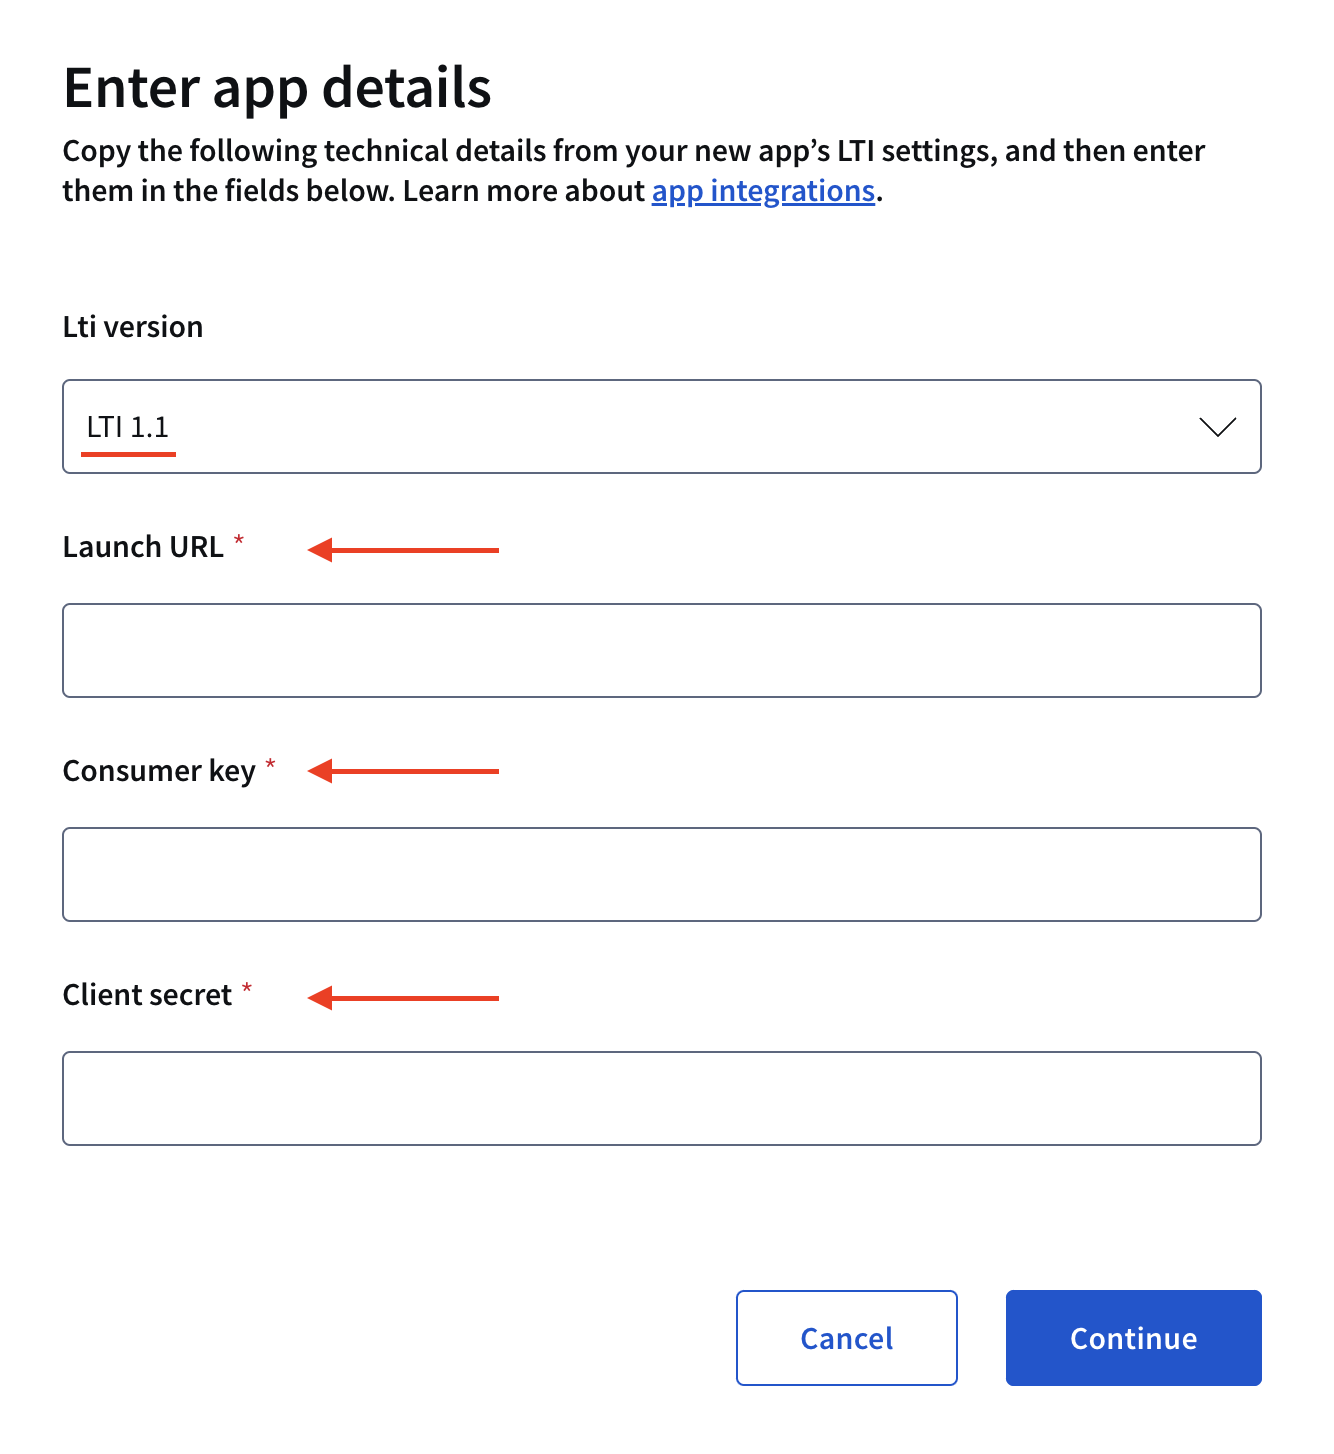
- After clicking Continue, name your app and set your learner privacy preferences. Then select
Add App.
- You can return to your 'App Item,' publish your newly created lab, and then launch it.
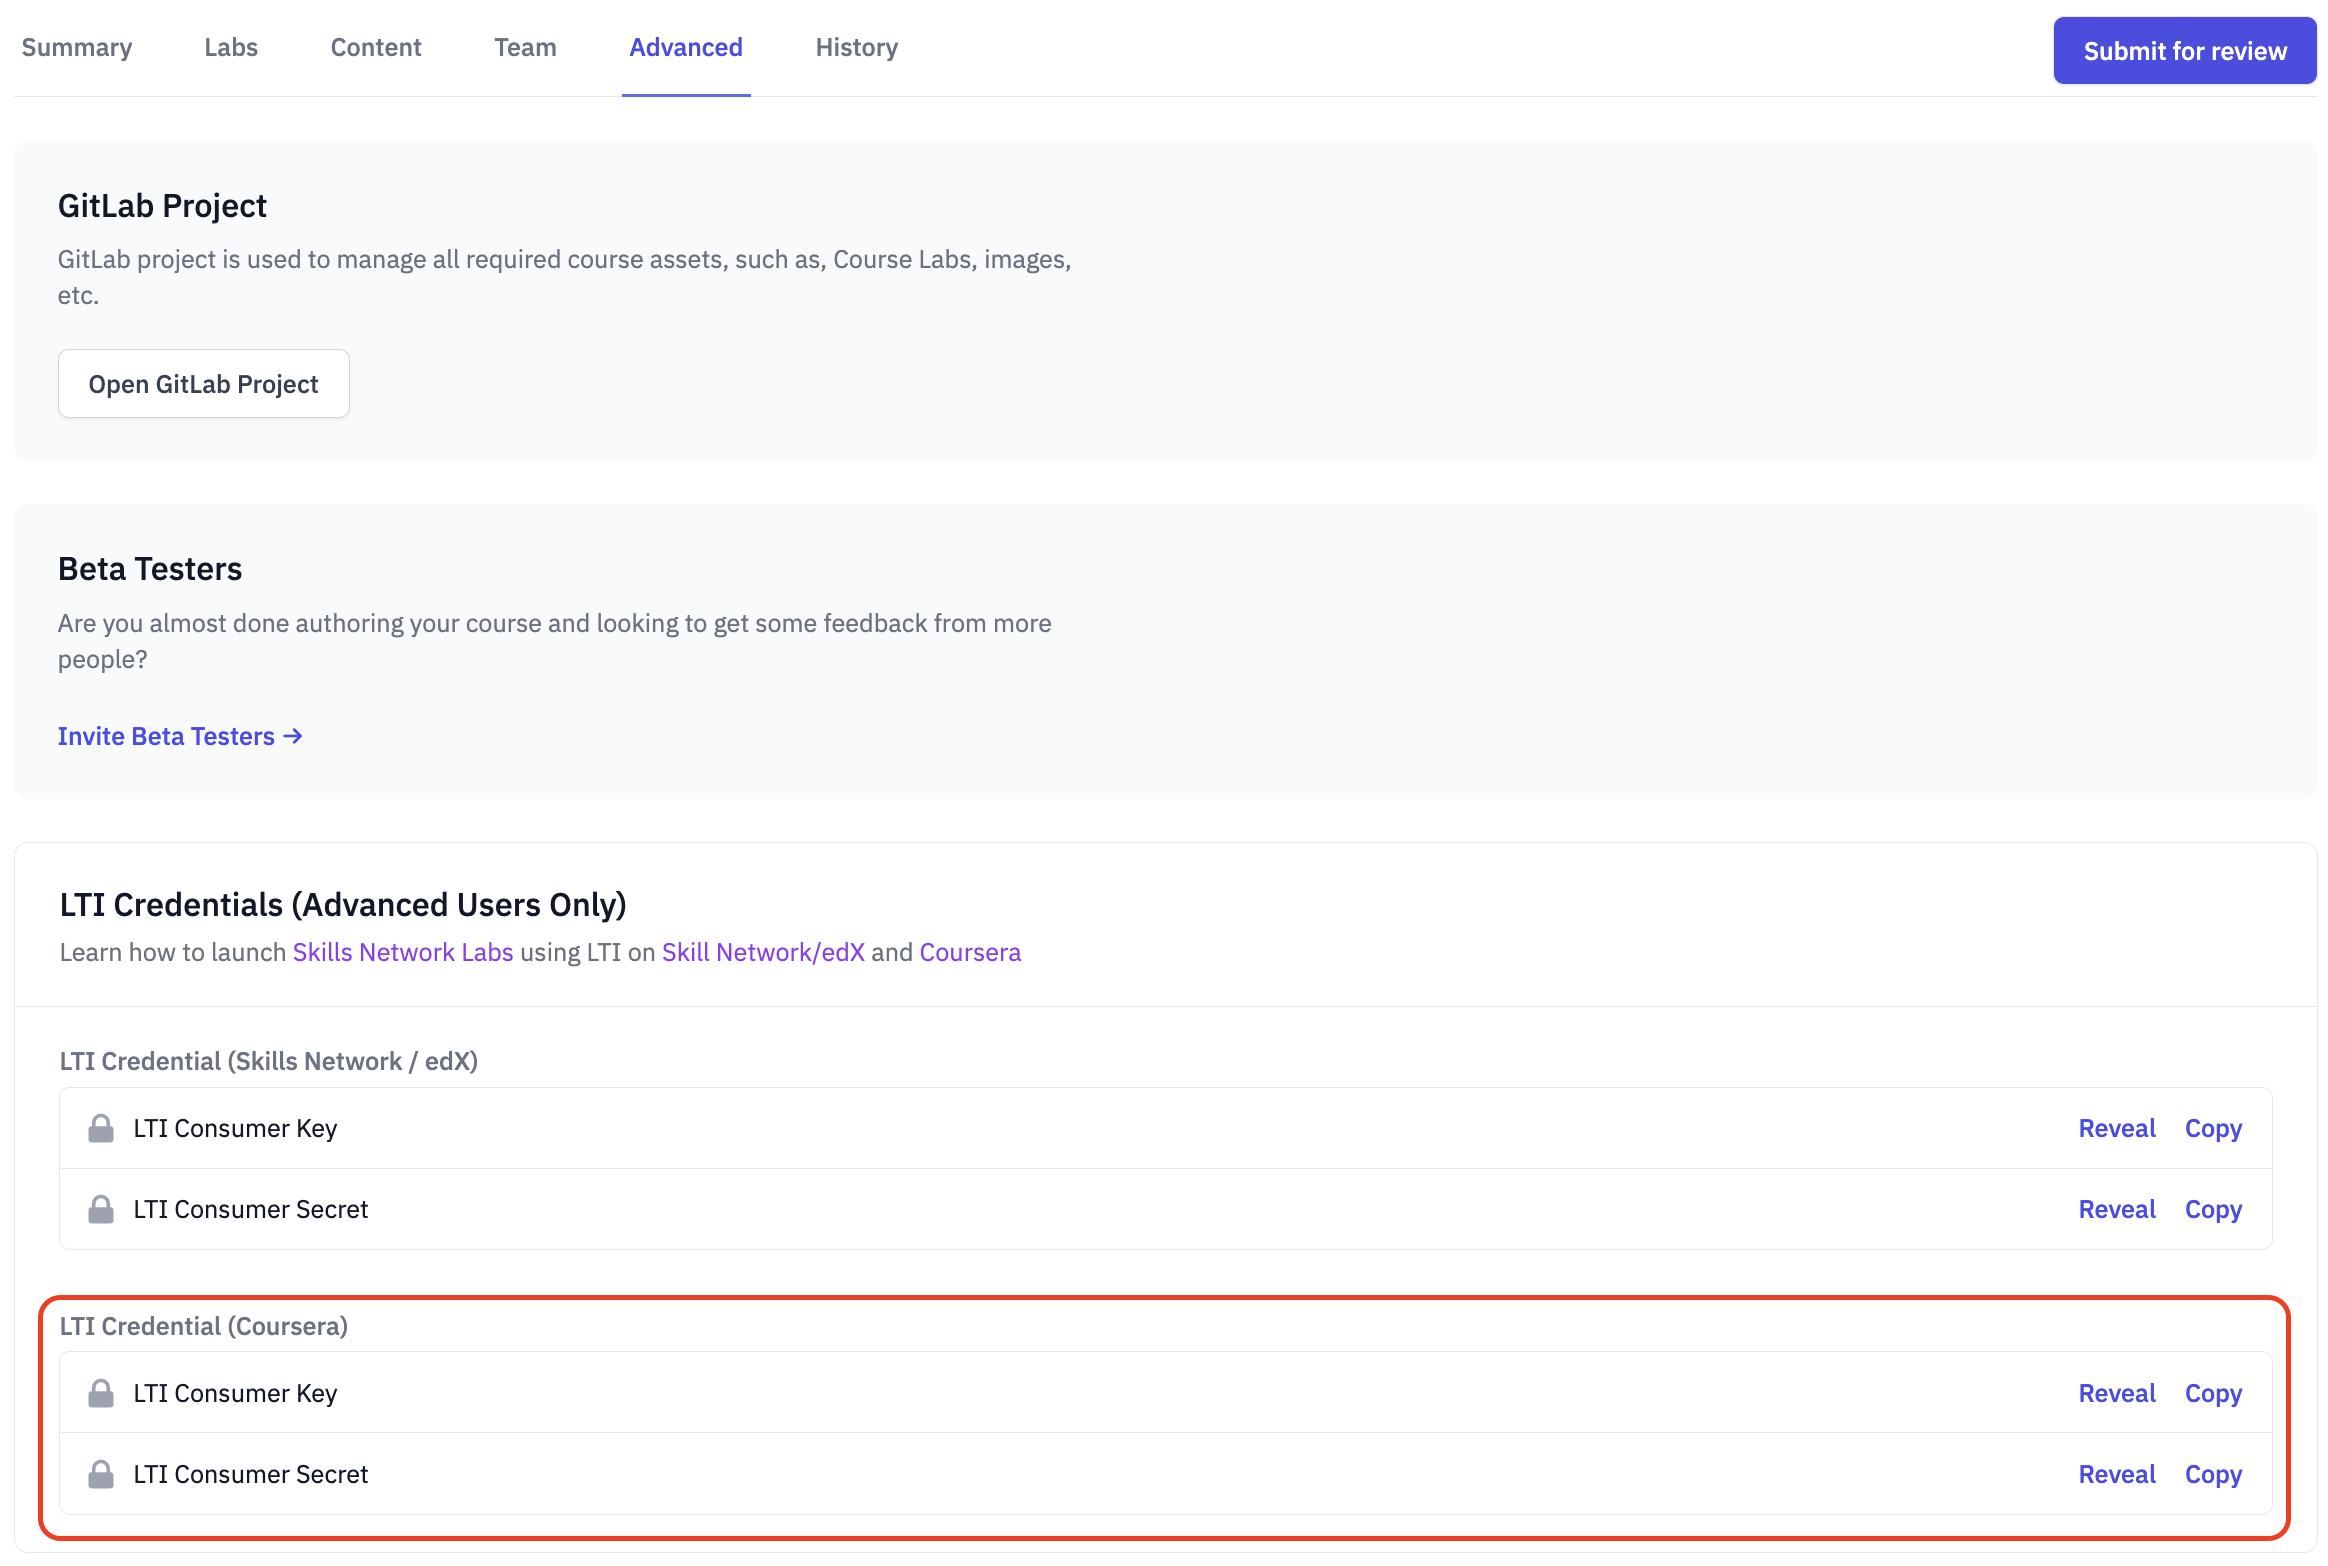
LTI Credentials
The consumer key and secret can be found in Author Workbench on your course page. Navigate to the Advanced tab and and scroll to the LTI Credentials (Advanced Users Only) section. Here, you will be able to copy the consumer key and secret. If you are publishing your course to Coursera, please use the LTI Credential (Coursera) credentials. Otherwise, use LTI Credential (Skills Network / edX).
Add a Datasette Lab to your Course
Adding Datasette labs to your course involves a few steps. This guide will outline all the steps you must follow to successfully add a Datasette lab to your course outline.
Step 1. Follow the guide: Add a (Non-Instructional) Lab to your Course
Start by following the same workflow as adding a non-instructional lab to your course. The difference being now you paste https://labs.cognitiveclass.ai/login/lti as your launch url
Step 2. Upload your database file to the SN File Library
You must supply a database file as the value for sn_asset_library_sqlite_db_url in your Custom LTI Parameters.
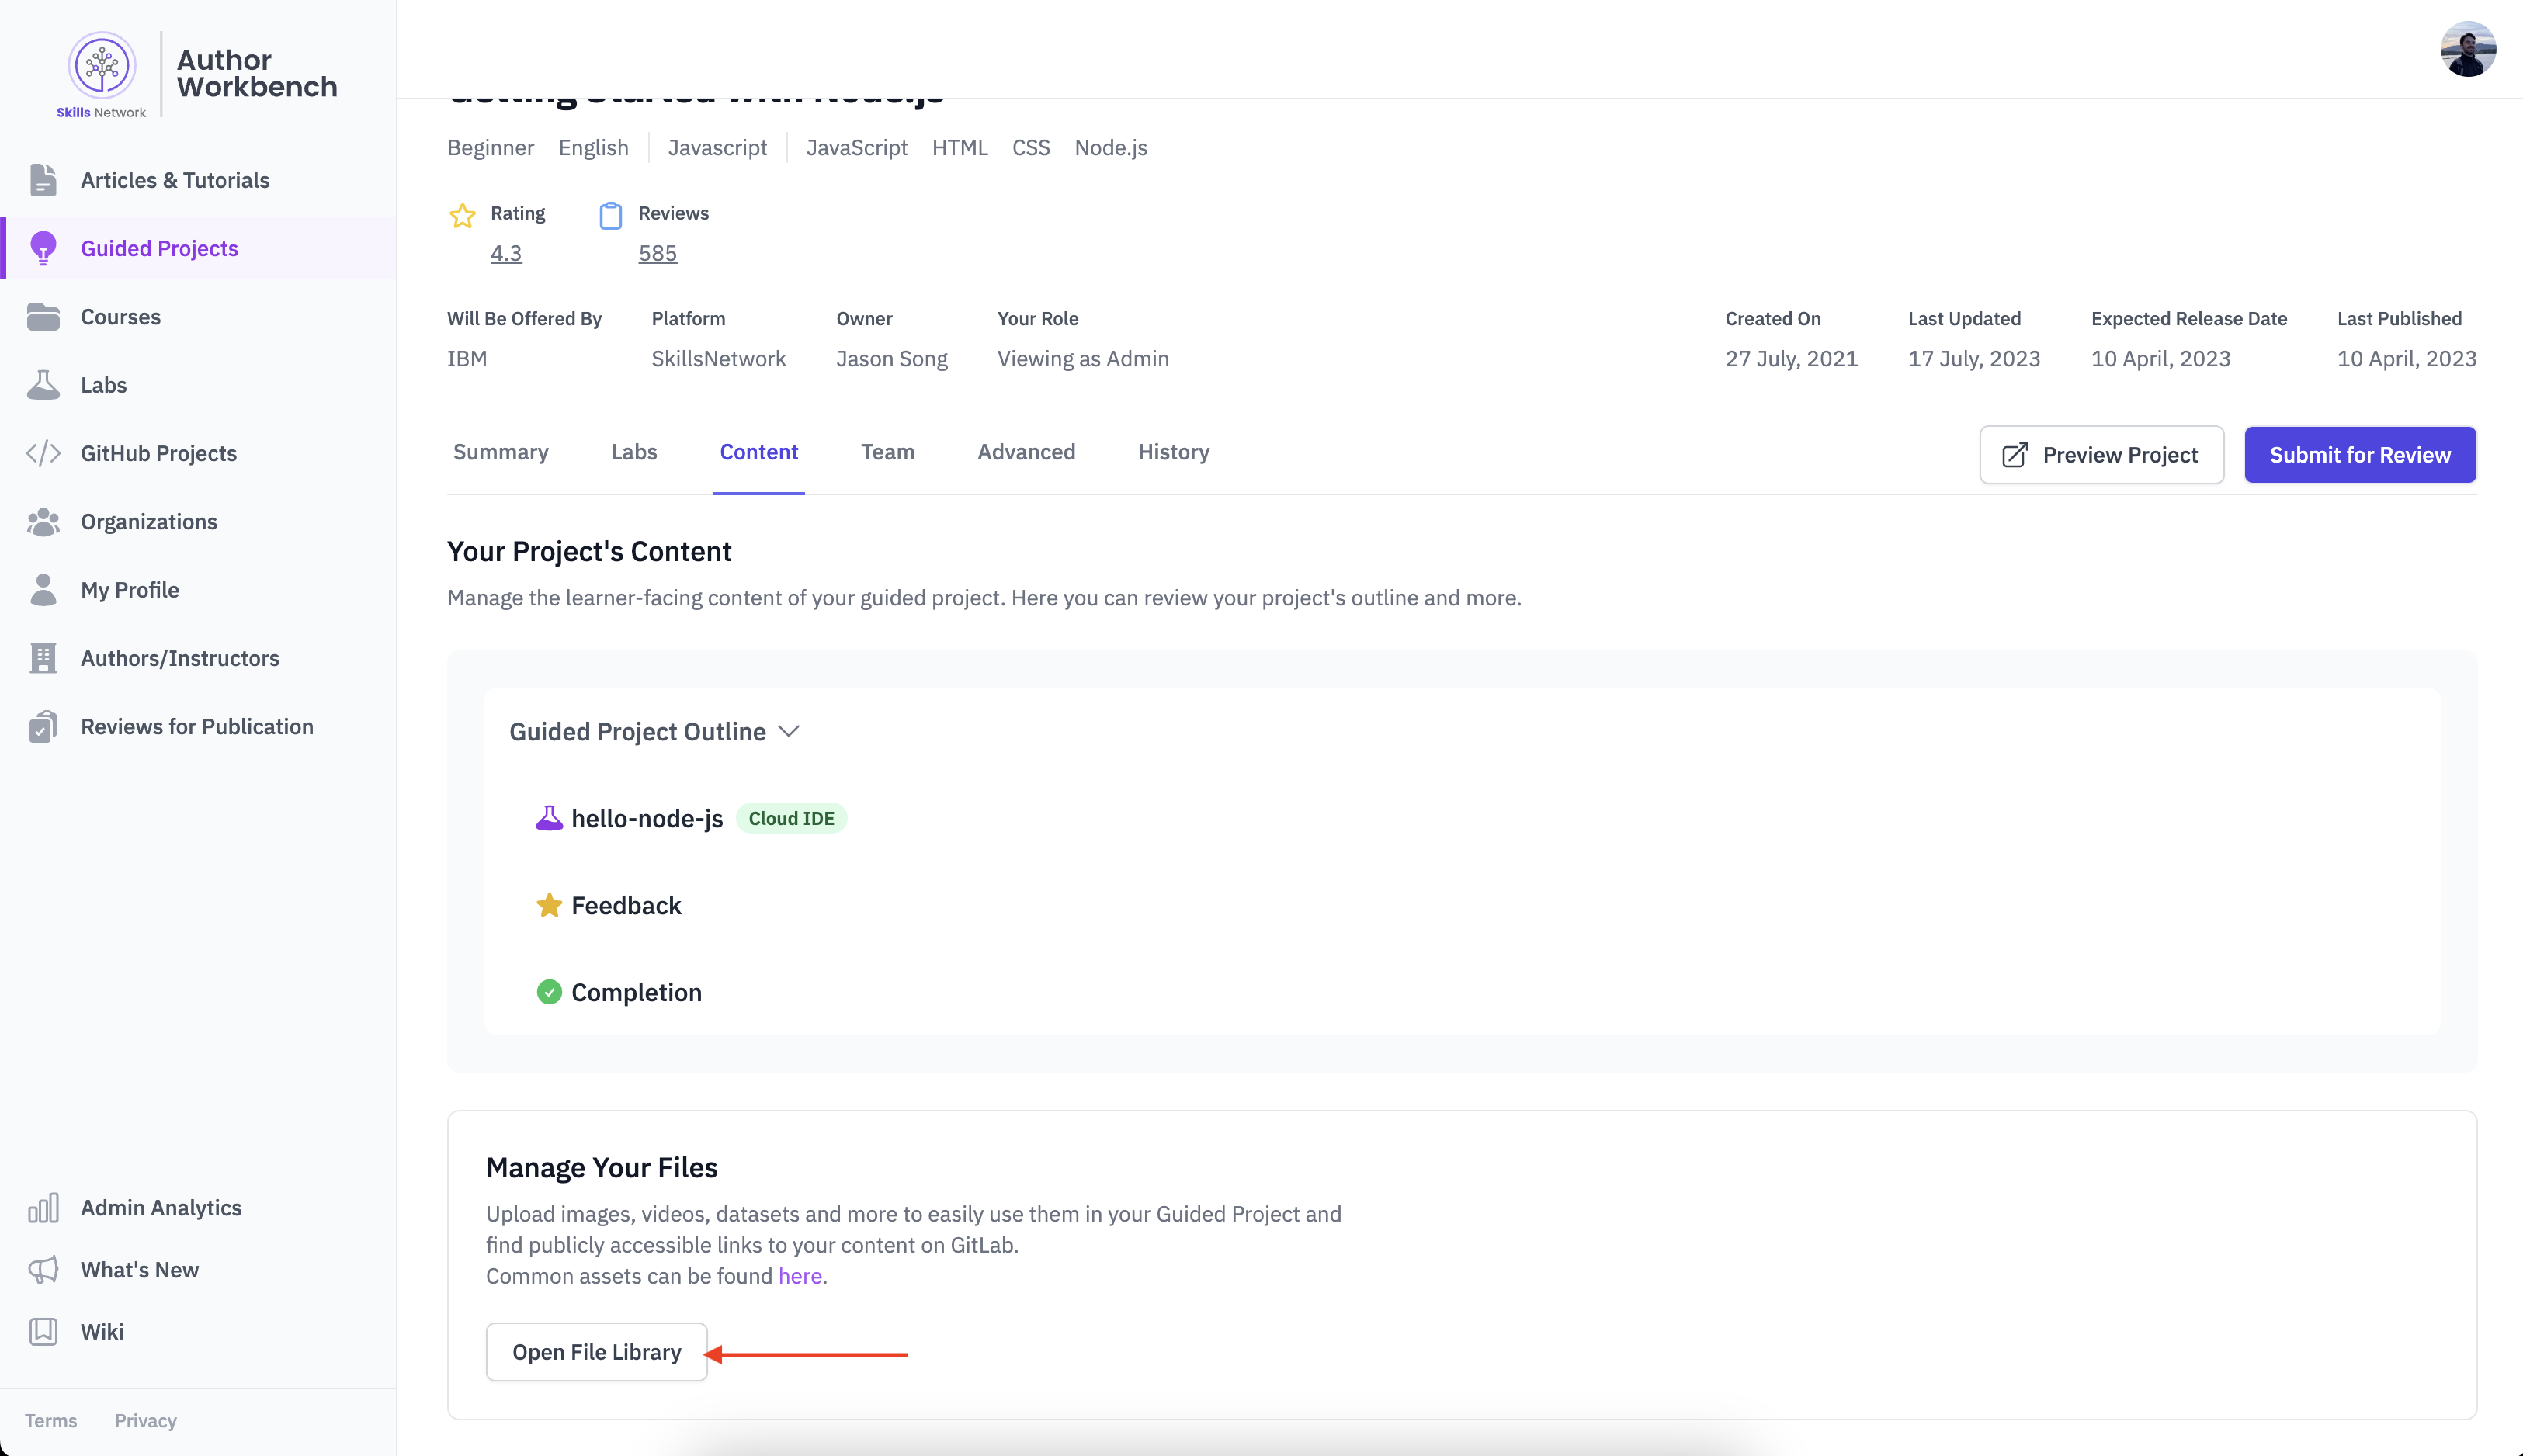
To do this, you should upload a .db or .sqlite file of your choice to the SN File Library. Head to the content tab of your course or guided project.
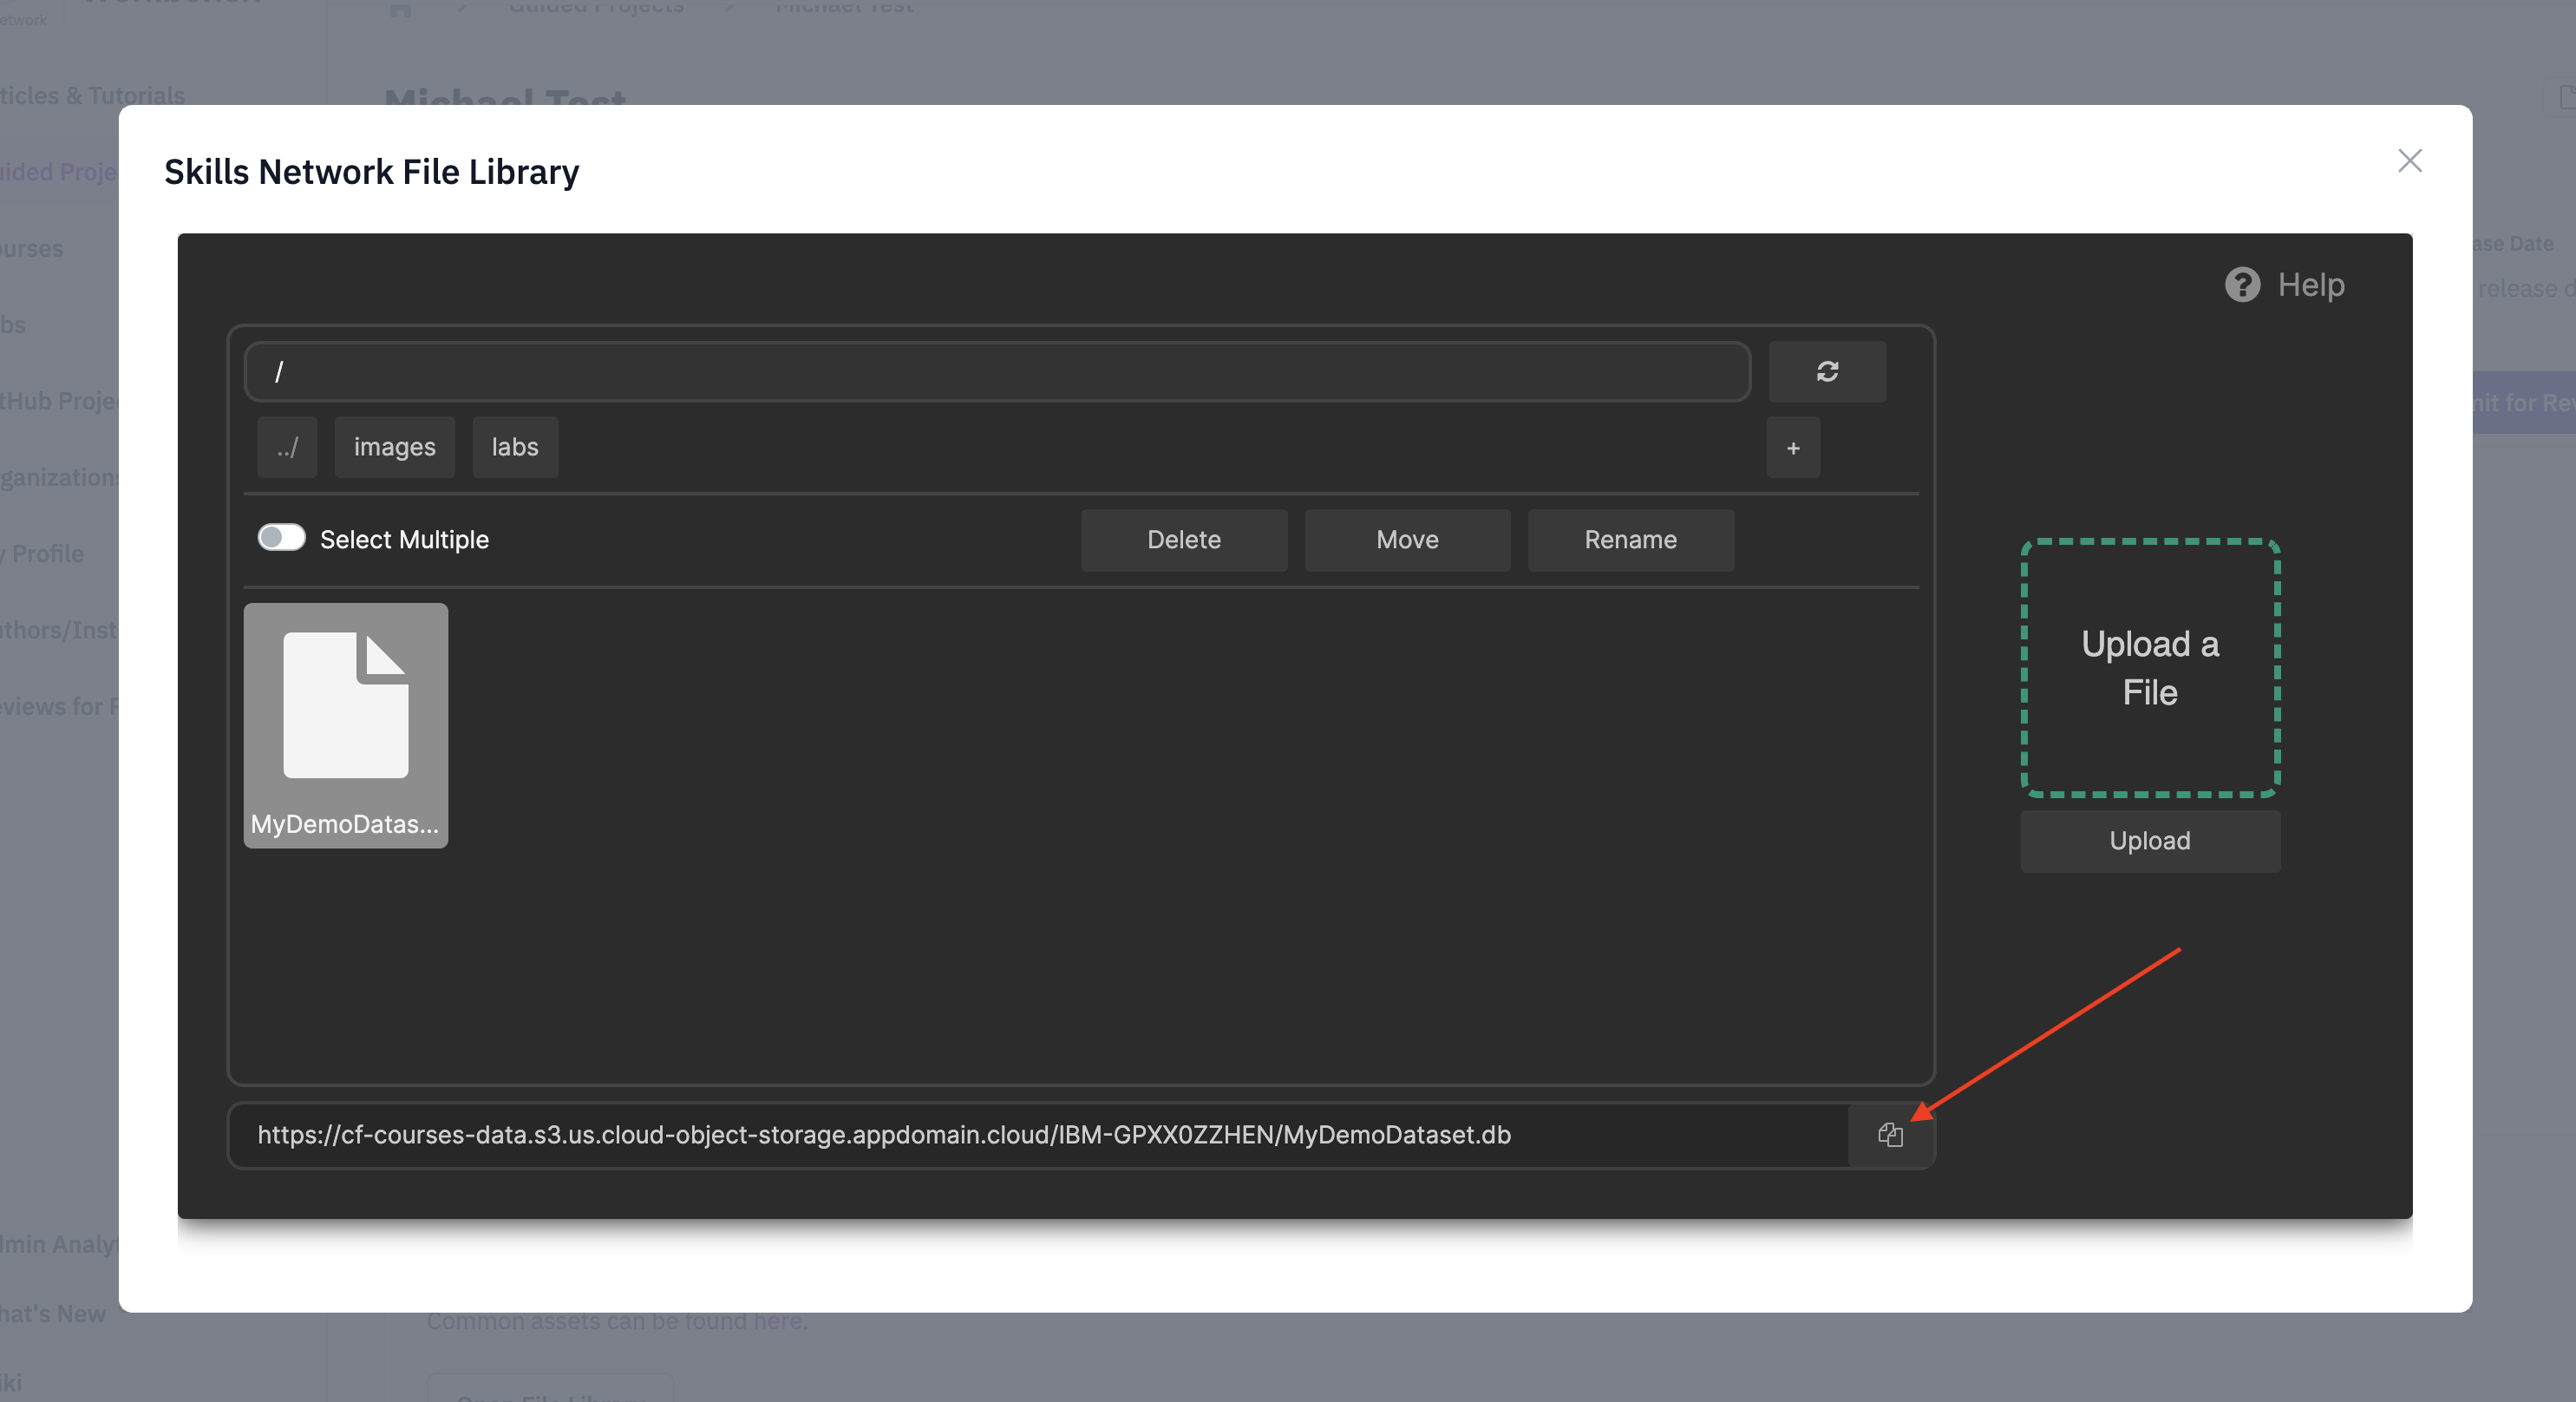
Here you can open the File Library and upload your database file.
Once you have uploaded your database file to SN File Library, select the file and copy the asset URL.
Step 3. Copy your instructions url
you will also need an instructions URL.
This can be obtained by clicking opening the embed popup on your lab in Author Workbench.
Step 4. Add custom parameters to your lti item
Fill out the custom parameters for your lti item
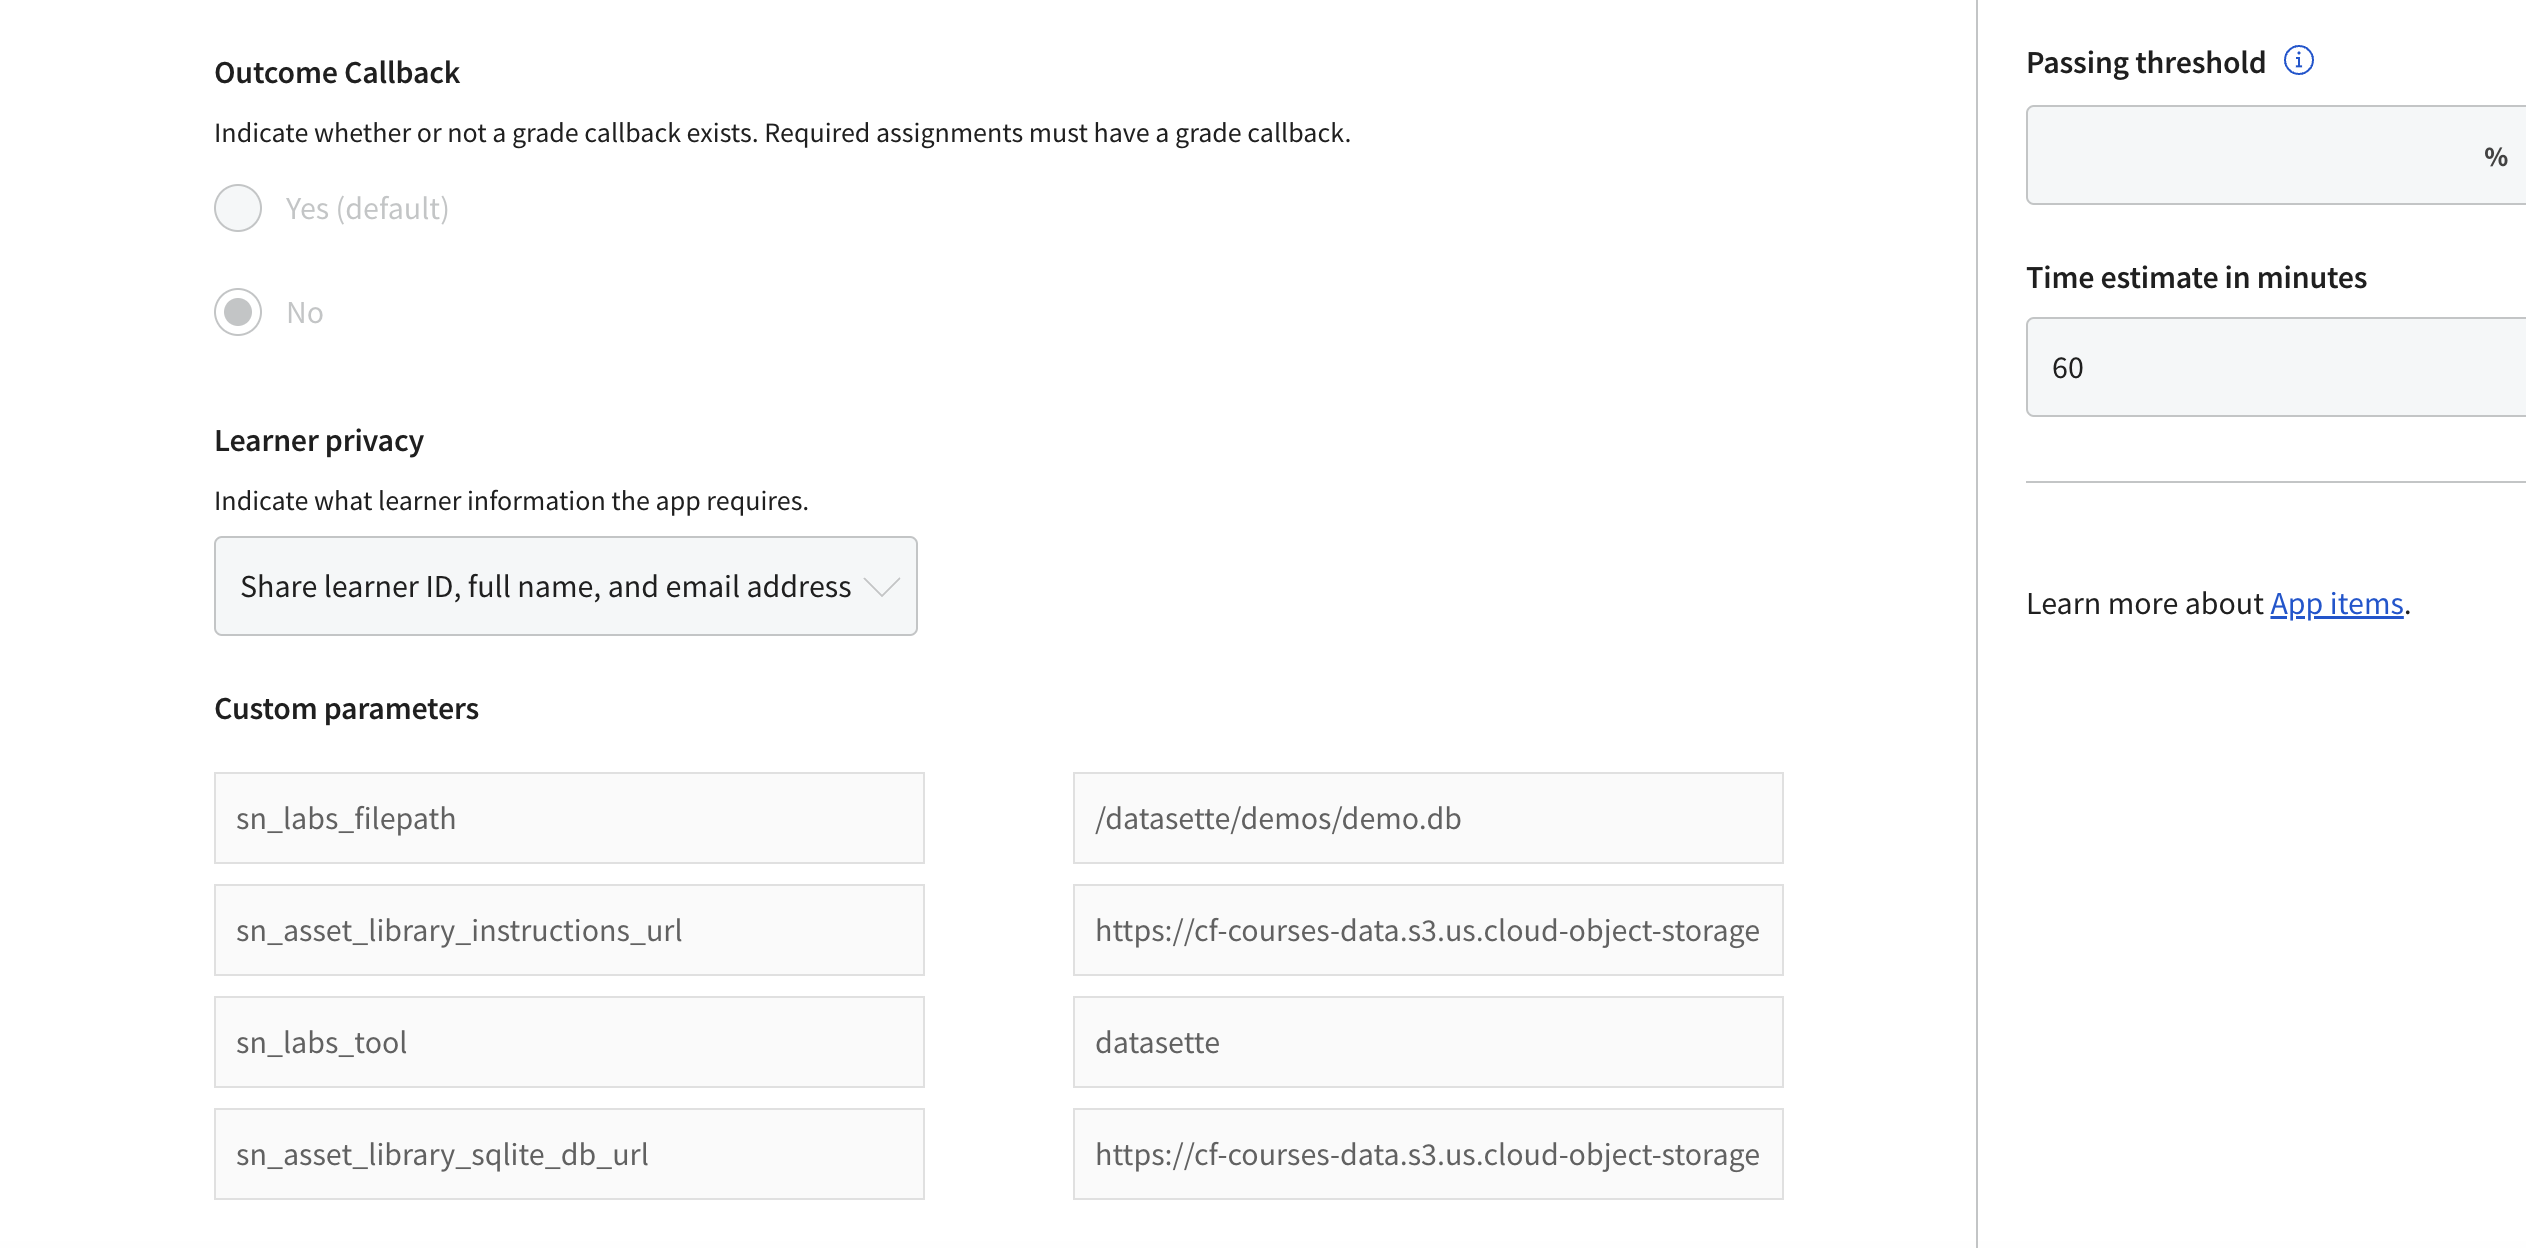
[
    "sn_labs_tool=datasette",
    "sn_labs_filepath=/labs/datasette/lab.db",
    "sn_asset_library_sqlite_db_url=<DB URL FROM STEP 2>",
    "sn_asset_library_instructions_url=<INSTRUCTIONS URL FROM STEP 3>"
]
Step 5. Test your lab
Your lab should now be set up to use Datasette. If there are any issues, please double check that you followed all the steps above correctly.