Quick Start
This guide will walk you through the process of creating your first deck in Presentation Studio.
What is Presentation Studio?
Presentation Studio turns a short brief, plus optionally the source documents you already have, into a finished PowerPoint deck. You describe what you want, the system proposes an outline and asks you anything it can't infer on its own, you approve the outline, and it builds the deck.
Nothing is generated, saved, or shared without your approval at two separate checkpoints: once before the deck is written, and again before it's released to you as a file.
This guide covers only what's live in the product today. A few controls you'll see on screen are tagged "Coming soon"; this guide leaves those out entirely, since they don't do anything yet. See What's Next for what they'll do.
Signing in
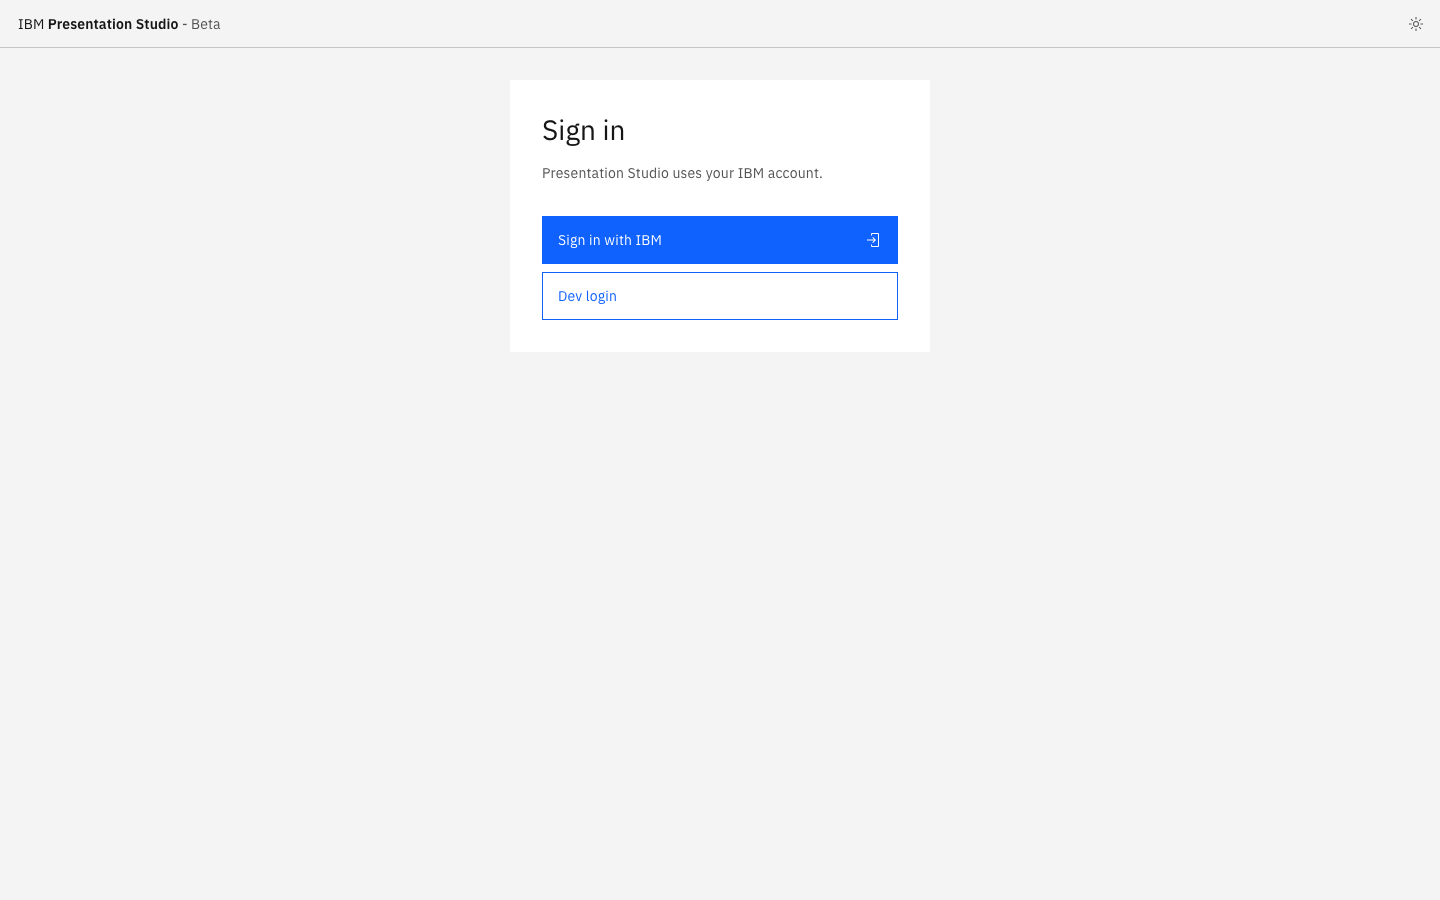
Presentation Studio uses your IBM account. Go to the app's URL and select Sign in with IBM. You'll be taken through IBM's normal sign-in flow and returned to the app once you're authenticated.
Creating your first deck
On the home screen, type what you want in the What are we making? box. This is the only required field, a sentence or two is enough.
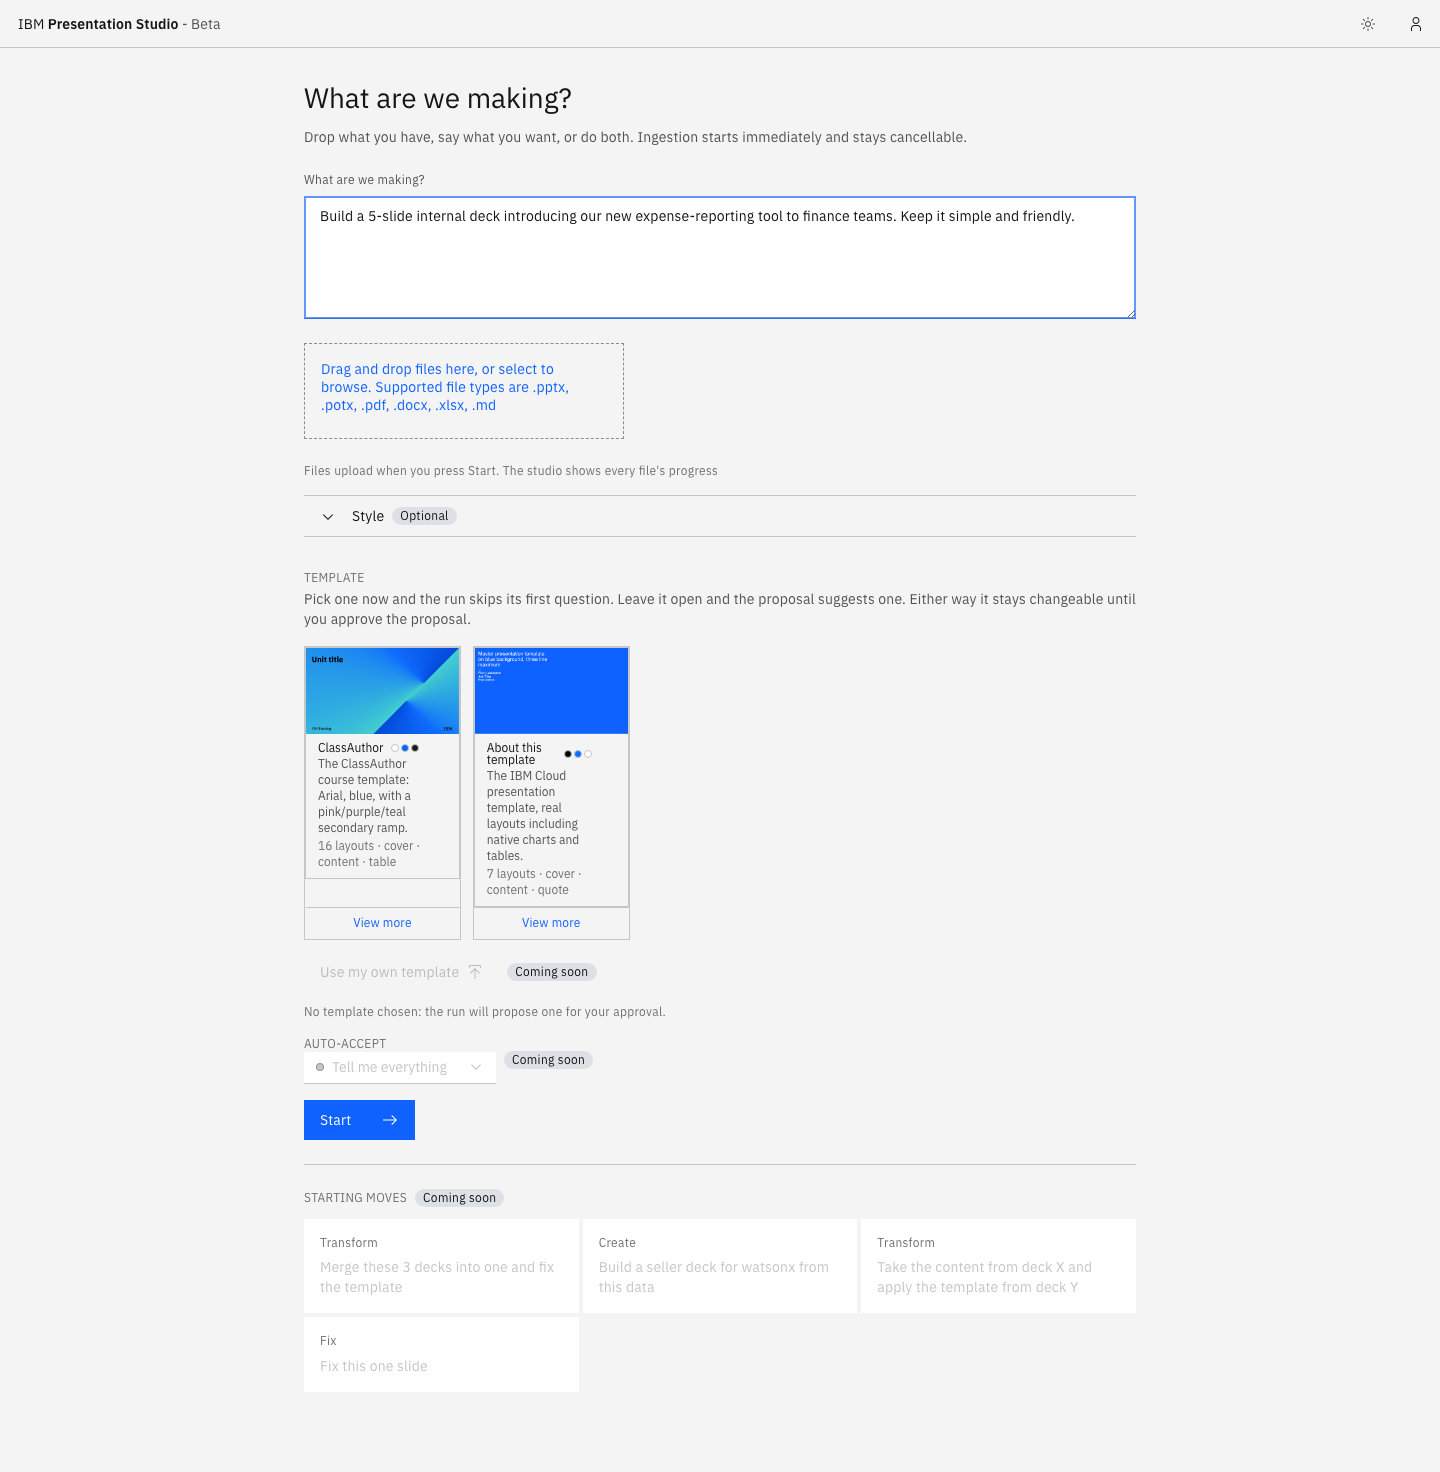
If you already have decks, documents, or spreadsheets the new deck should draw from, drag them onto the drop zone under the text box, or click it to browse for files. Supported types are .pptx, .potx, .pdf, .docx, .xlsx, and .md. Files don't upload until you press Start, and everything in them is treated strictly as content, never as instructions: anything inside a file that reads like a command to the AI is only ever surfaced for you to see, not followed.
Open the Style section to set who the deck is for, how it should sound, how much text per slide, and any look and feel notes. Anything you fill in here becomes a binding instruction and skips the matching question later; anything you leave blank, the system will ask about once it needs to know.
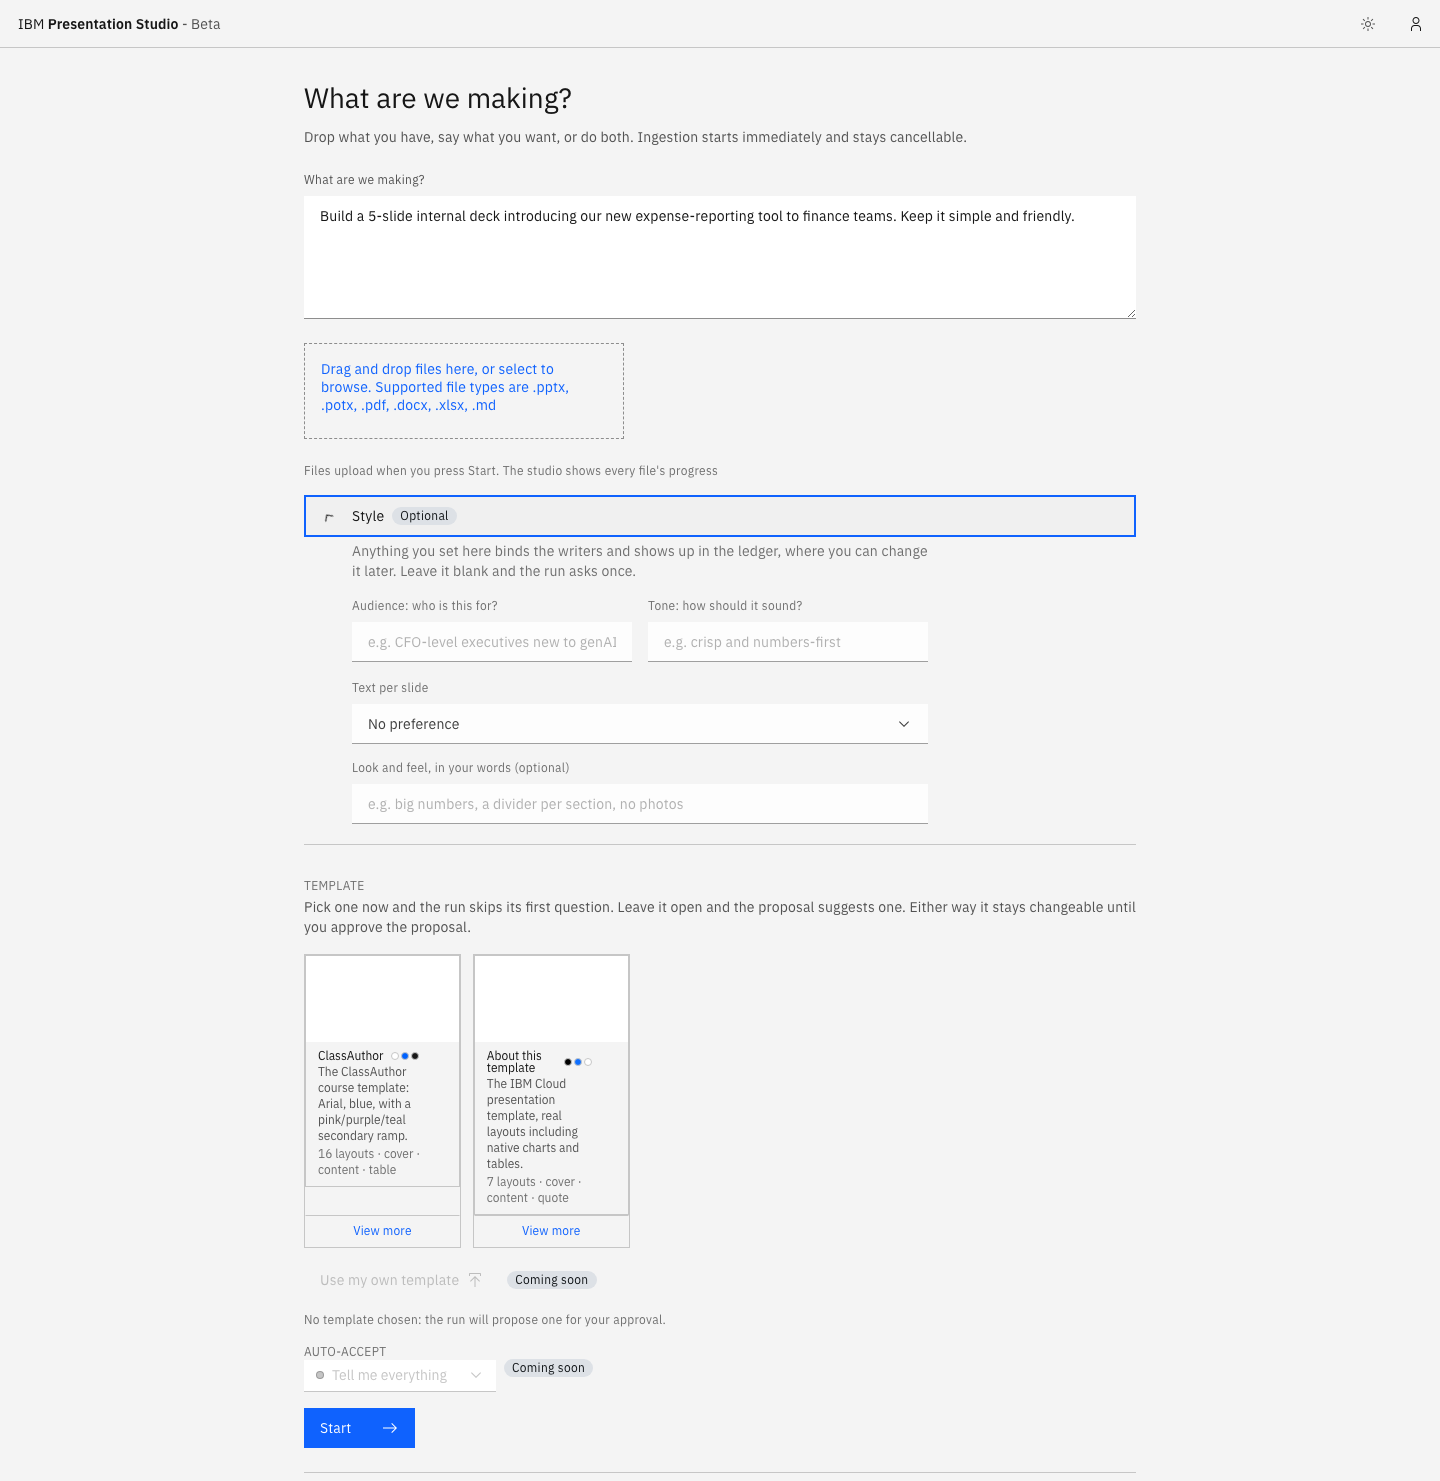
Choose a template from the gallery to skip that question too, or leave it unset and the proposal will suggest one for your approval. Either way, the template stays changeable until you approve the proposal.
Once you're ready, click Start. You're taken straight to the run's Proposal screen, where everything from here happens.
Answering questions along the way
As the run works, it asks about anything it can't safely infer: which template to use, who the audience is, and so on. Each question appears as a banner at the top of the screen and blocks that part of the work until it's answered.
You always have four ways to respond: pick one of the offered options, choose None of these if none fit, supply your own answer where offered via Use my own, or click Not now to park the question and come back to it later. The run keeps waiting either way, so parking doesn't lose your place.
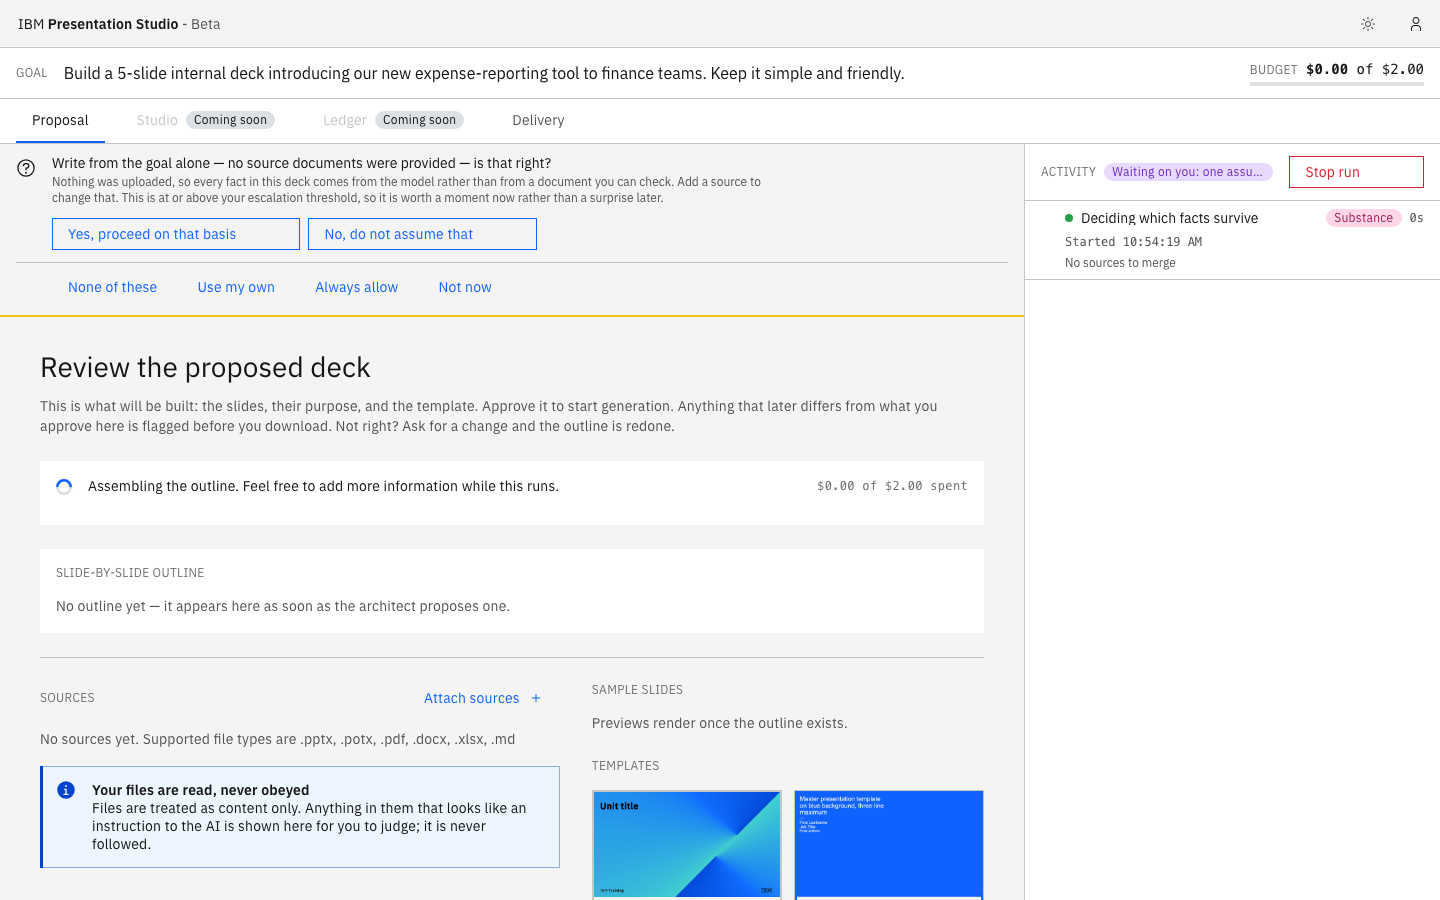
Every answer is written to the run's record as a binding instruction. It shapes everything built after it, and you can see it again from the Proposal screen.
Reviewing the proposal
Once the system has enough to work with, it assembles a slide by slide outline. This is the core of what you're being asked to approve: the deck's slide list, purpose, and layout, before any actual content is written. Everything else on this screen (the sample previews, the sources panel, the template picker) supports that decision.
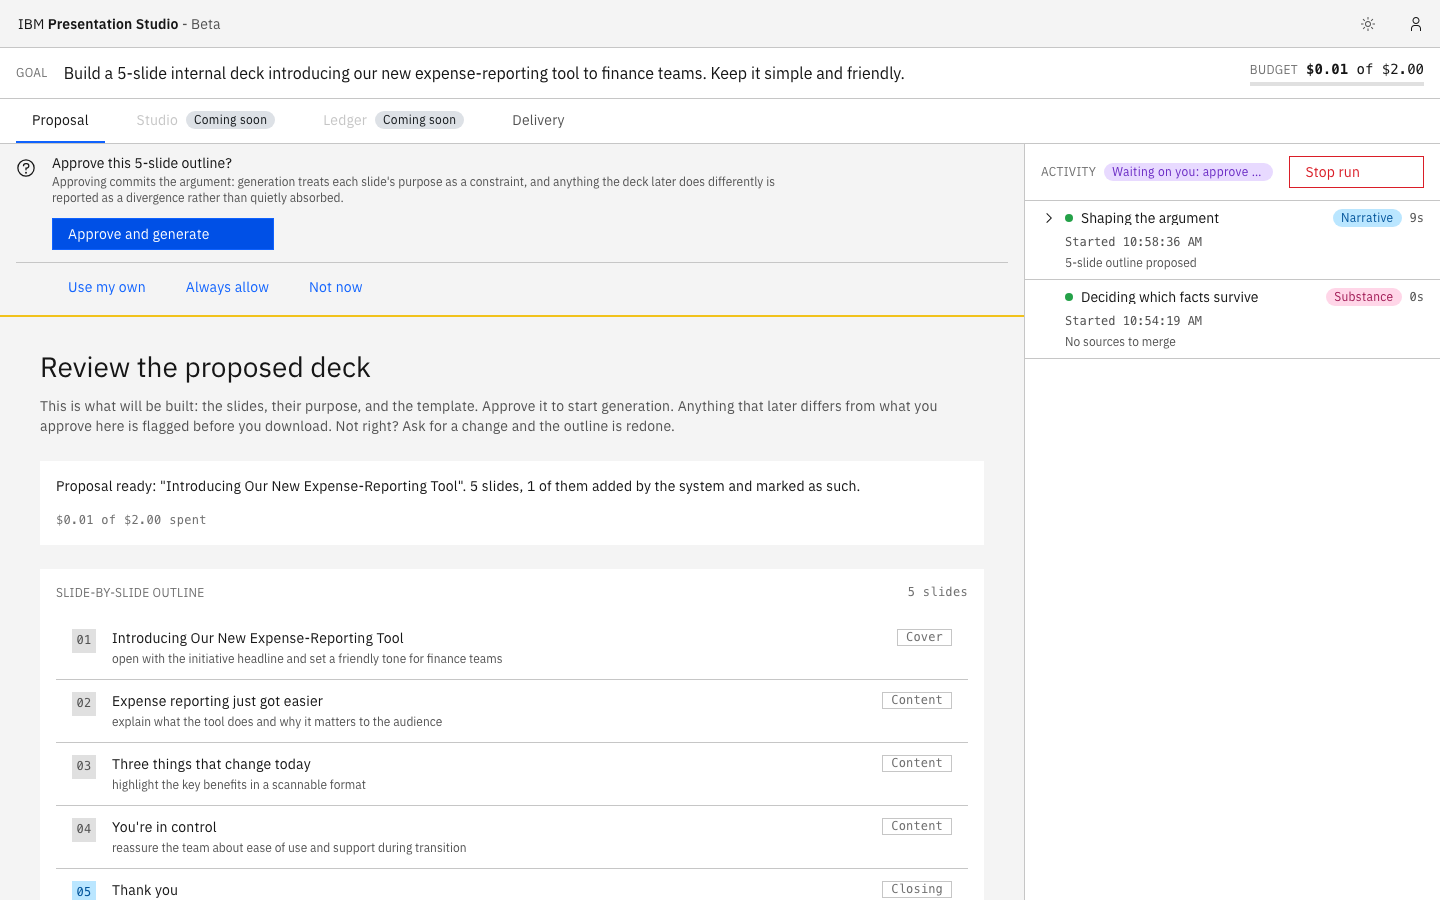
- Slide-by-slide outline: every proposed slide with its title and purpose. A slide the system added on its own, because the story didn't hold together without it, is tagged "Added by the system."
- Sample slides: the first two slides rendered in the real template, so you can judge the actual look before approving.
- Sources: attach more files at any point while the proposal is being built, you don't have to wait or restart.
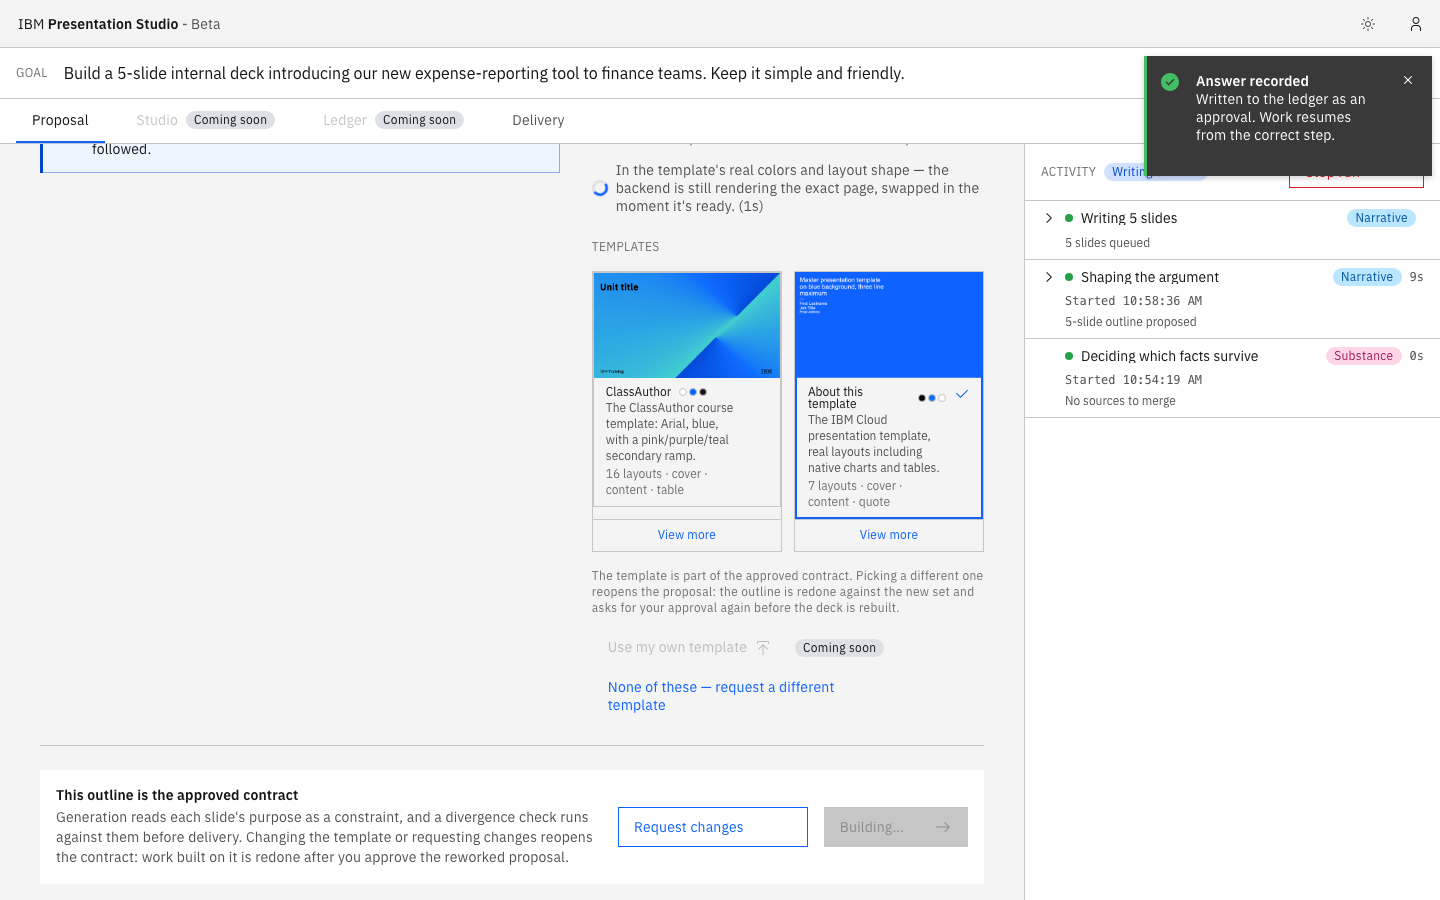
- Templates: switch templates here if the one chosen isn't right.
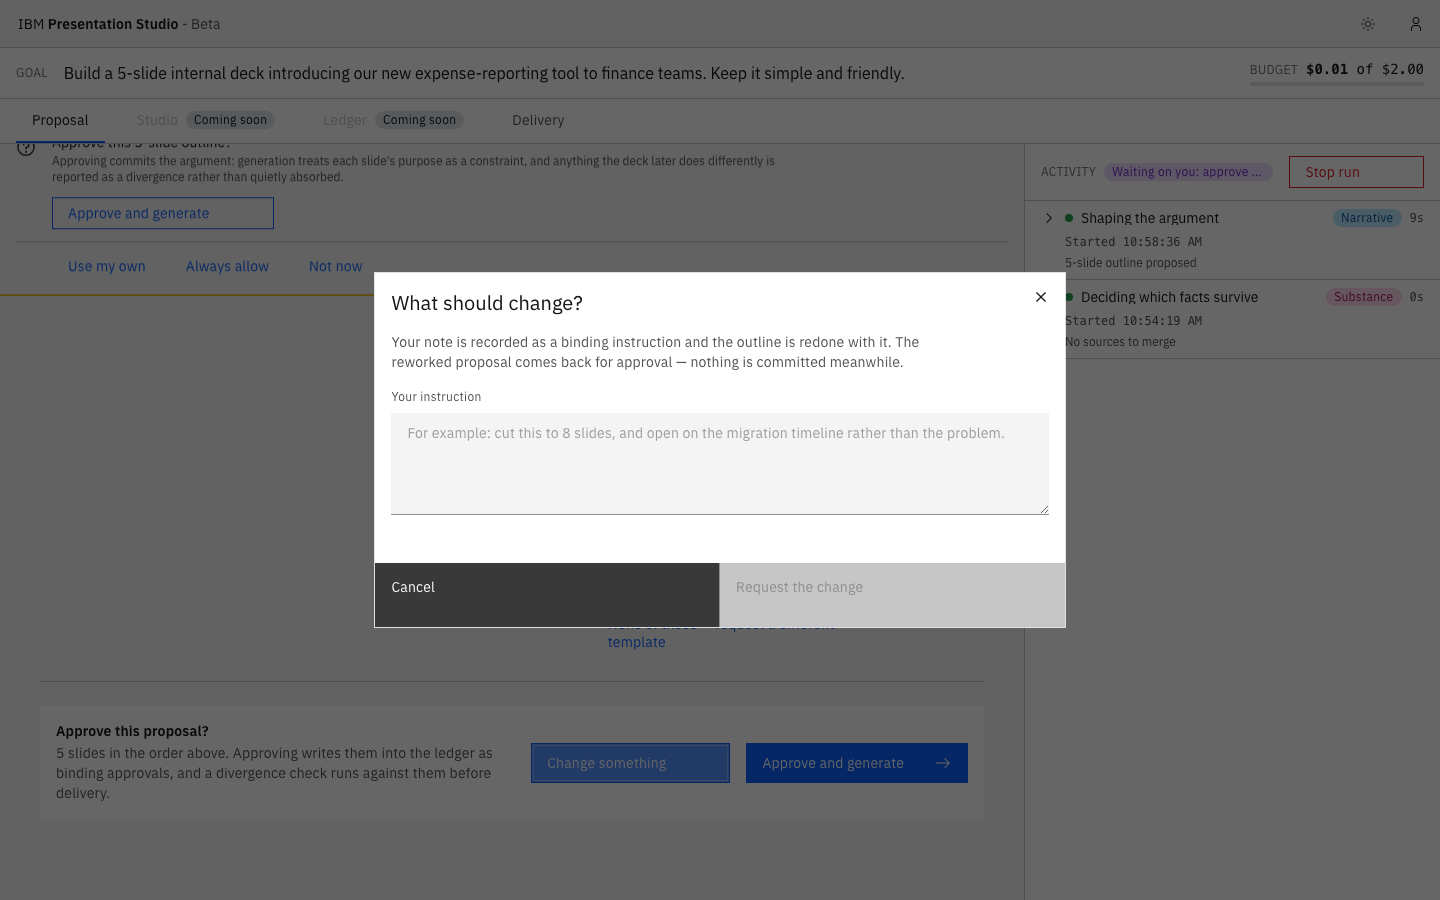
If the outline isn't right, click Change something and describe what should change in plain language. Your note is recorded as a binding instruction and the outline is redone against it; nothing already approved is rebuilt until you approve the reworked version.
When the outline looks right, click Approve and generate. This is the first of the two approval checkpoints: approving here writes every slide's purpose into the run's record as a binding commitment, and generation begins. The screen stays on Proposal and now shows the approved contract. From here you can either keep refining (a template change or another change request reopens the contract and asks for approval again) or move on to watch the deck get built.
Building and downloading your deck
Click Watch it build (or Review and download once it's finished) to move to the Delivery screen. This is where the finished deck, once ready, gets its final review and release.
Once generation finishes, Delivery shows every slide in a filmstrip, a full-size preview you can page through, and a divergence check comparing the finished deck against what you approved in the proposal. Anything that changed along the way is called out here with a reason, so nothing different from what you approved reaches you silently.
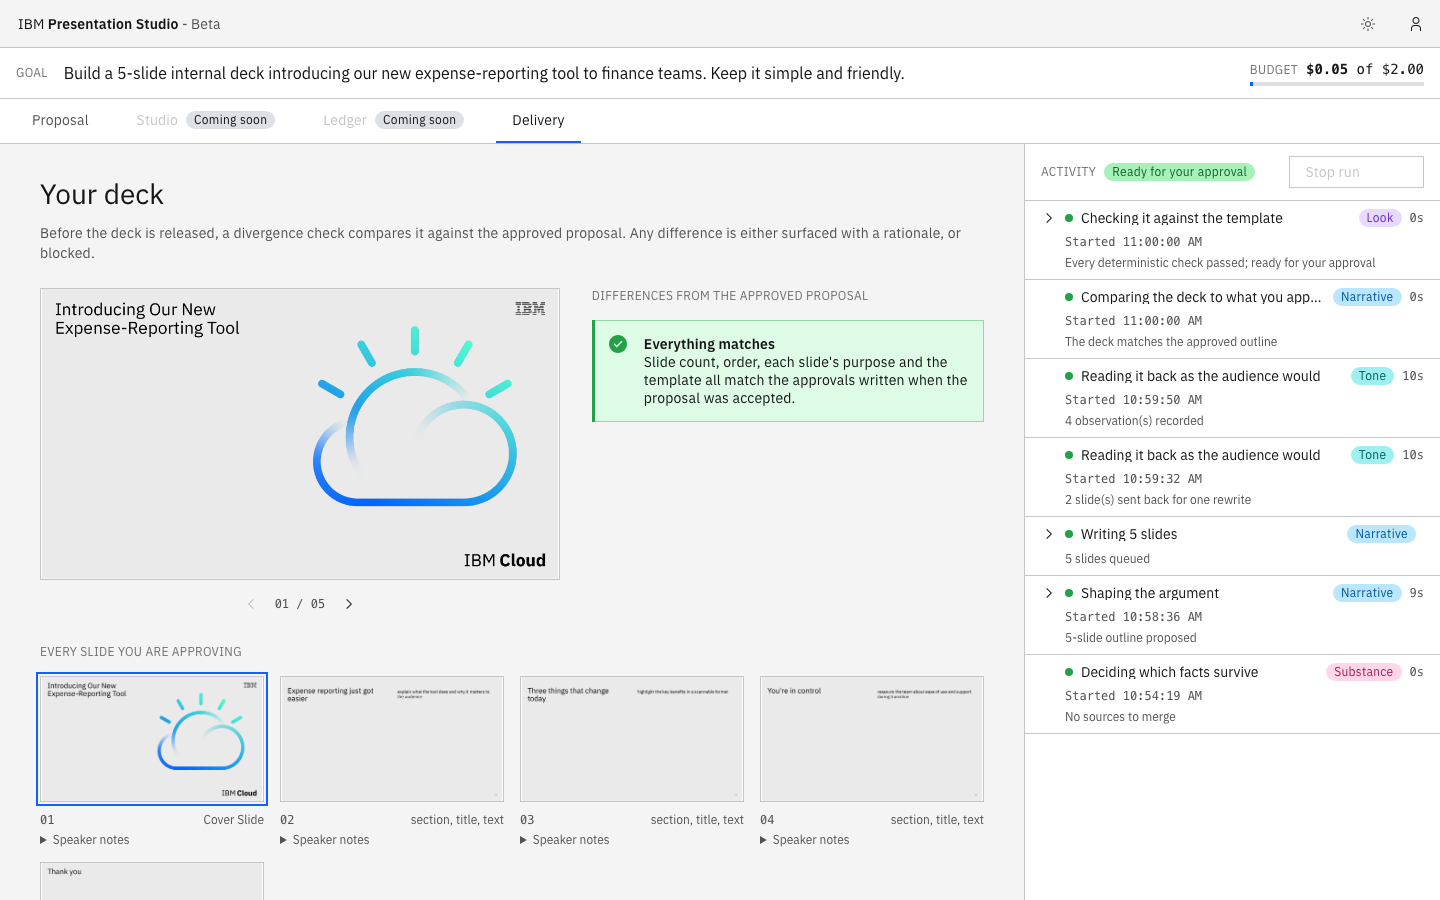
Click Approve and download (this is the second checkpoint) to release the file, or Download directly if it's already been approved once. Keep working is always available here too, and takes you back to the proposal if you'd rather change something before finishing.
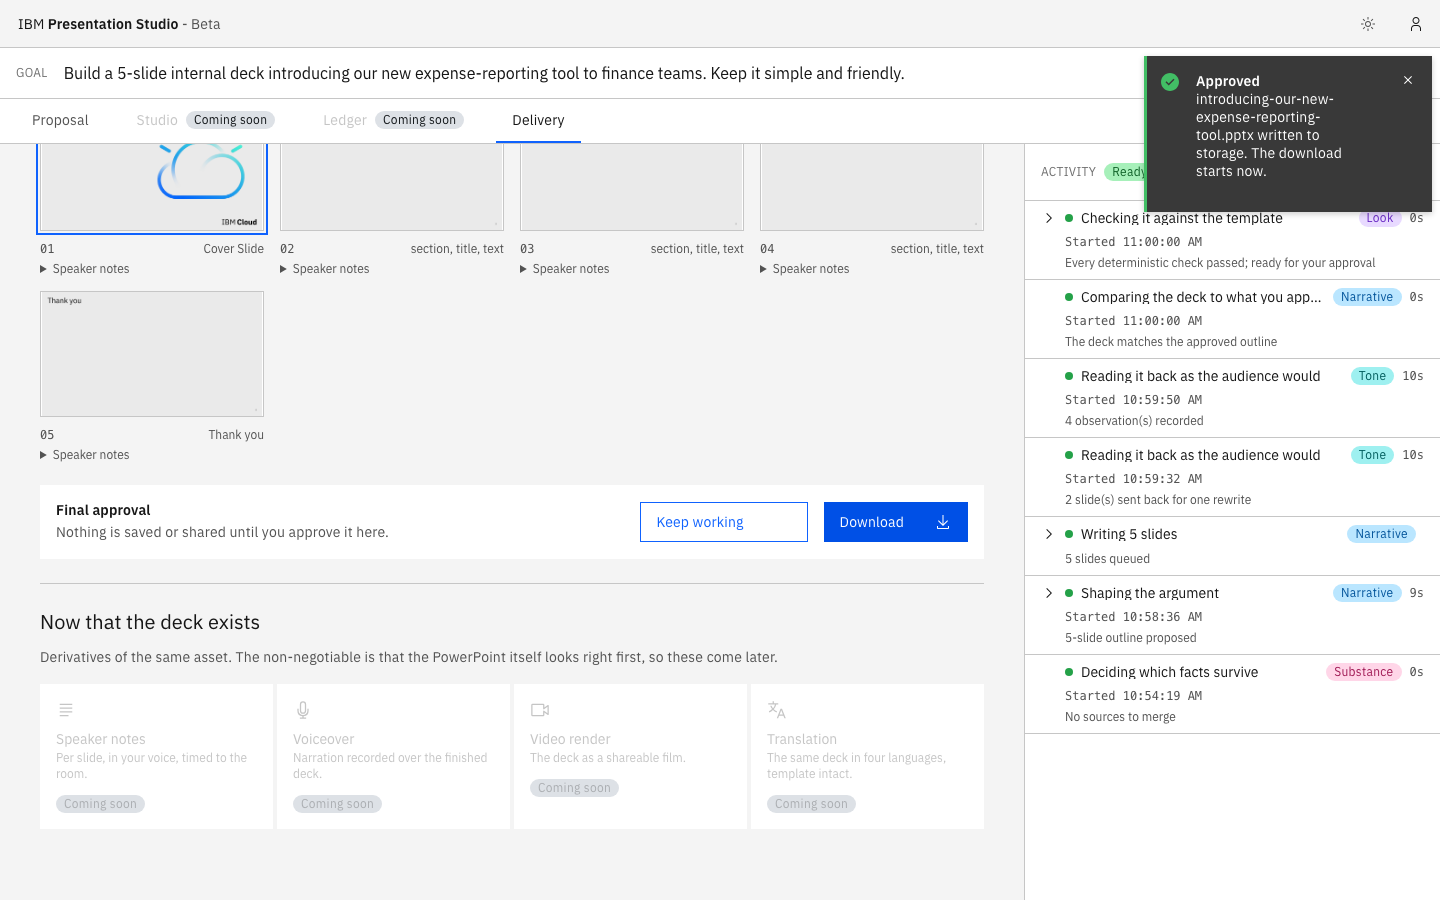
That's it! Your deck is downloaded and ready to use.
A few things to know while a run is going
- Goal and budget bar: the top of every run screen shows the original brief and how much of the run's budget has been spent against its cap.
- Activity panel: the right-hand rail on every screen shows what the run is doing right now, and lets you stop the run at any time with Stop run.
- Your files are read, never obeyed: anything in an attached source that looks like an instruction to the AI is surfaced for you to see in the Sources panel, and is never acted on.